Check the Audit Trail
The audit trail in DataGuard CPM is an essential feature that allows you to track and review all changes made to a Citizen's Consents. This guide will show you how to access and examine the permission change history for a Citizen, ensuring transparency and compliance with data protection regulations.
Step 1: Navigate to the Citizen's Profile
Use the search functionality to locate the specific Citizen whose Preferences you wish to update, as detailed in the Record Consent guide.
Step 2: Access the History Tab
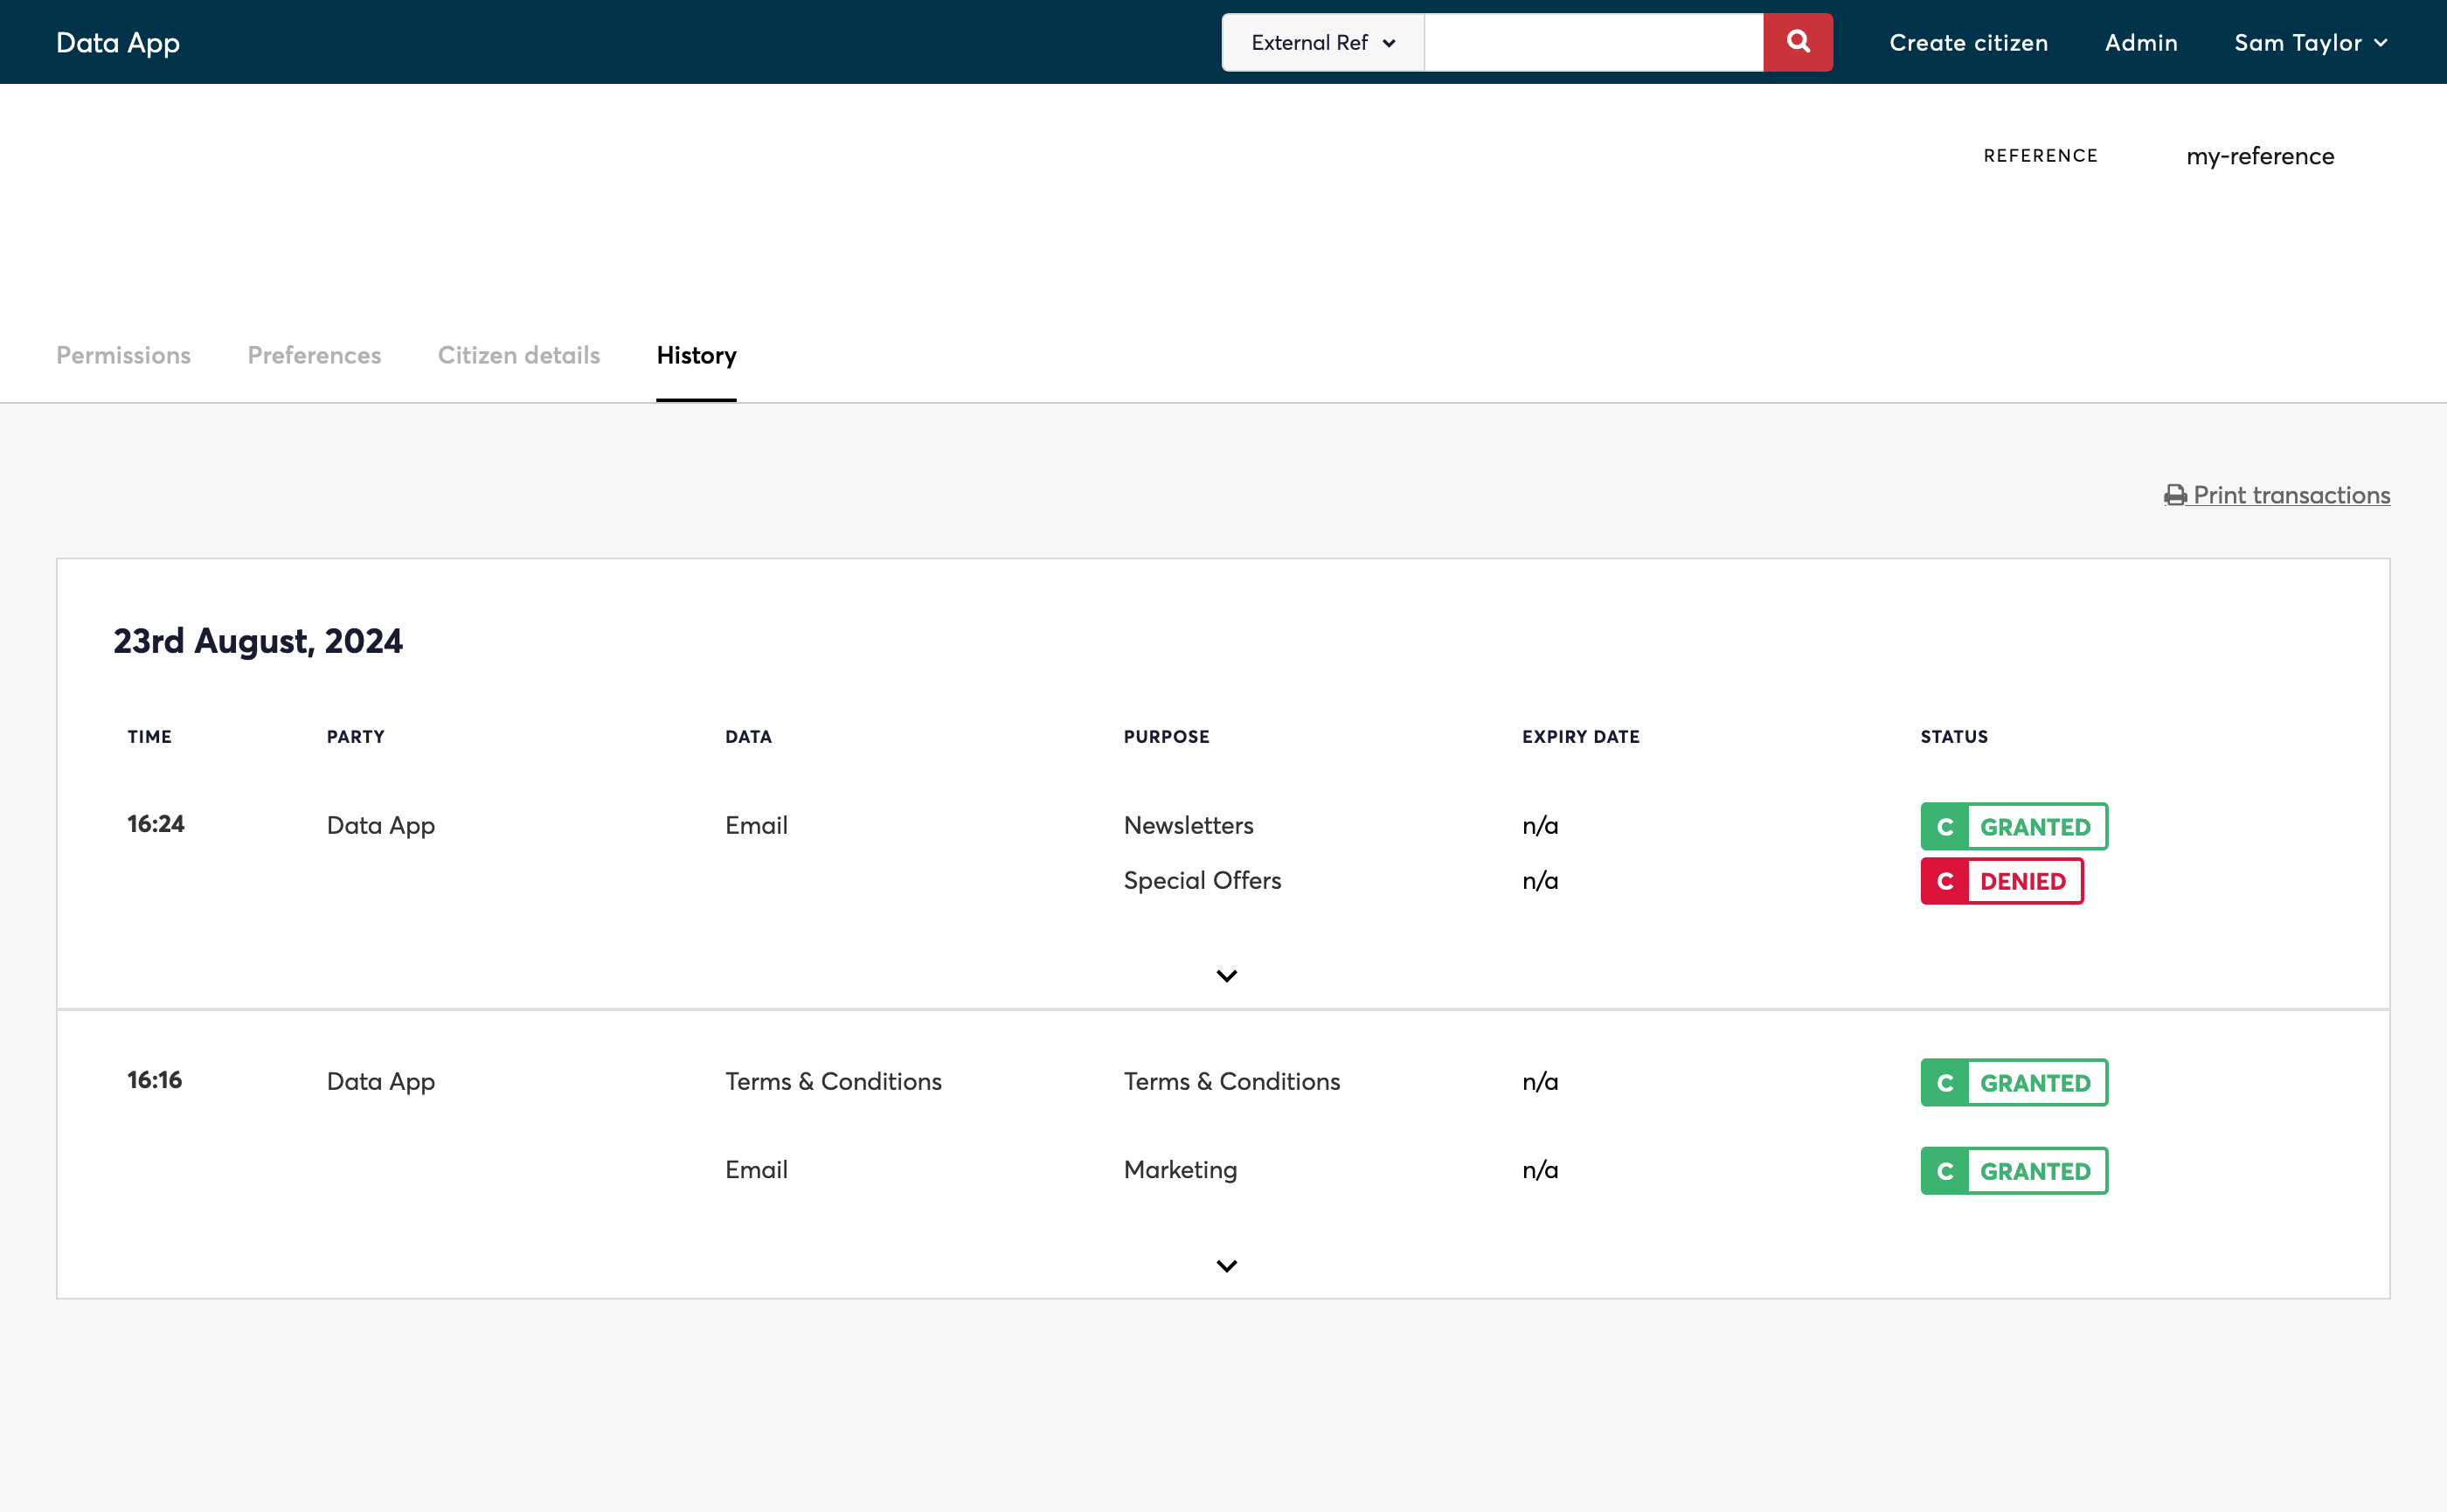
Within the Citizen’s profile, navigate to the "History" tab. This tab displays a detailed log of all permission changes, including timestamps, the type of change, and the user who made the change.
Step 3: Browse and Export the Audit Trail
Browse through the list of changes to review the Citizen’s permission history. Each entry provides critical information about the actions taken.
If you need to export these changes, click on the "Print transactions" button at the top of the tab. This will allow you to export the entire audit trail as a PDF.
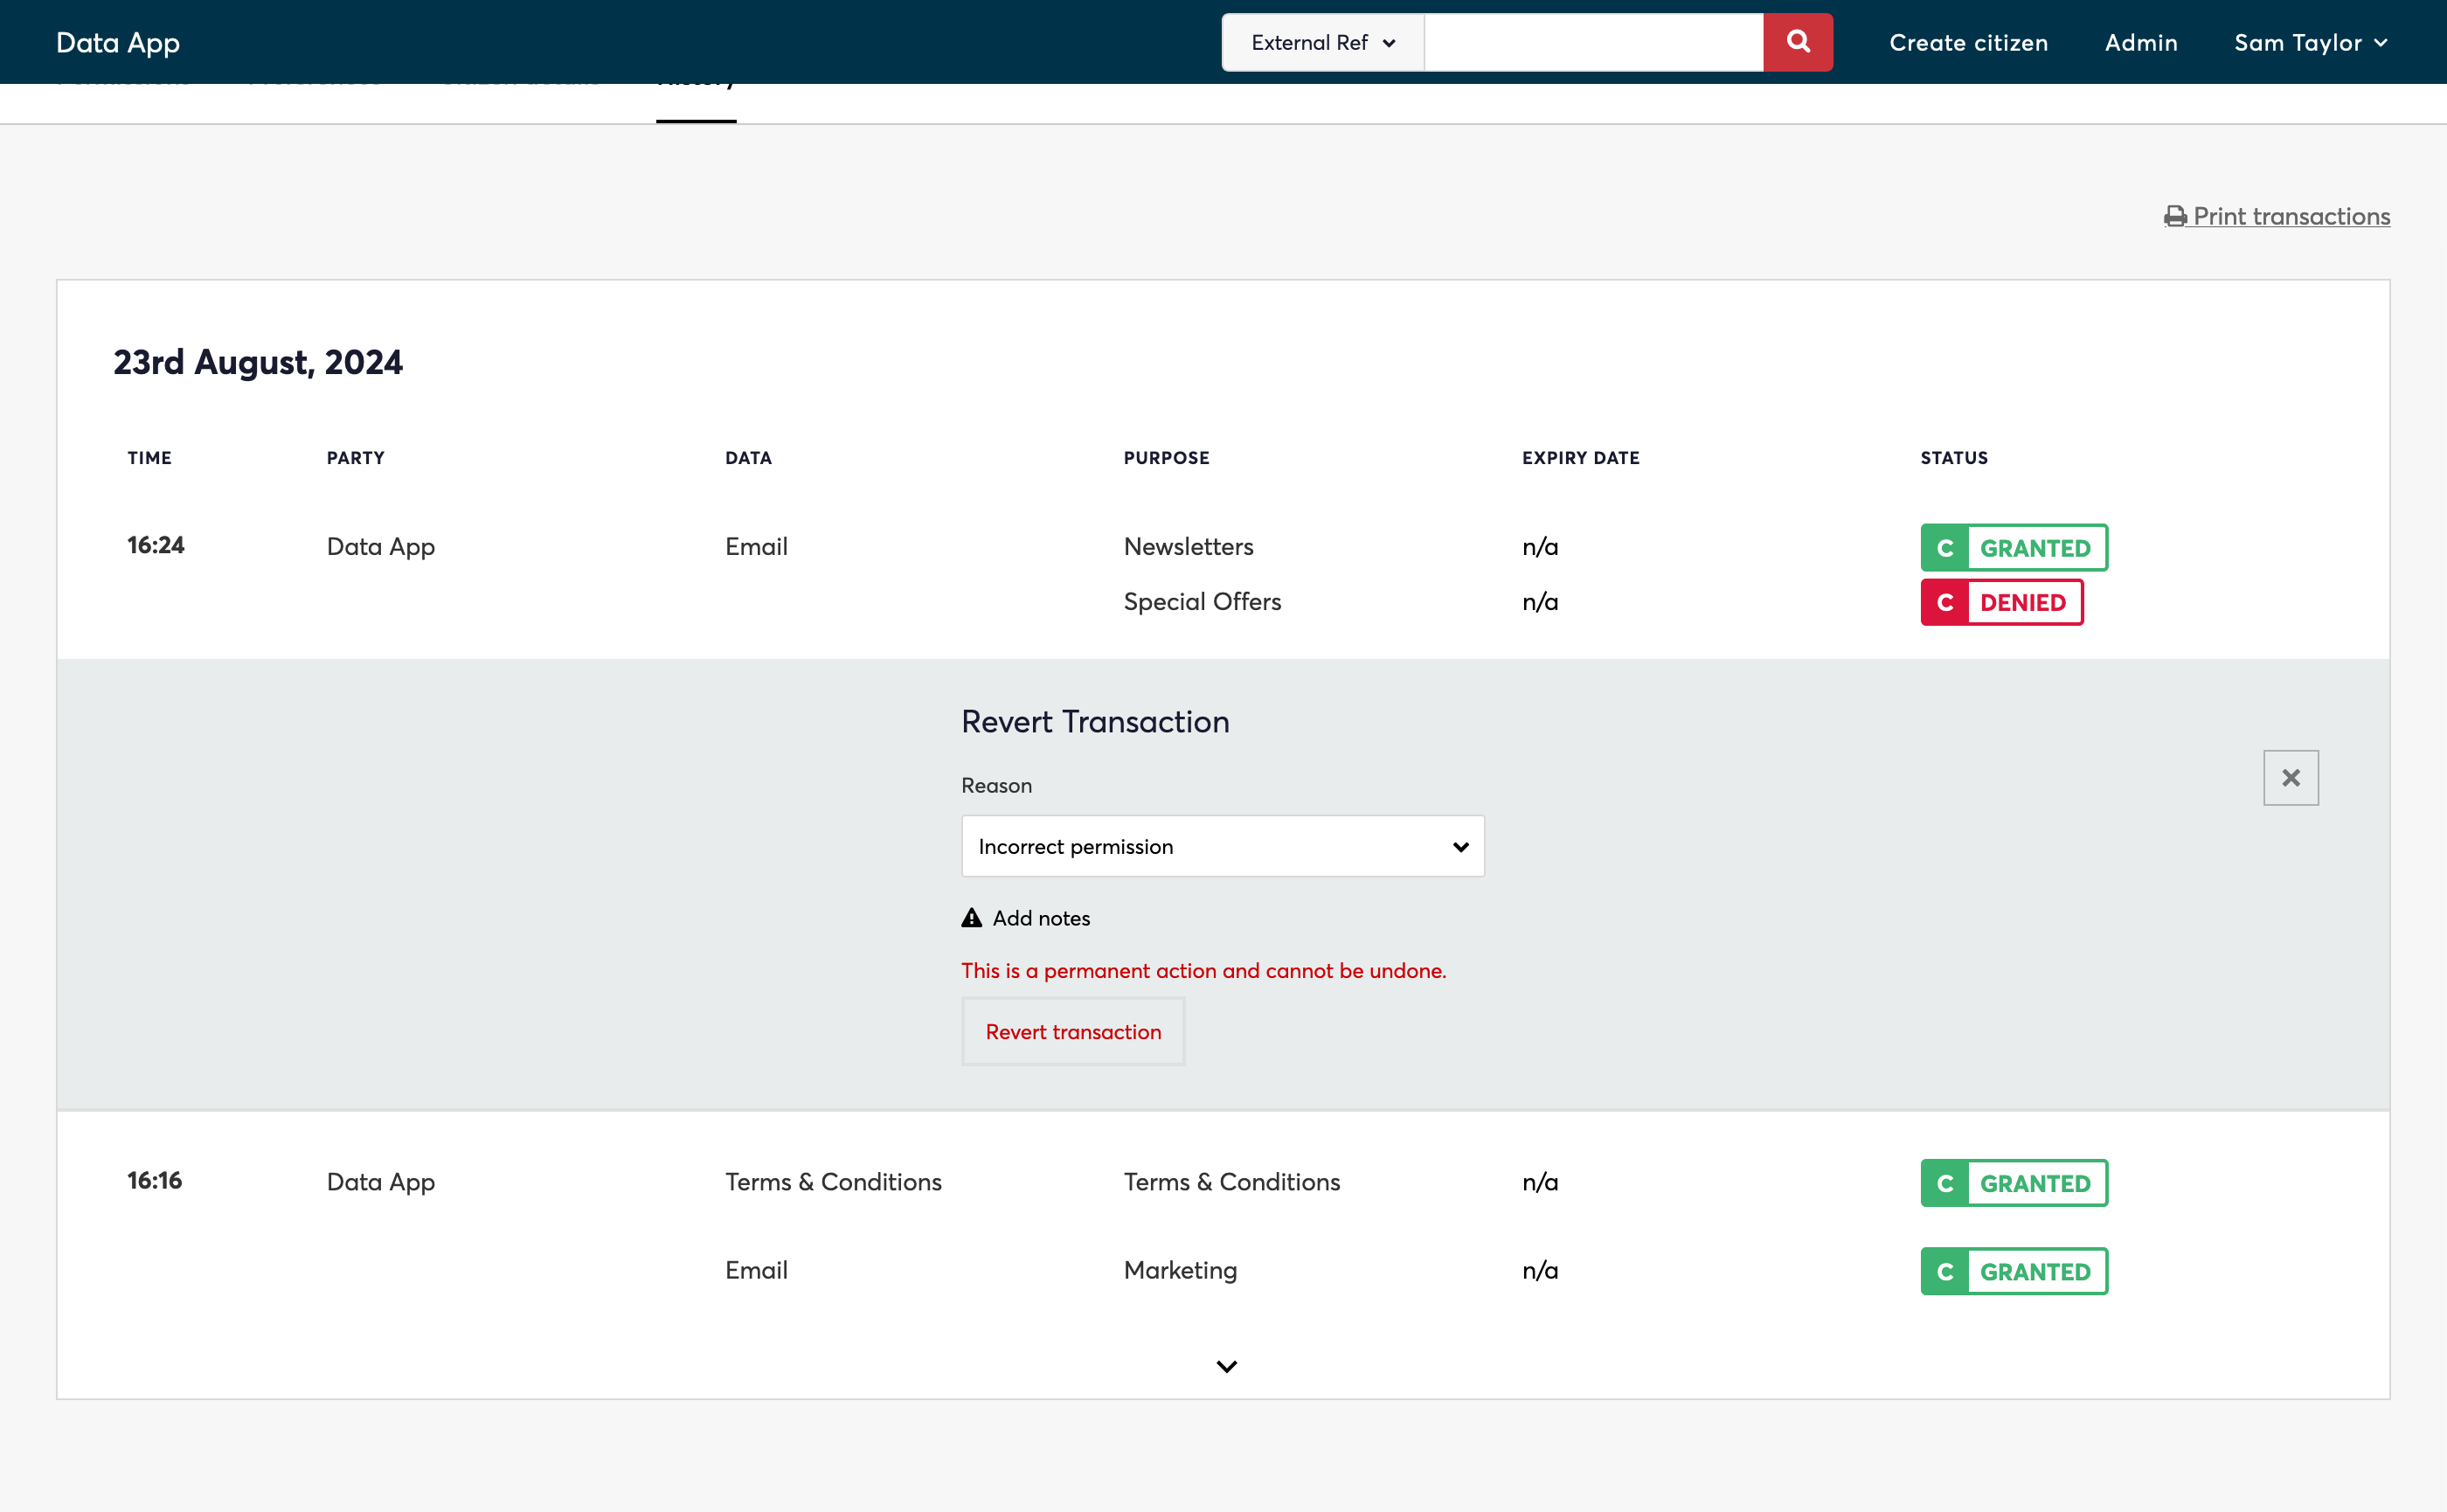
Step 4: Revert a Transaction
If a transaction was made in error, you can revert it by clicking on the "bin" icon next to the specific transaction.
Note that the reversion process itself is also recorded in the audit trail, ensuring a complete and transparent history of all actions.
Conclusion
You’ve now learned how to access and manage the audit trail for a Citizen in DataGuard CPM, ensuring that all permission changes are transparent and easily traceable. This is the final page in the Manage Citizens in the UI guide.
To continue learning, explore another How-To Guide or visit the CPM Handbook for more detailed information on advanced features and configurations.
Updated over 1 year ago