Salesforce

Salesforce is a leading customer relationship management (CRM) platform that helps businesses manage their sales, customer service, and marketing operations. The integration between Salesforce and DataGuard CPM enables seamless synchronisation of consent data between the two platforms, ensuring that your Salesforce contacts or leads are always up to date with the latest consent and preference information from DataGuard CPM.
Prerequisites
Before you begin, ensure you have the following:
- Access to the DataGuard CPM Platform.
- Administrative access to a Salesforce account to set up the integration.
If you don't have access to the DataGuard CPM Platform, please contact us.
Salesforce Setup
Step 1: Create a Salesforce Connected App
- Log in to Salesforce as the dedicated "integrations" user.
- Navigate to the Salesforce setup page.
- Go to Platform Tools > Apps > App Manager.
- Click on New Connected App.
- Fill in the required fields, such as "Connected App Name" (e.g., "DG CPM Integration") and "Contact Email."
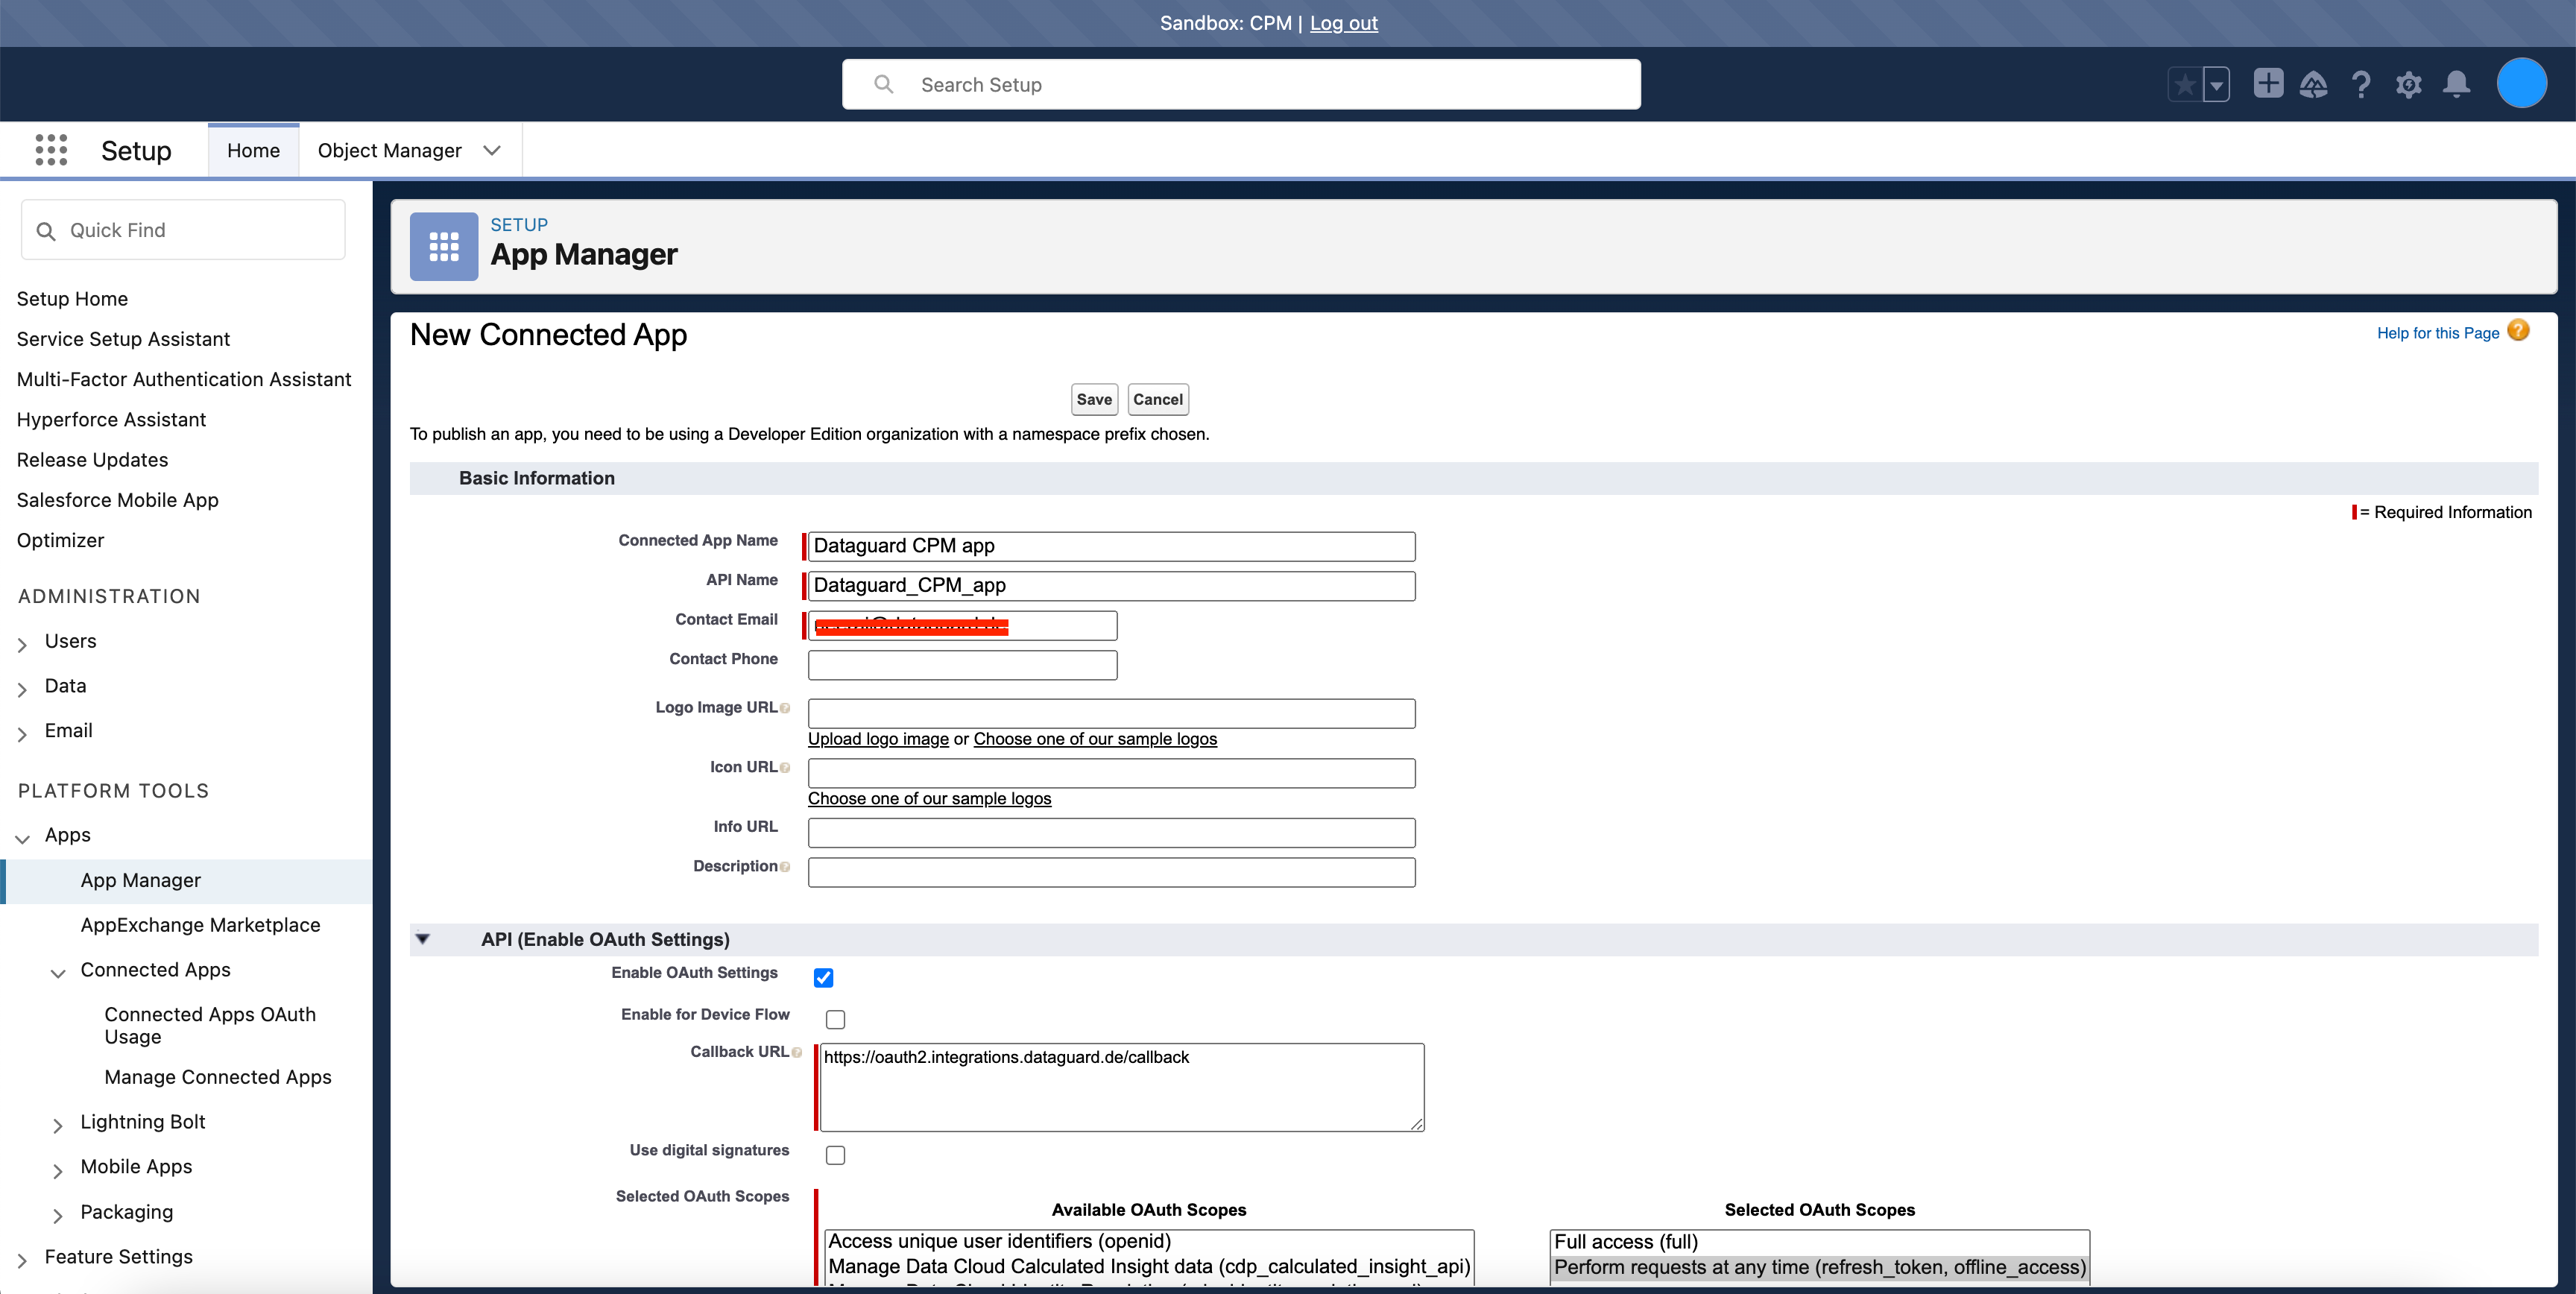
- Under API (Enable OAuth Settings), check the box to enable OAuth settings.
- Set the Callback URL to:
https://oauth2.integrations.dataguard.de/callback - Add the following scopes to the Selected OAuth Scopes: "Full access (full)" and "Perform requests at any time."
- Ensure the checkboxes for "Require Secret for Web Server Flow" and "Require Secret for Refresh Token Flow" are checked, and "Require Proof Key for Code Exchange (PKCE) Extension for Supported Authorization Flows" is unchecked.
- Click Save to create the Connected App.
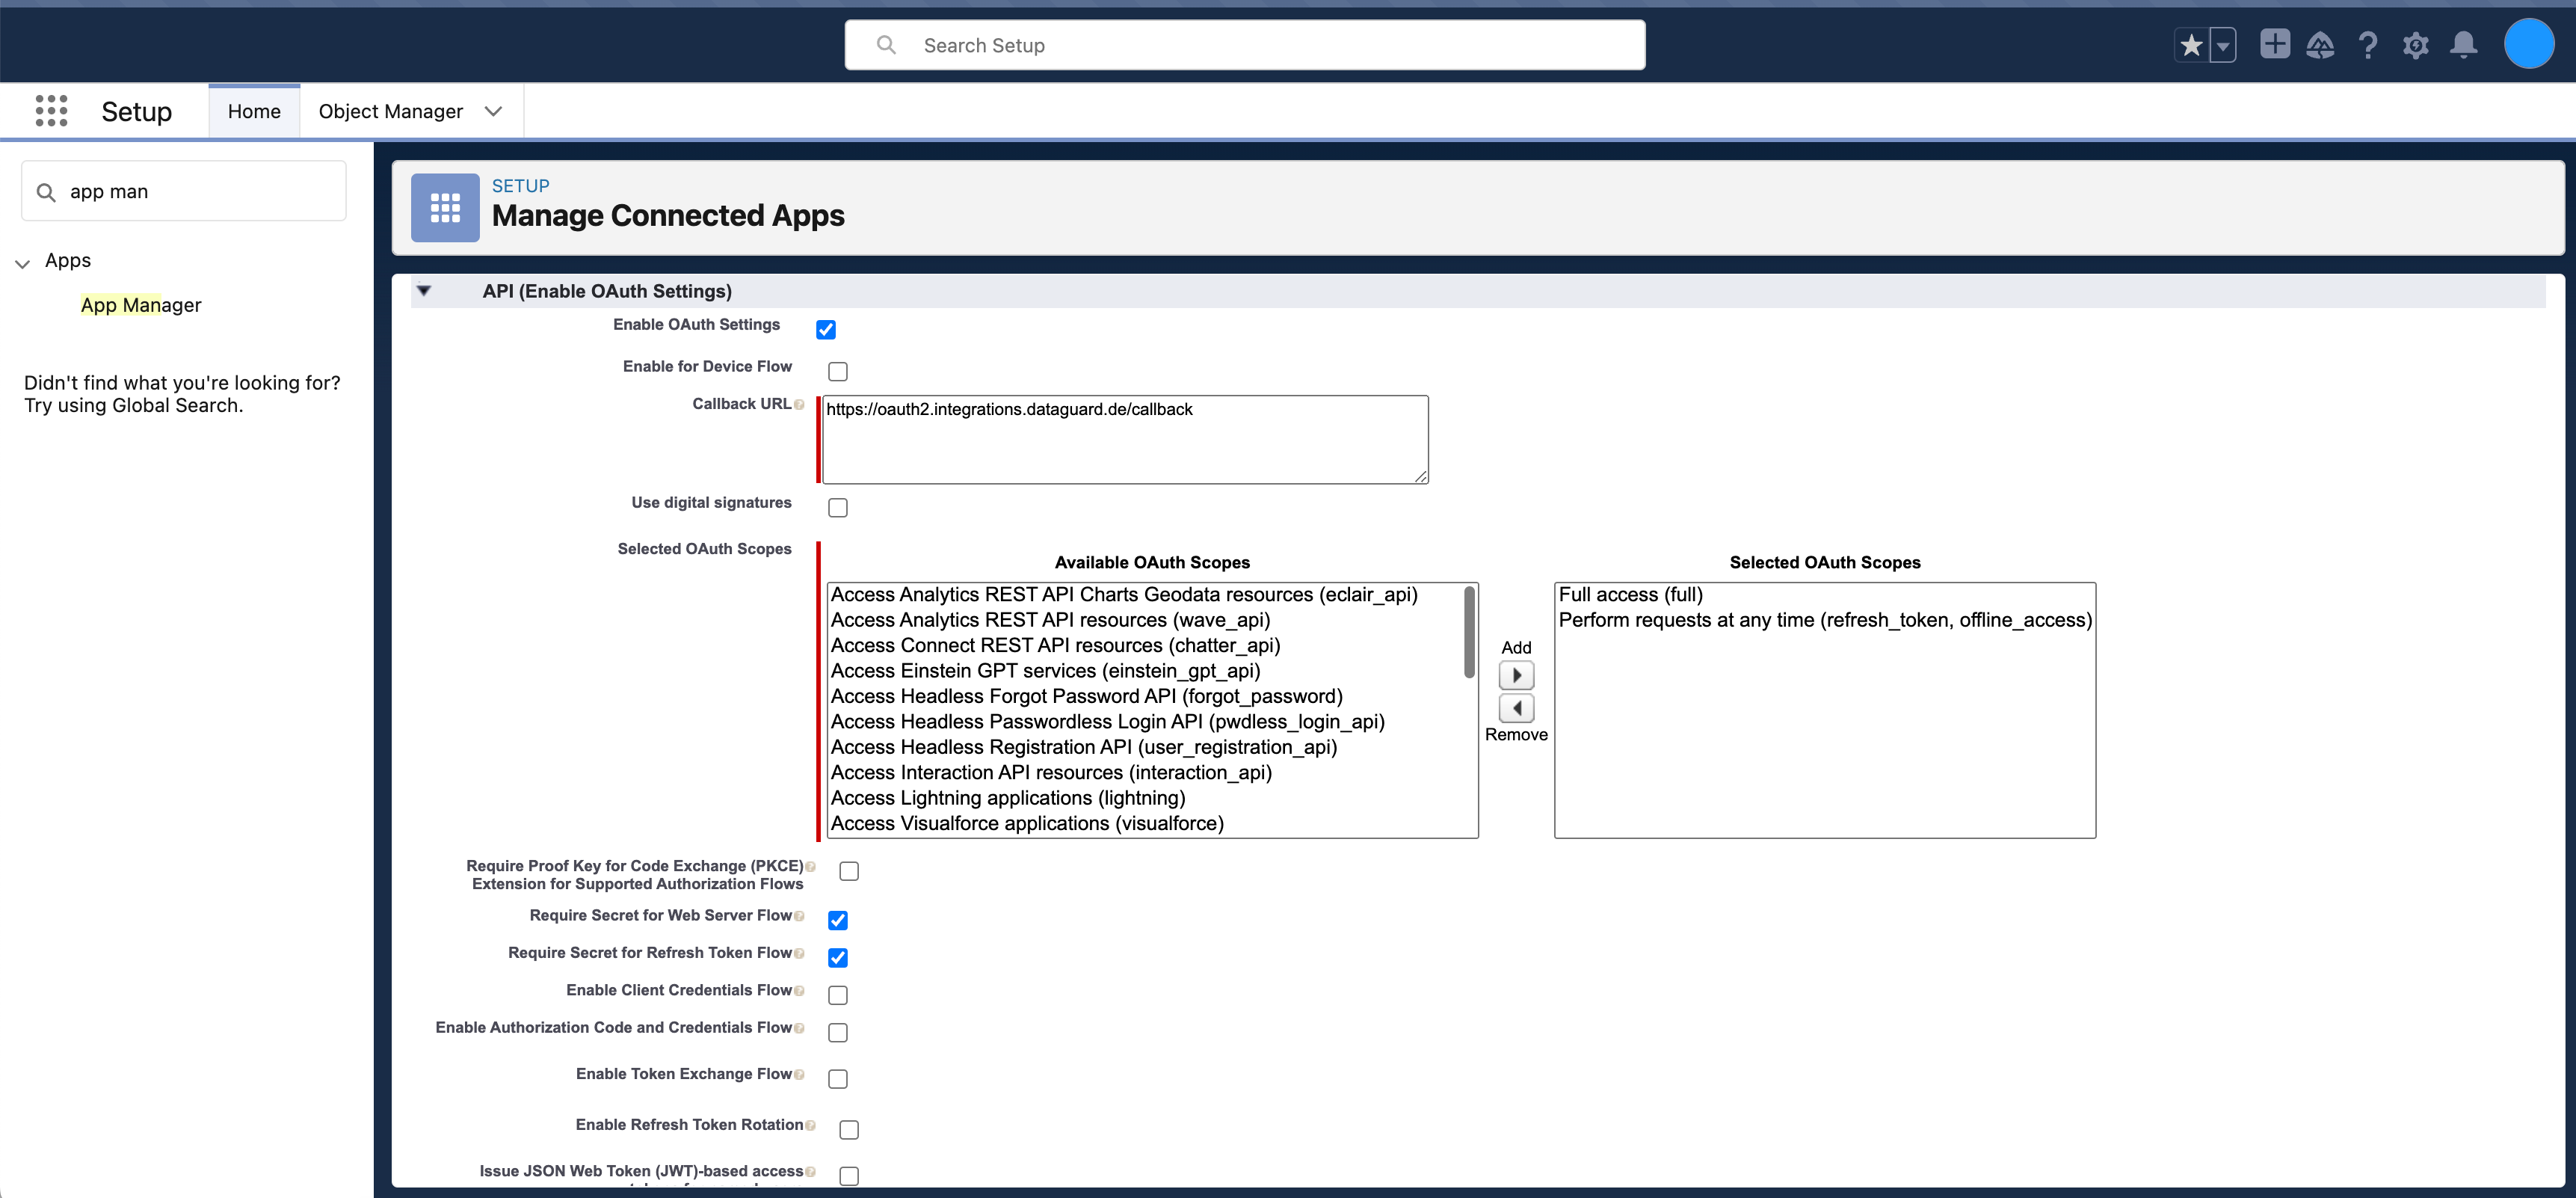
Step 2: Obtain a Consumer Key and Secret
- After creating the Connected App, Salesforce will generate a Consumer Key and Consumer Secret. Keep these details secure as you will need them later in the DataGuard CPM setup.
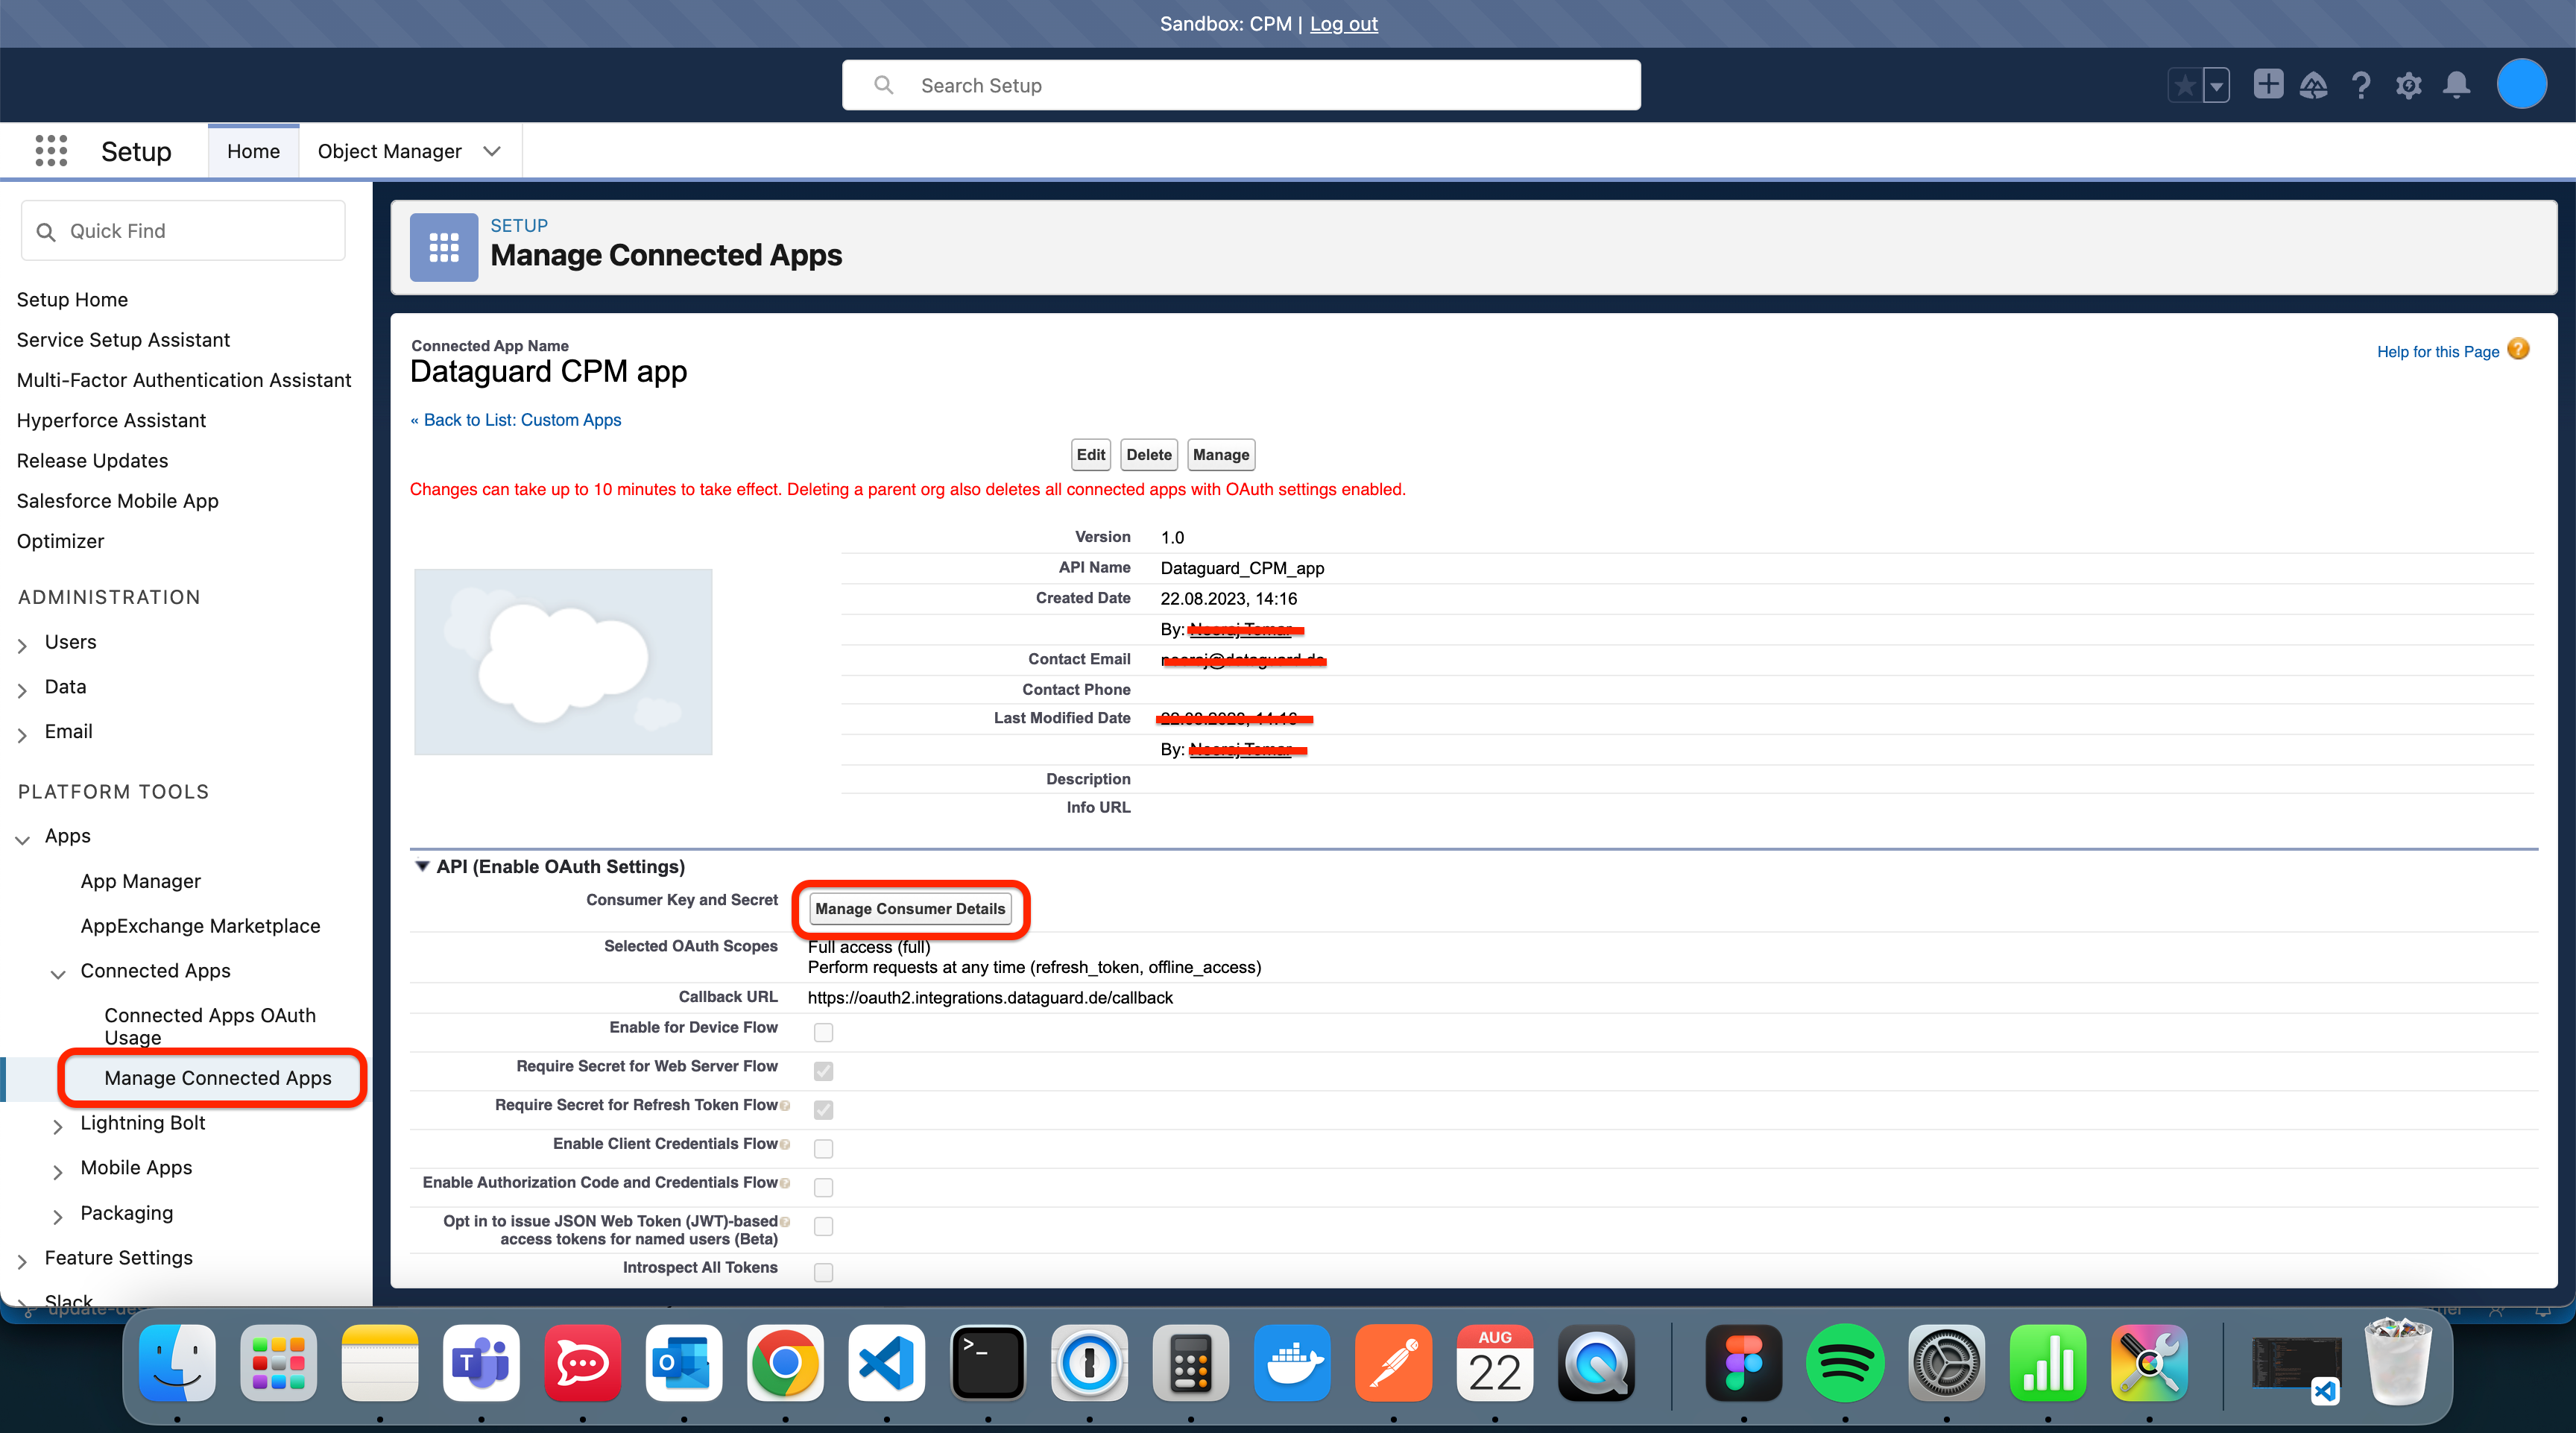
Step 3: Create a Dedicated Salesforce User
- Set up a dedicated "integrations" user in Salesforce with administrative rights. This user will be used to set up and maintain the integration, and should never be used to make changes to a Contact or Lead's Permissions or Preferences, as updates made by this user will not be synced.
Integration Setup
Access the Integrations Marketplace
- Log in to the DataGuard CPM Platform.
- Navigate to the Integrations section and click on Marketplace.
- You will see a list of available integrations.
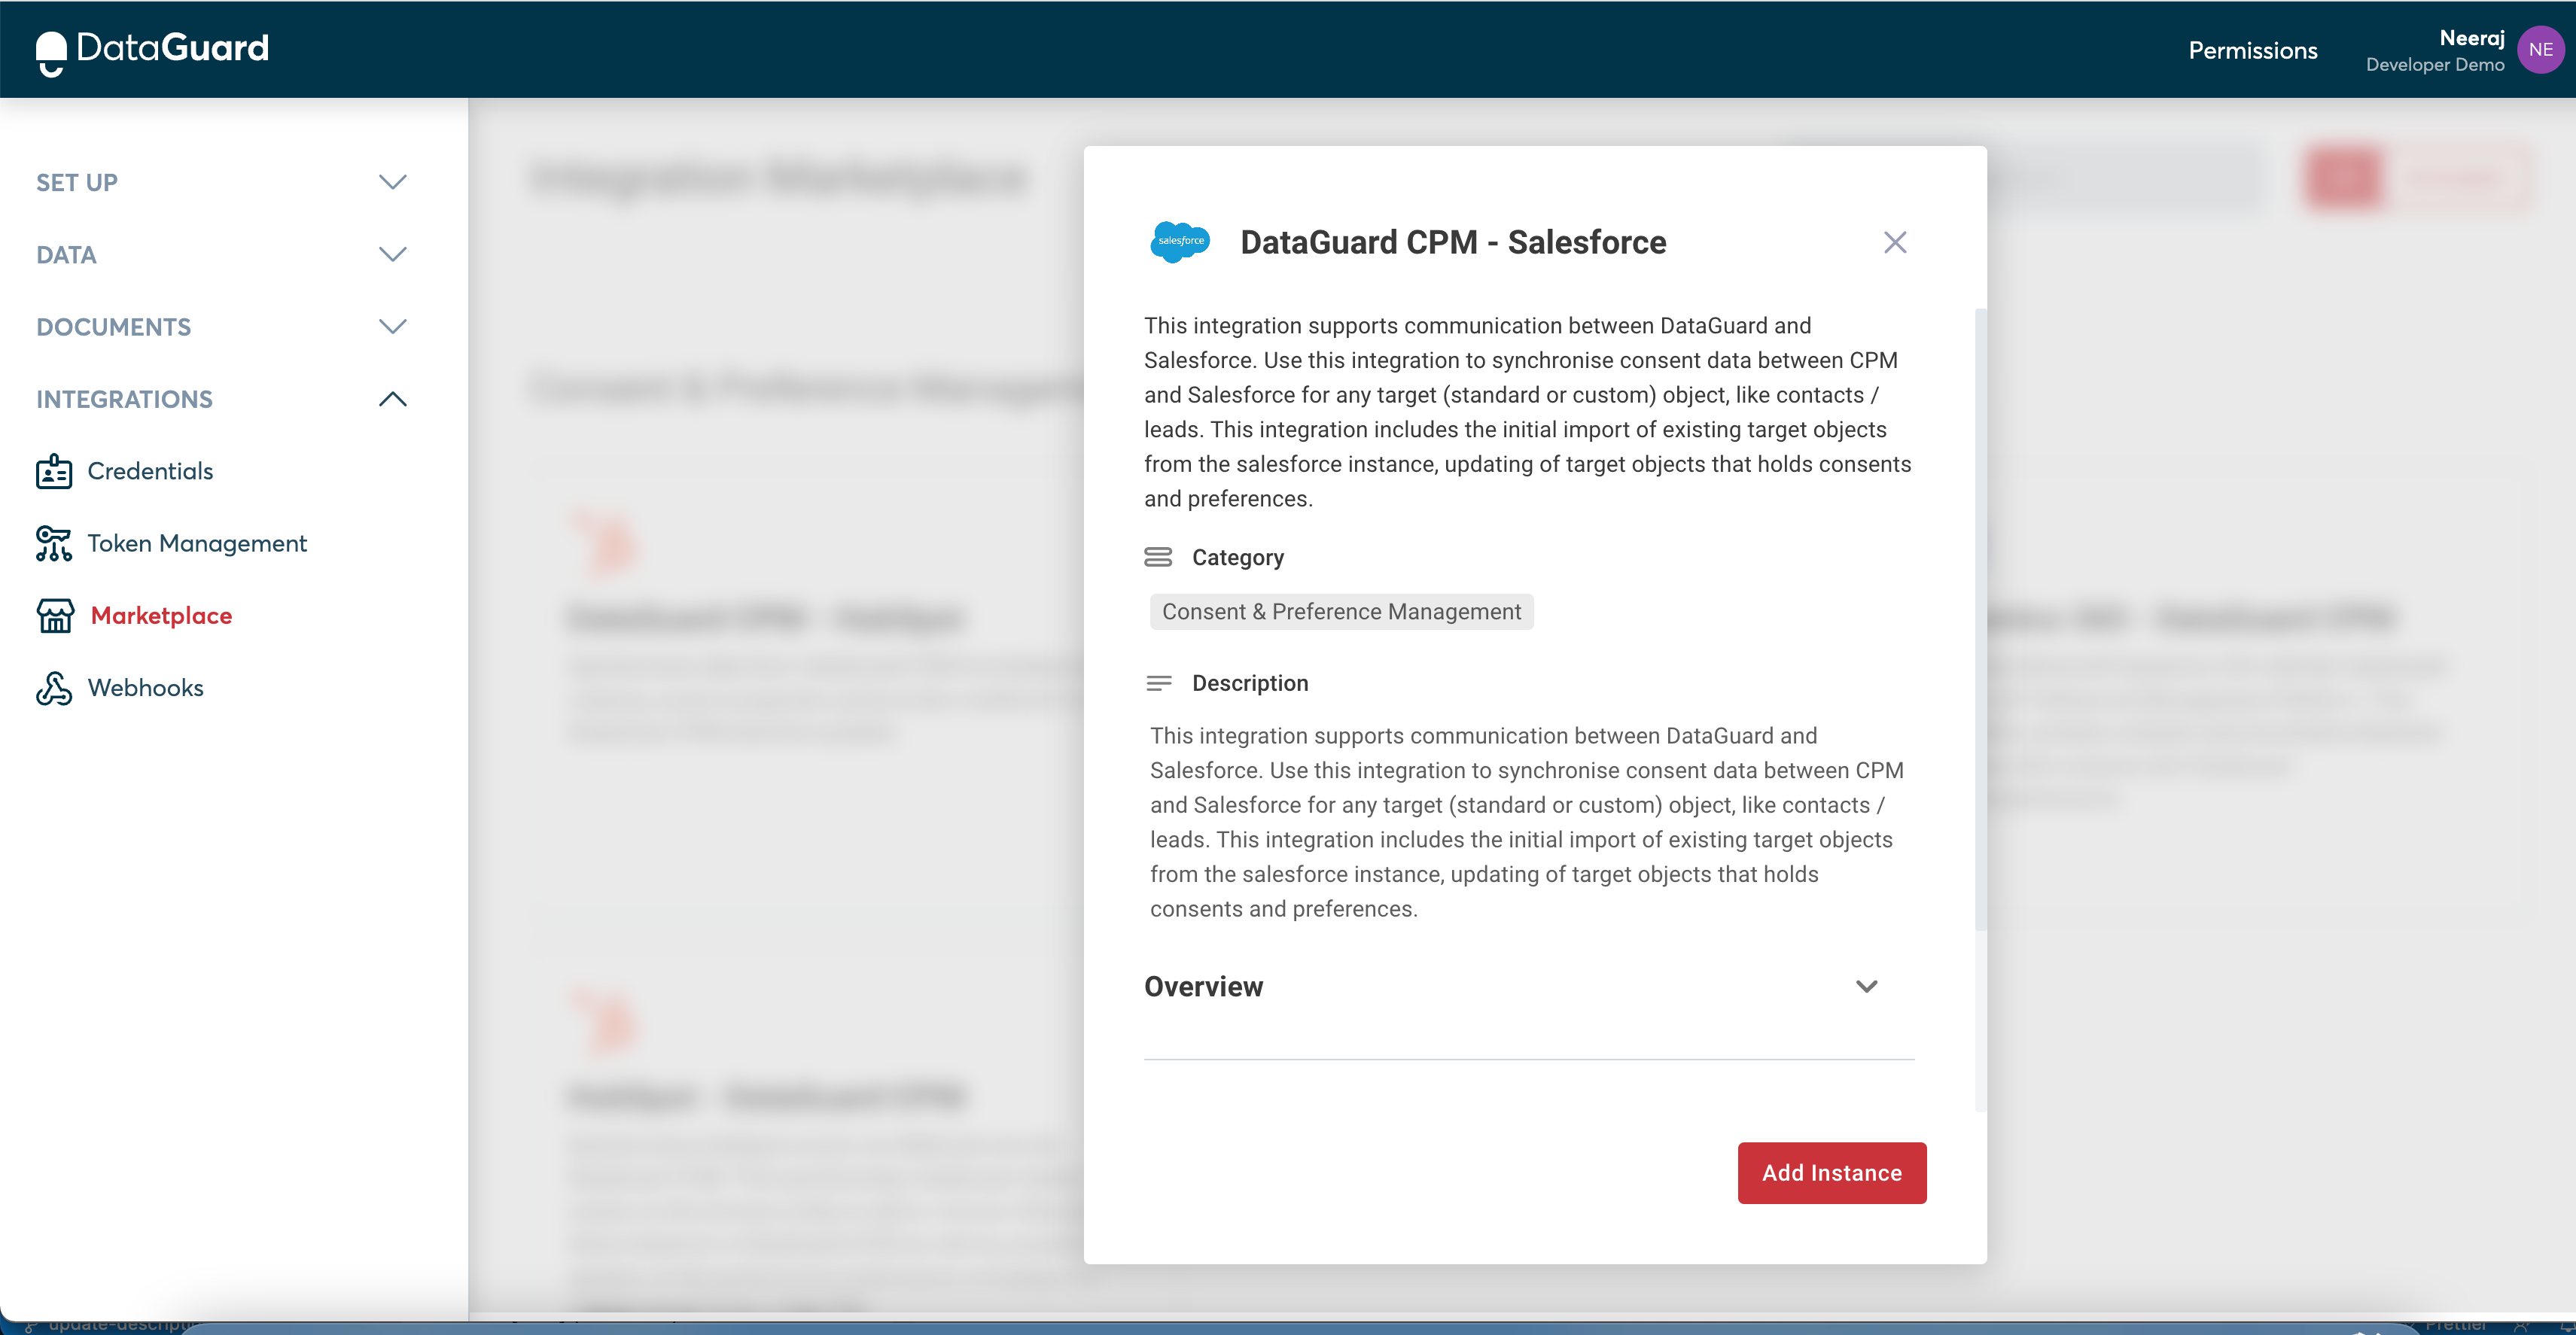
- Click on the DataGuard CPM-Salesforce integration to start the setup.
- In the popup, click on Add Instance to begin configuring a new integration instance.
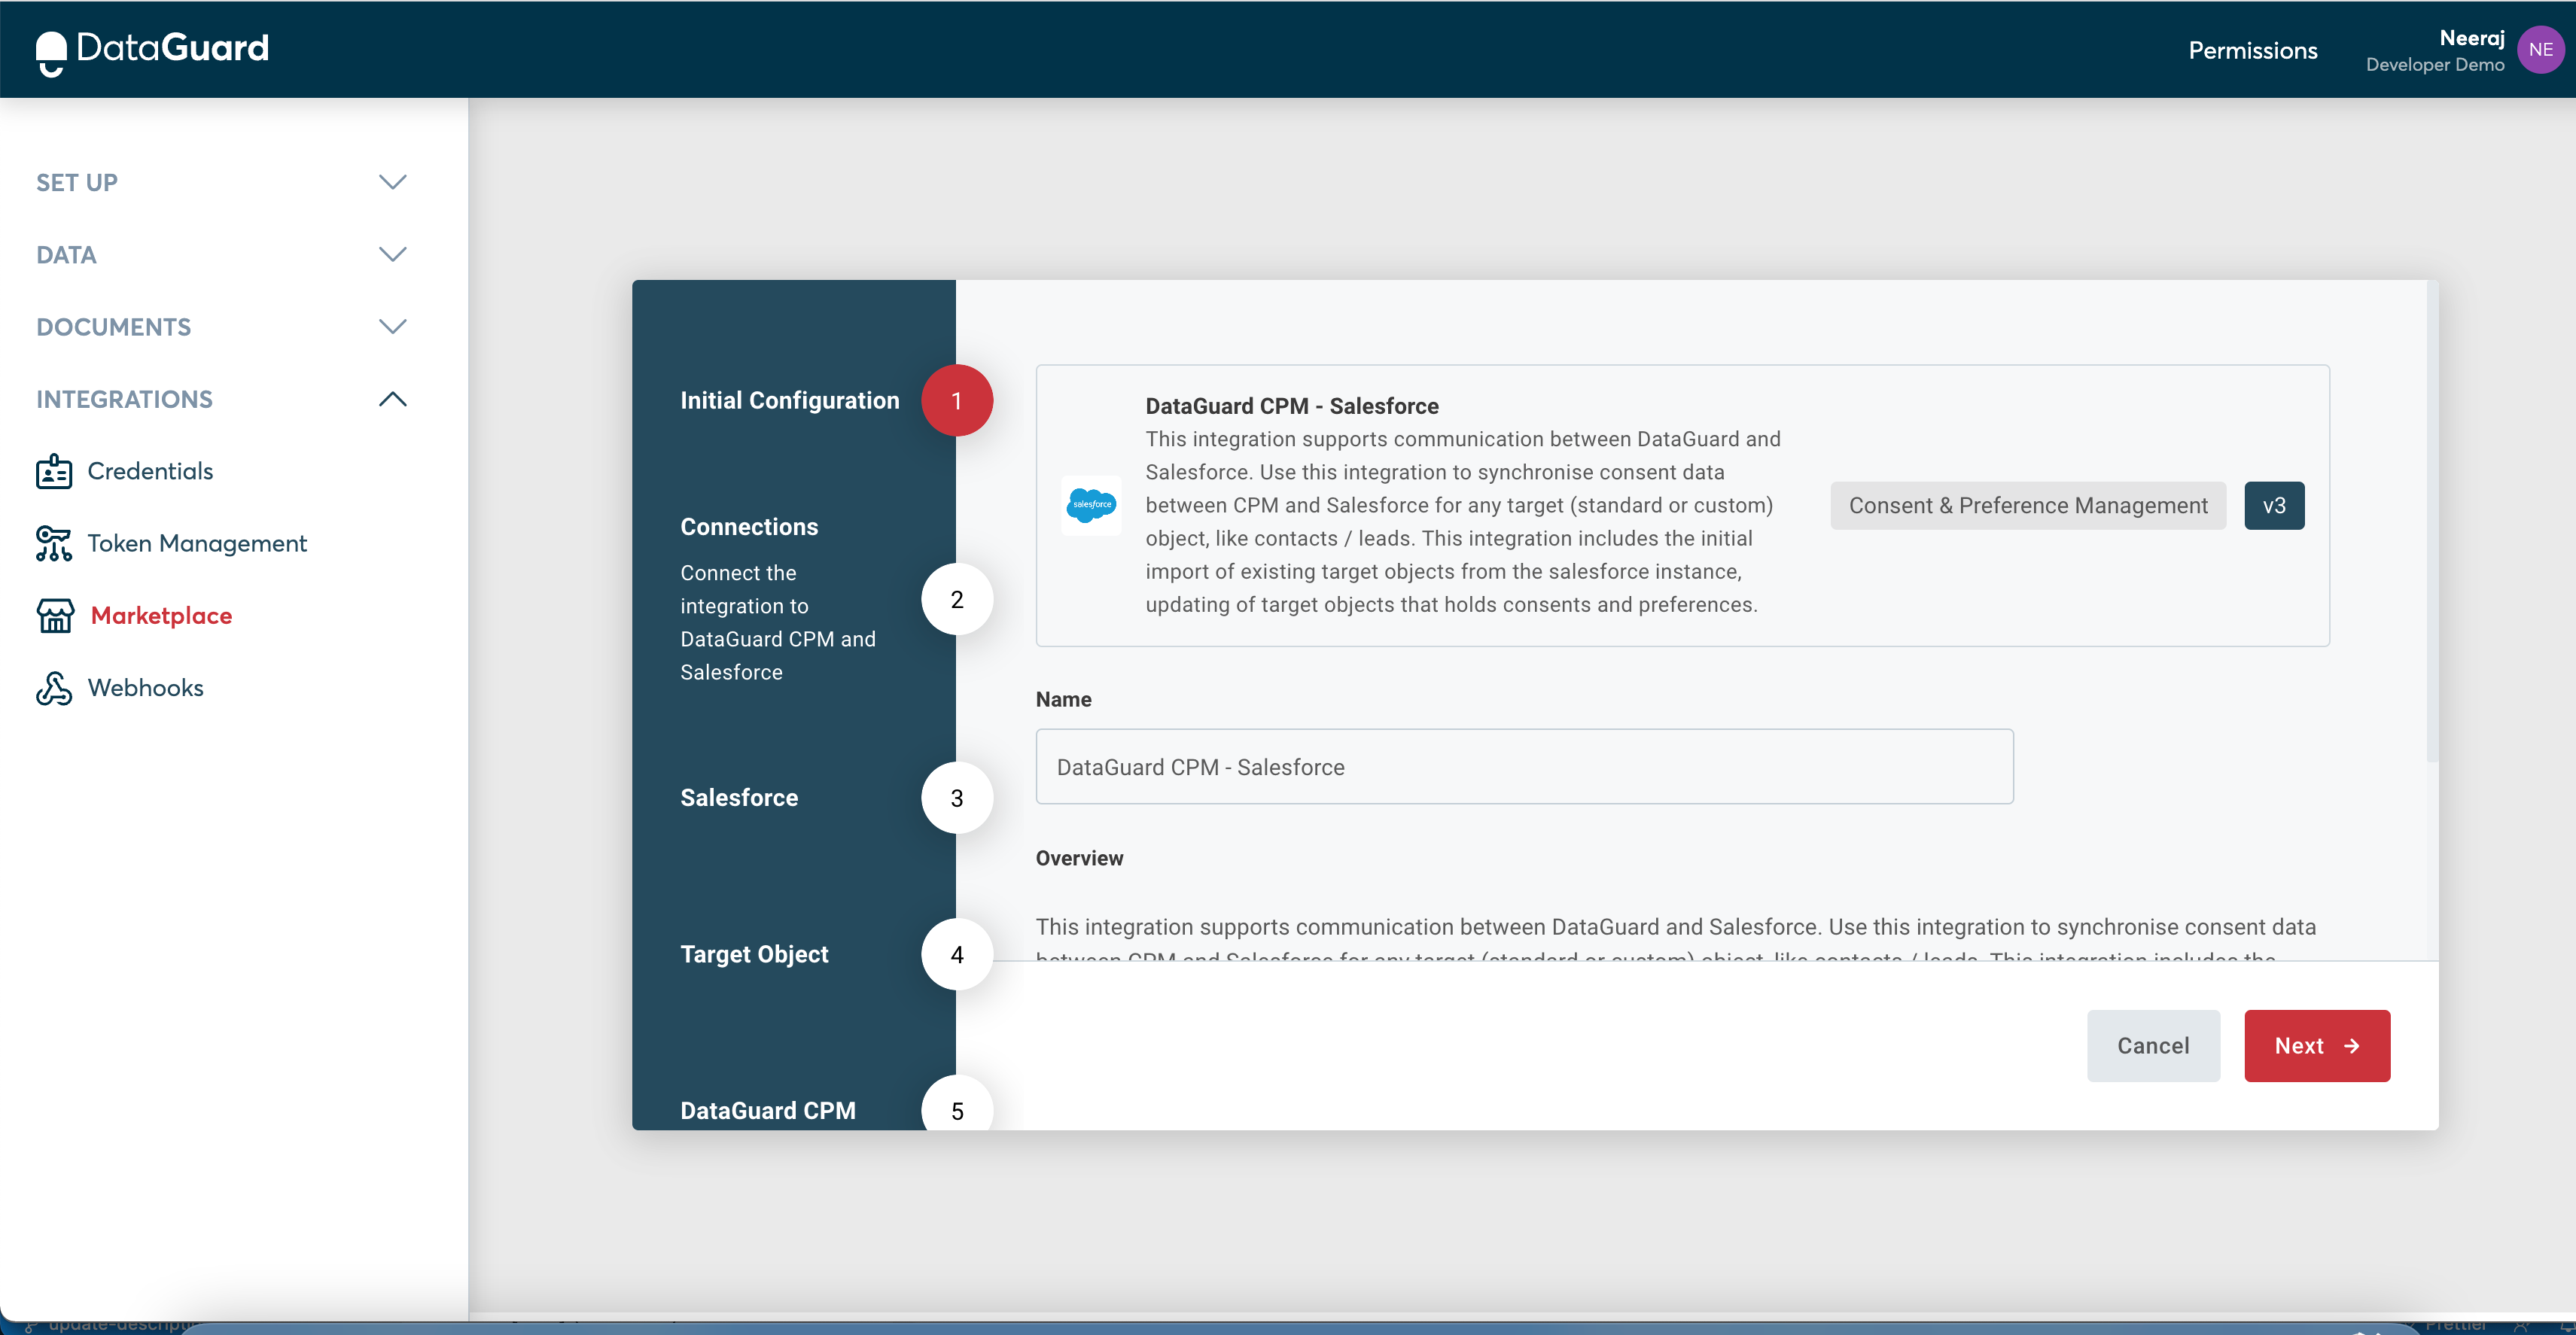
Step 1: Initial Configuration
- Review the information presented, such as the Name, Version, and Description of the connector.
- Click Next to proceed.
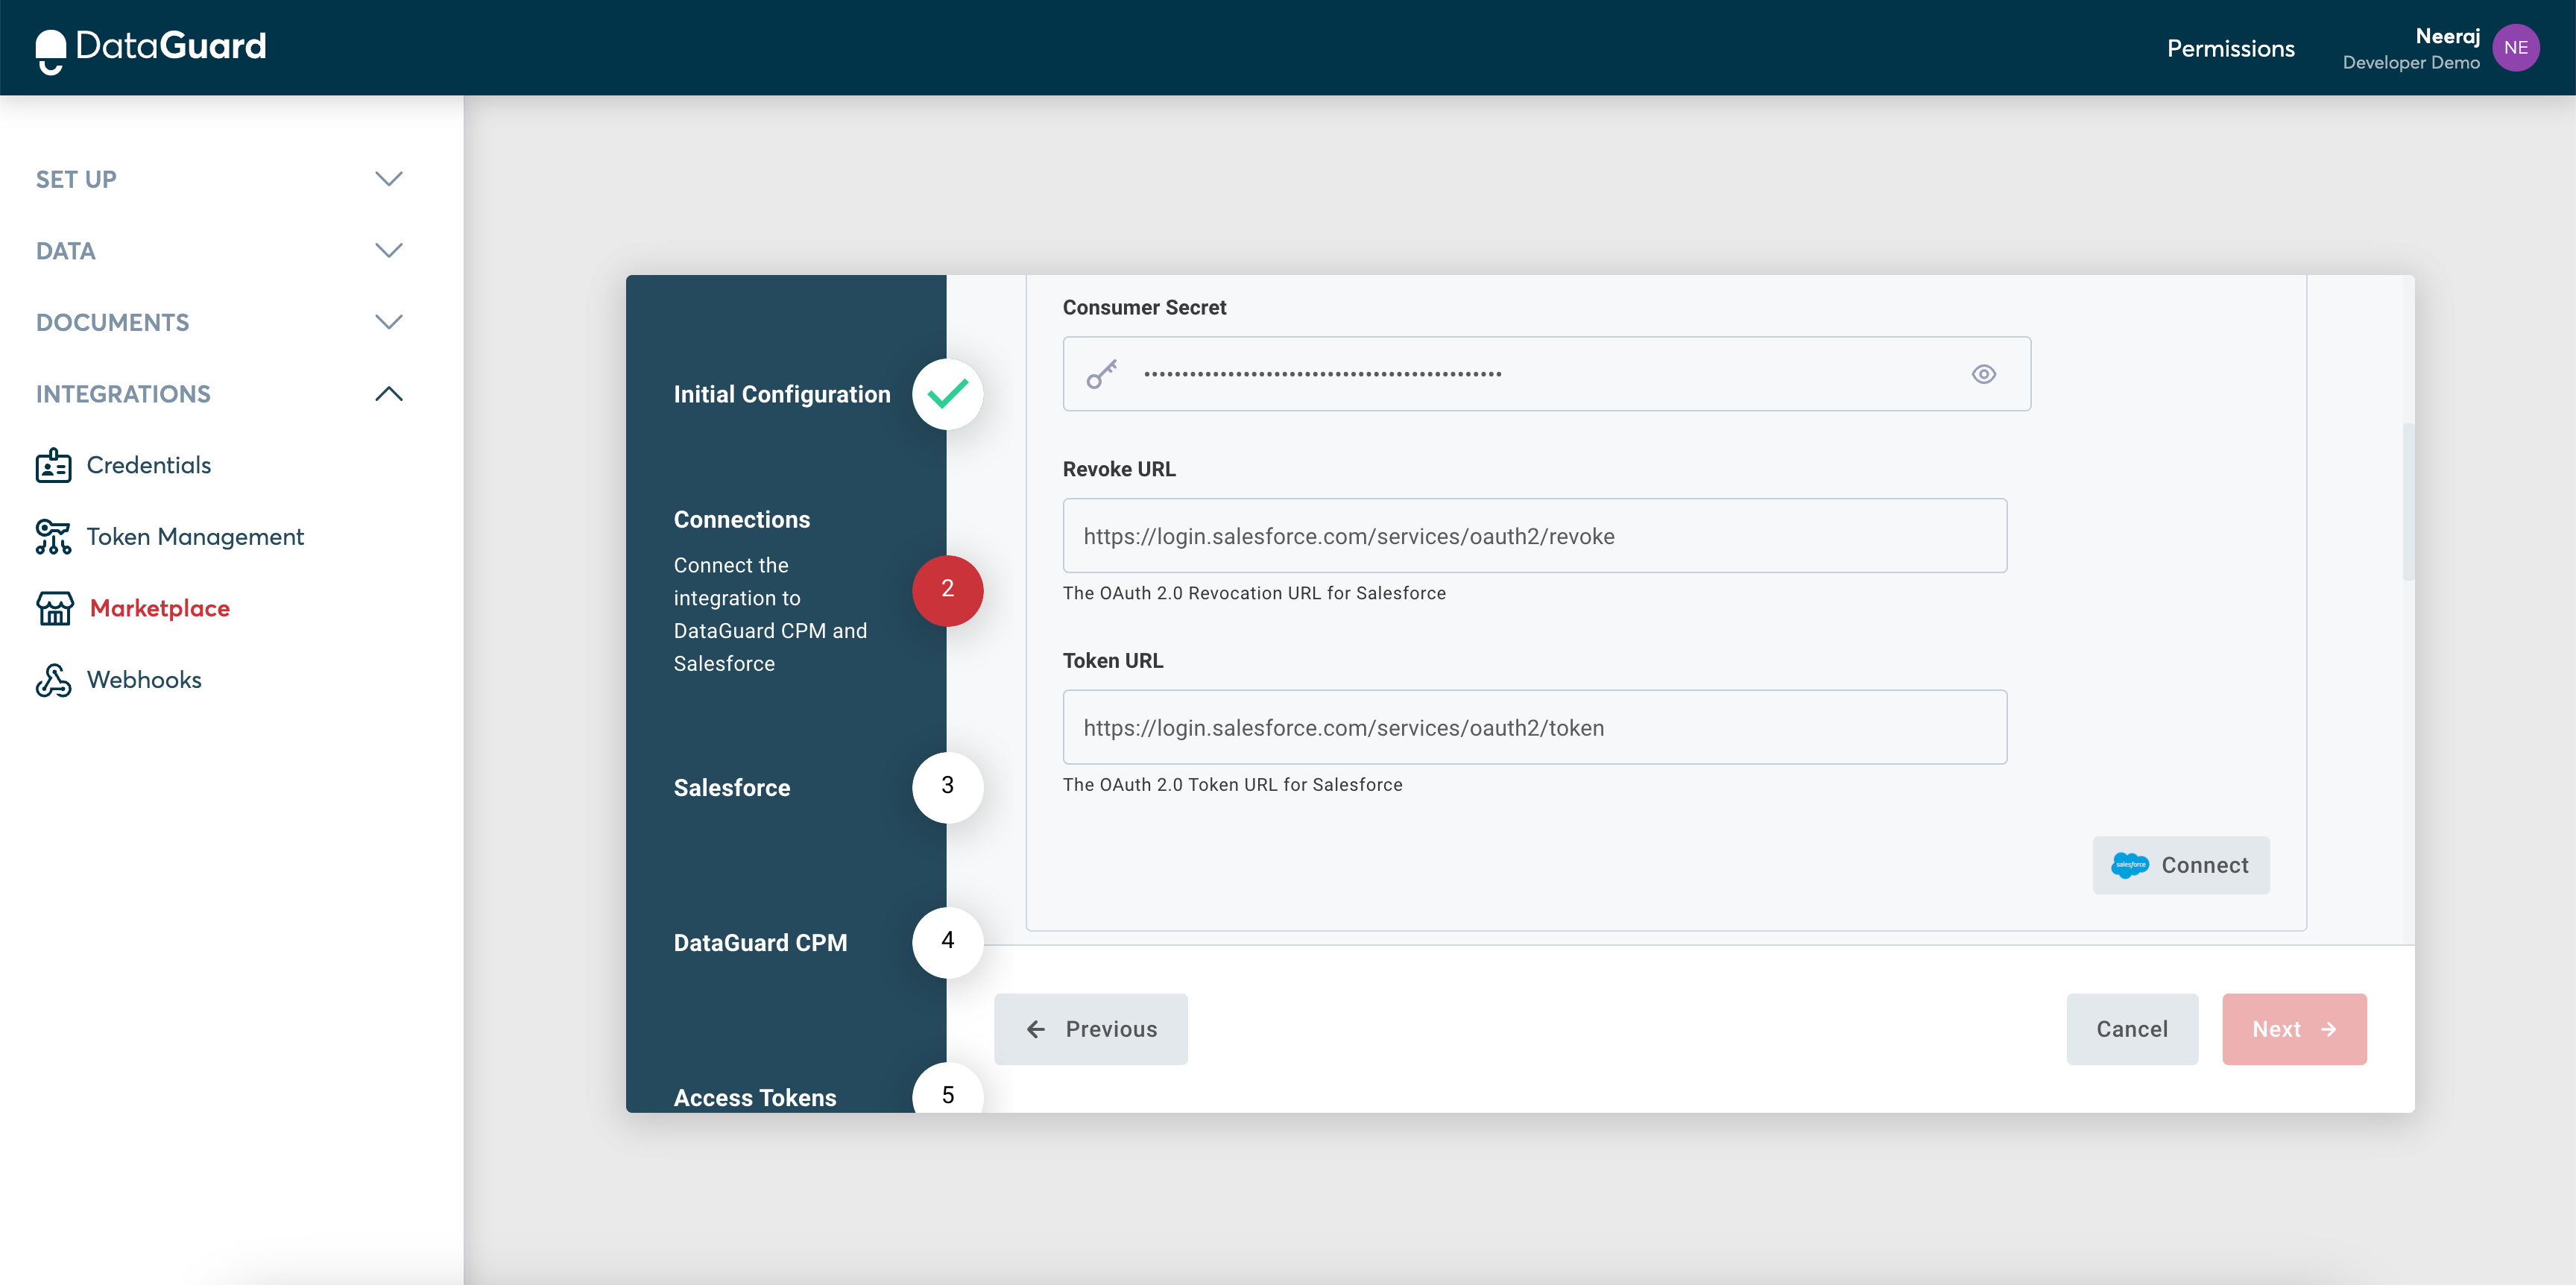
Step 2: Connections
Salesforce Connection
- Enter the Consumer Key and Consumer Secret you obtained from Salesforce.
- Enter the Authorize URL, Token URL and Revoke URL values. These URL fields will be different depending on whether you are using a production Salesforce instance or a sandbox Salesforce instance. The table below shows the URL prefix for each type of Salesforce instance.
| Environment | URL Prefix |
|---|---|
| Production Salesforce | https://login.salesforce.com/ |
| Sandbox Salesforce | https://test.salesforce.com/ |
- Click Connect to establish the connection.
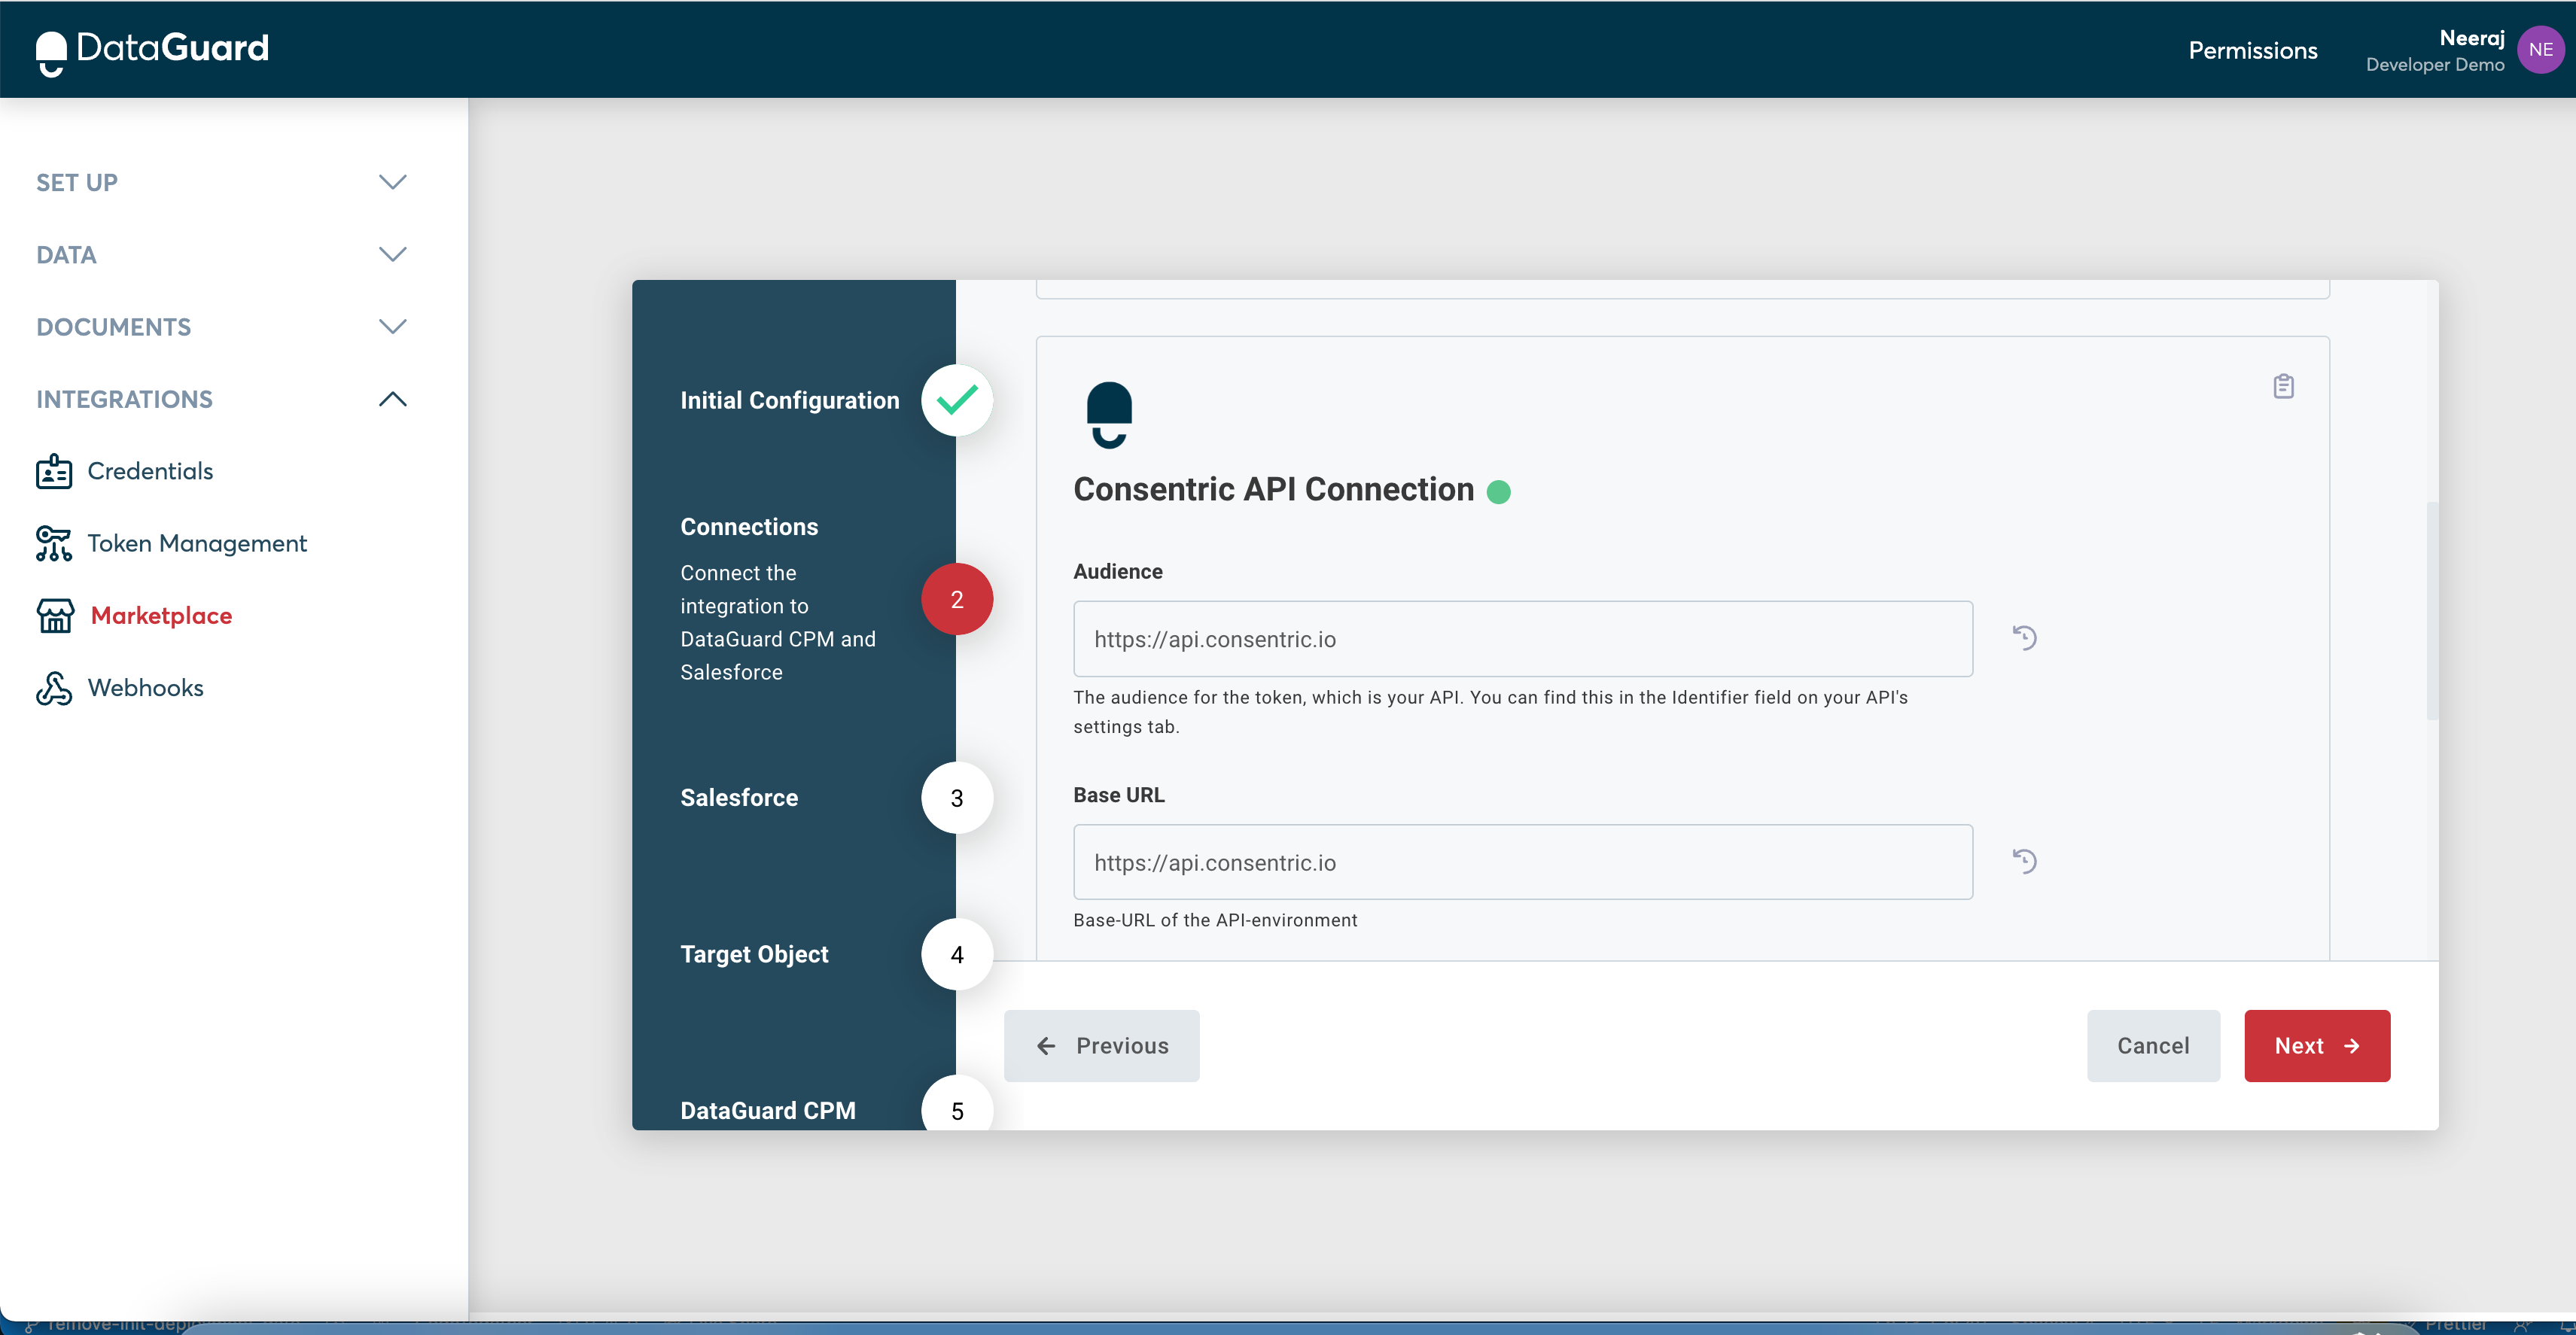
CPM Connection
- The values of these fields will vary depending on the environment, enter these values into the form, using the Environments page to replace the palceholders below:
- Token URL: Should match this pattern:
<auth-url>/oauth/token?audience=<audience-url>. - Audience URL: Should be
<audience-url>. - Client ID: Is found on the Credentials page of the UI.
- Client Secret: found on the Credentials page of the UI.
- Base URL: Should be
<api-url>.
- Token URL: Should match this pattern:
- Click Connect to establish the connection.
- Click Next to proceed.
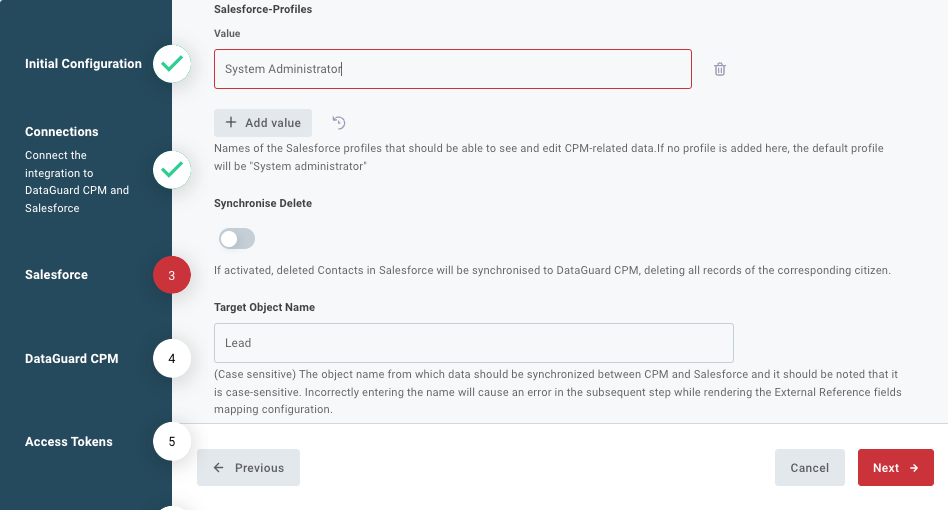
Step 3: Salesforce Configuration
- Enter the names of the Salesforce profiles that should have access to CPM-related data, e.g. "System Administrator"
- Configure additional settings like Synchronise Delete and Target Object Name.
- Click Next to proceed.
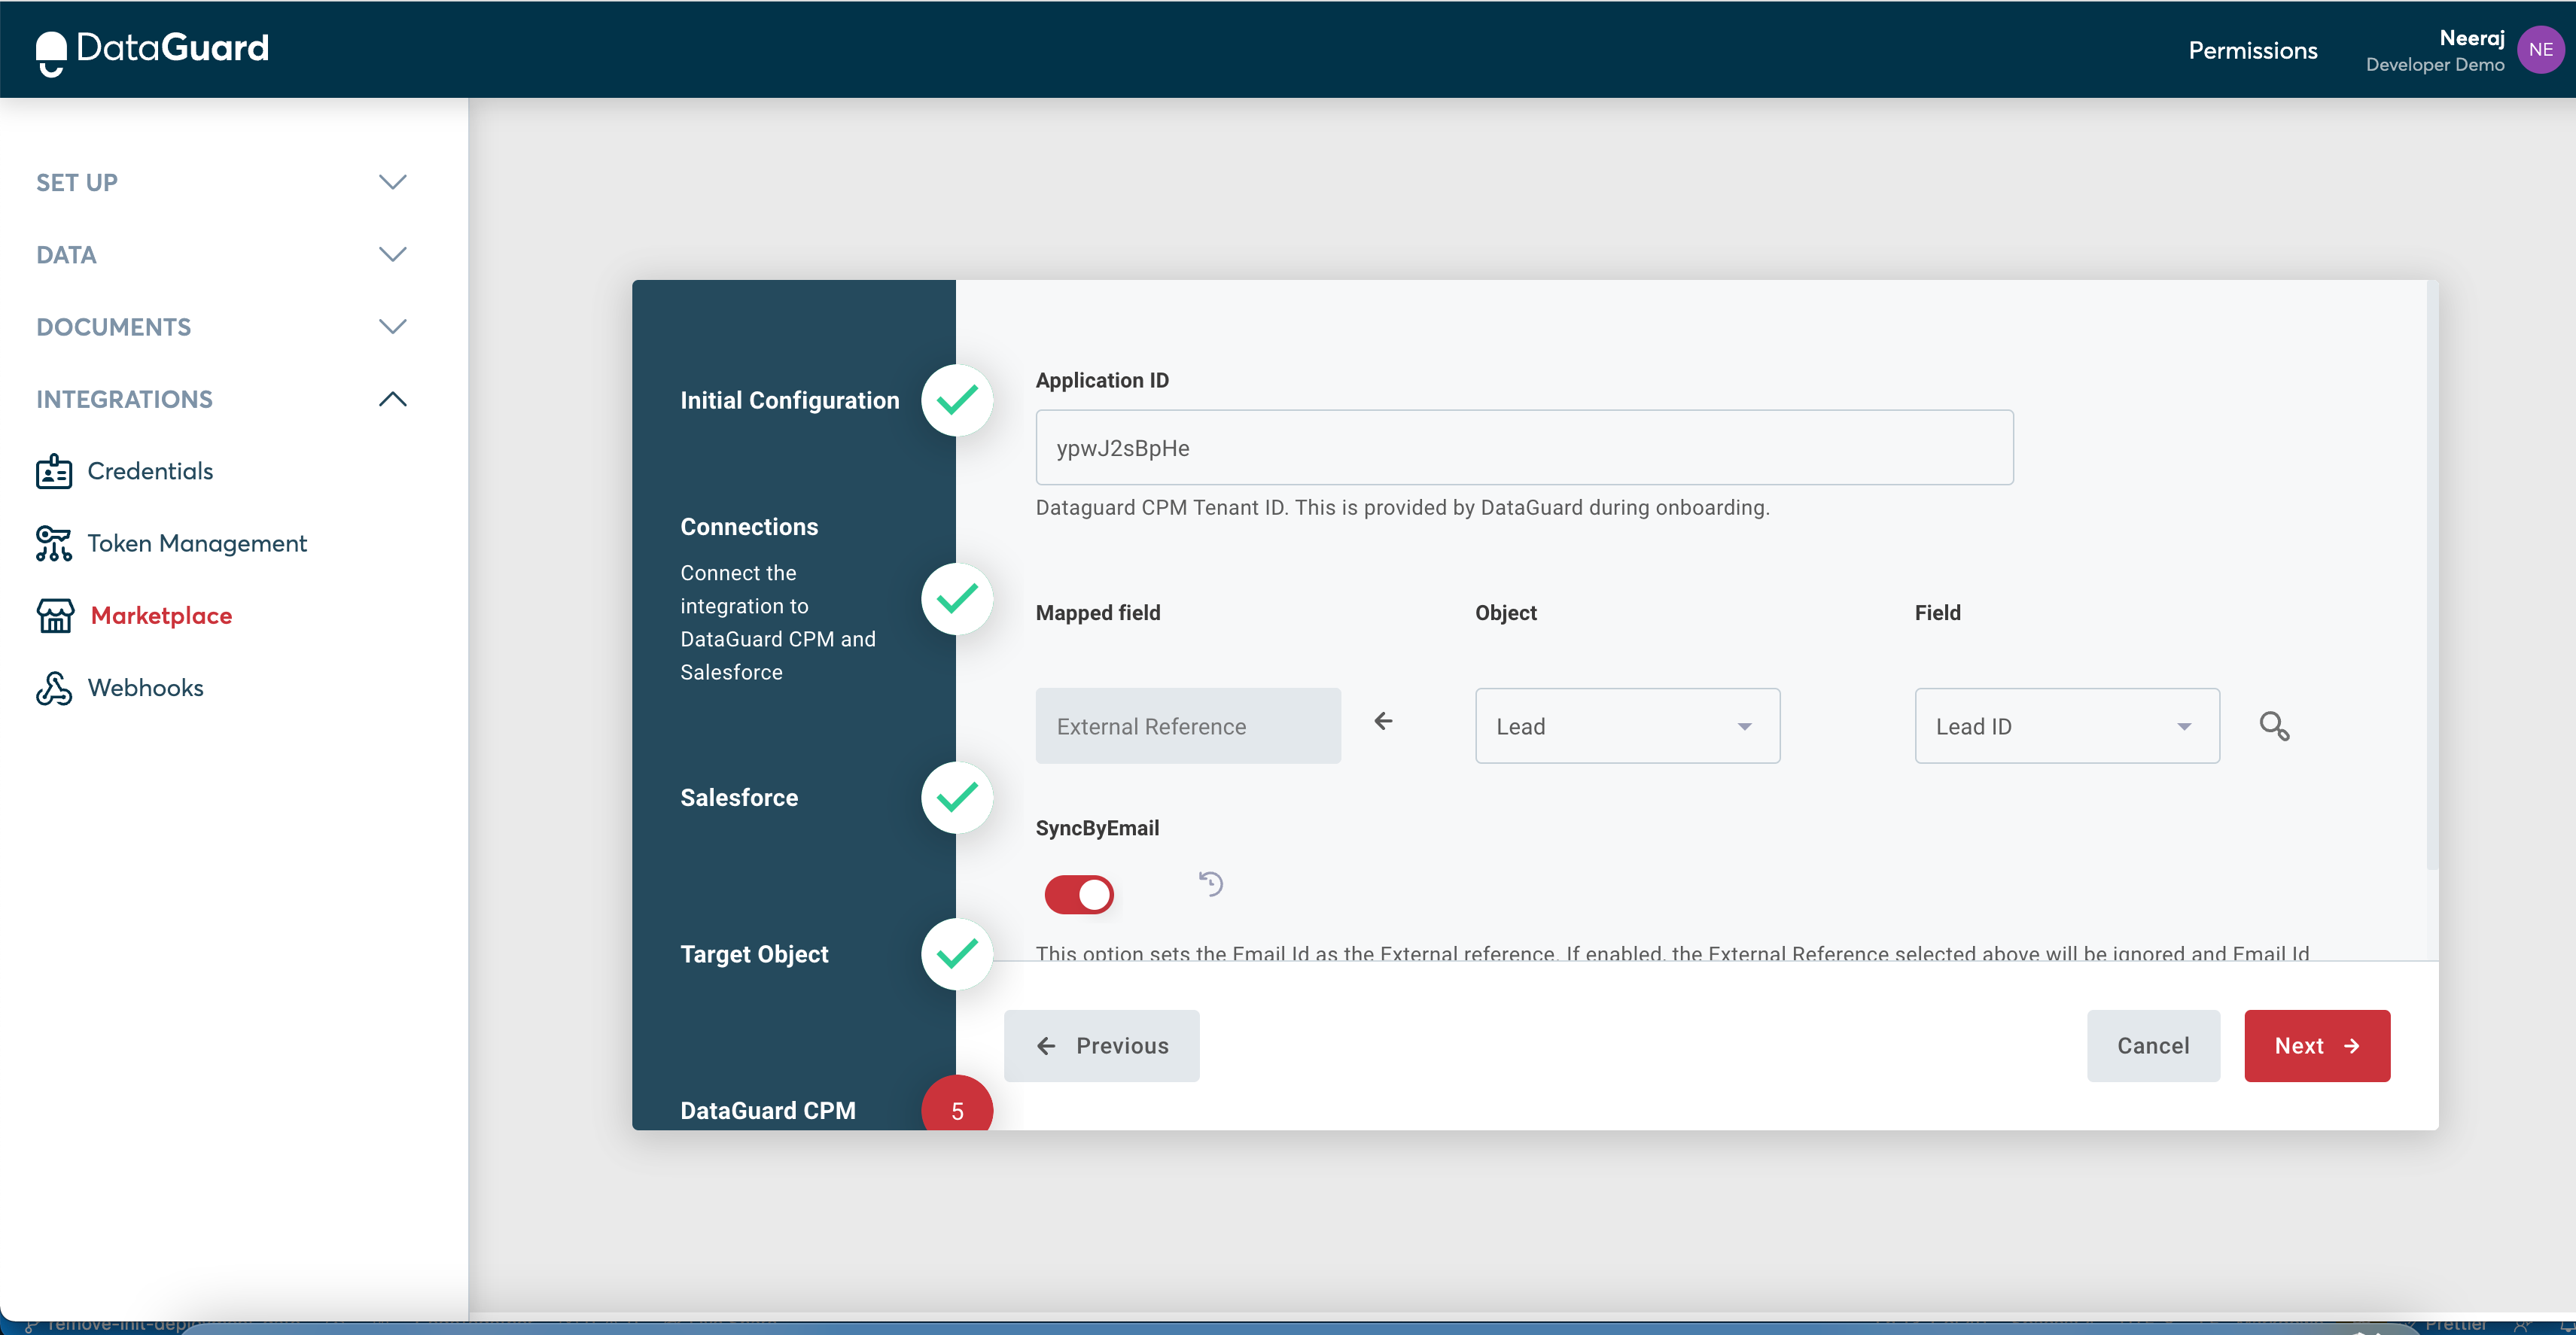
Step 4: DataGuard CPM Configuration
- Enter the Application ID, this can be found on the Credentials page of the UI.
- The External Reference mapped field specifies which Salesforce field will be used as the identifier in CPM. Typically this will be the Contact ID or Lead ID. If you wish to use the email address as the identifier, see the Sync By Email option below.
- Optionally, enable Sync By Email if you wish to use the Email Address field to map between Salesforce and CPM records.
- Click Next to proceed.
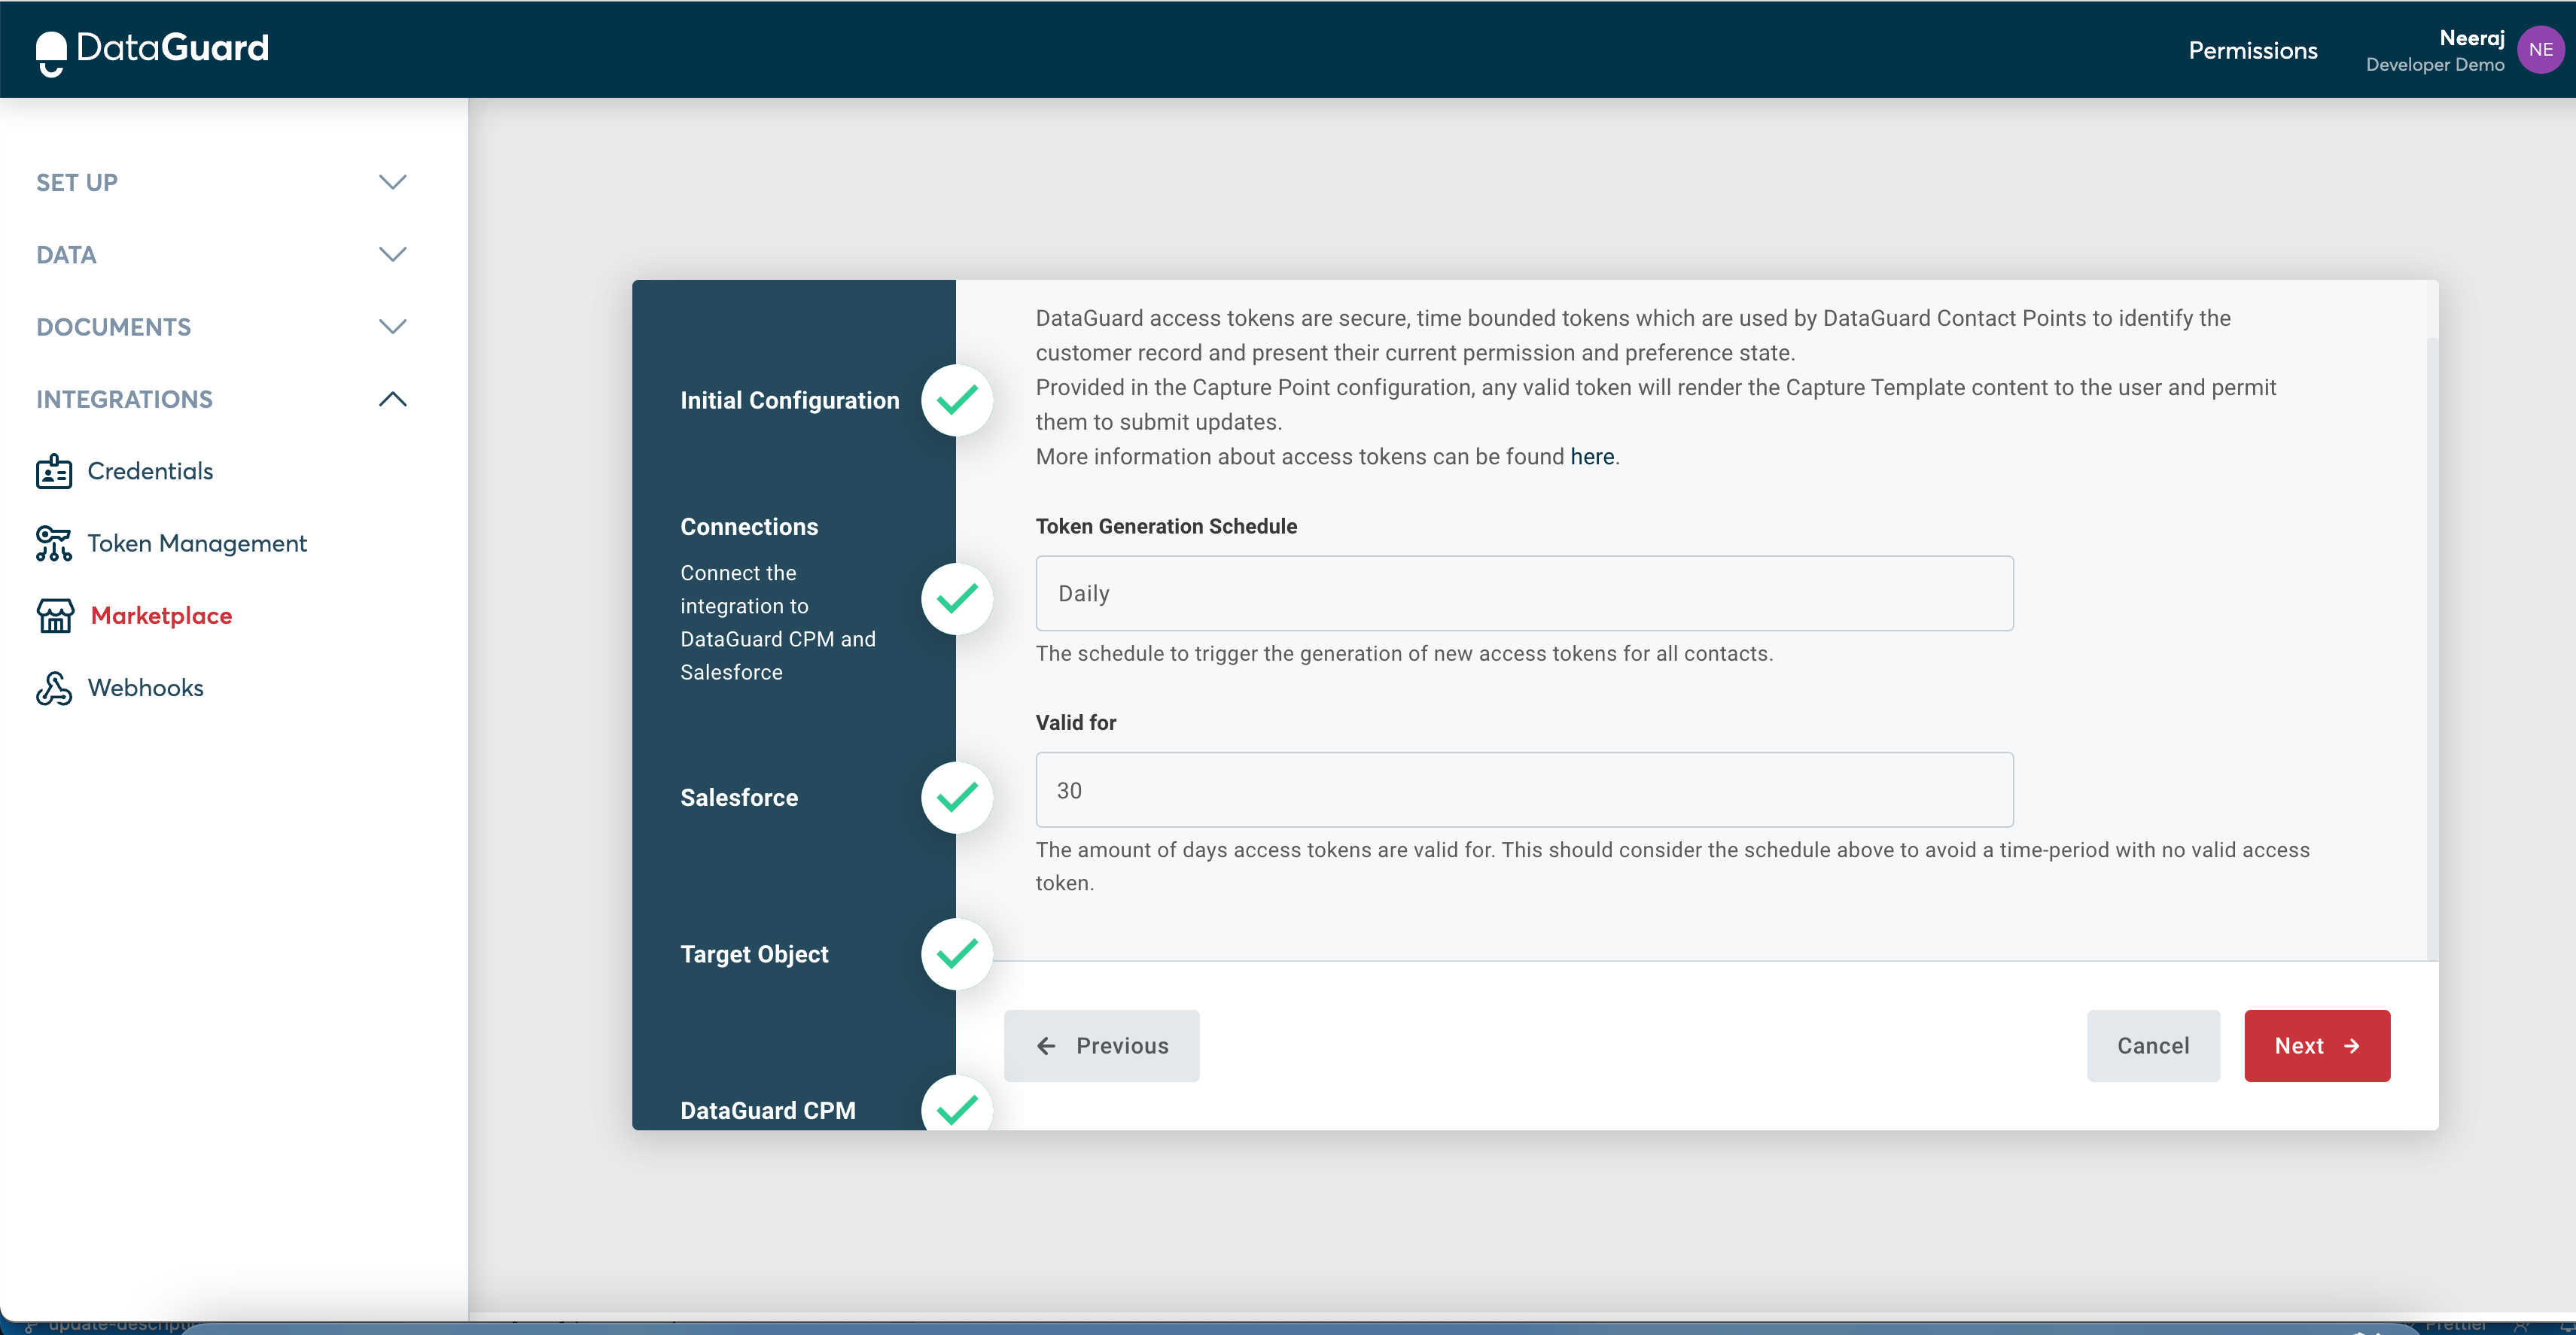
Step 5: Access Tokens
- Set up a schedule for generating access tokens used by DataGuard Capture Points.
- Click Next to proceed.
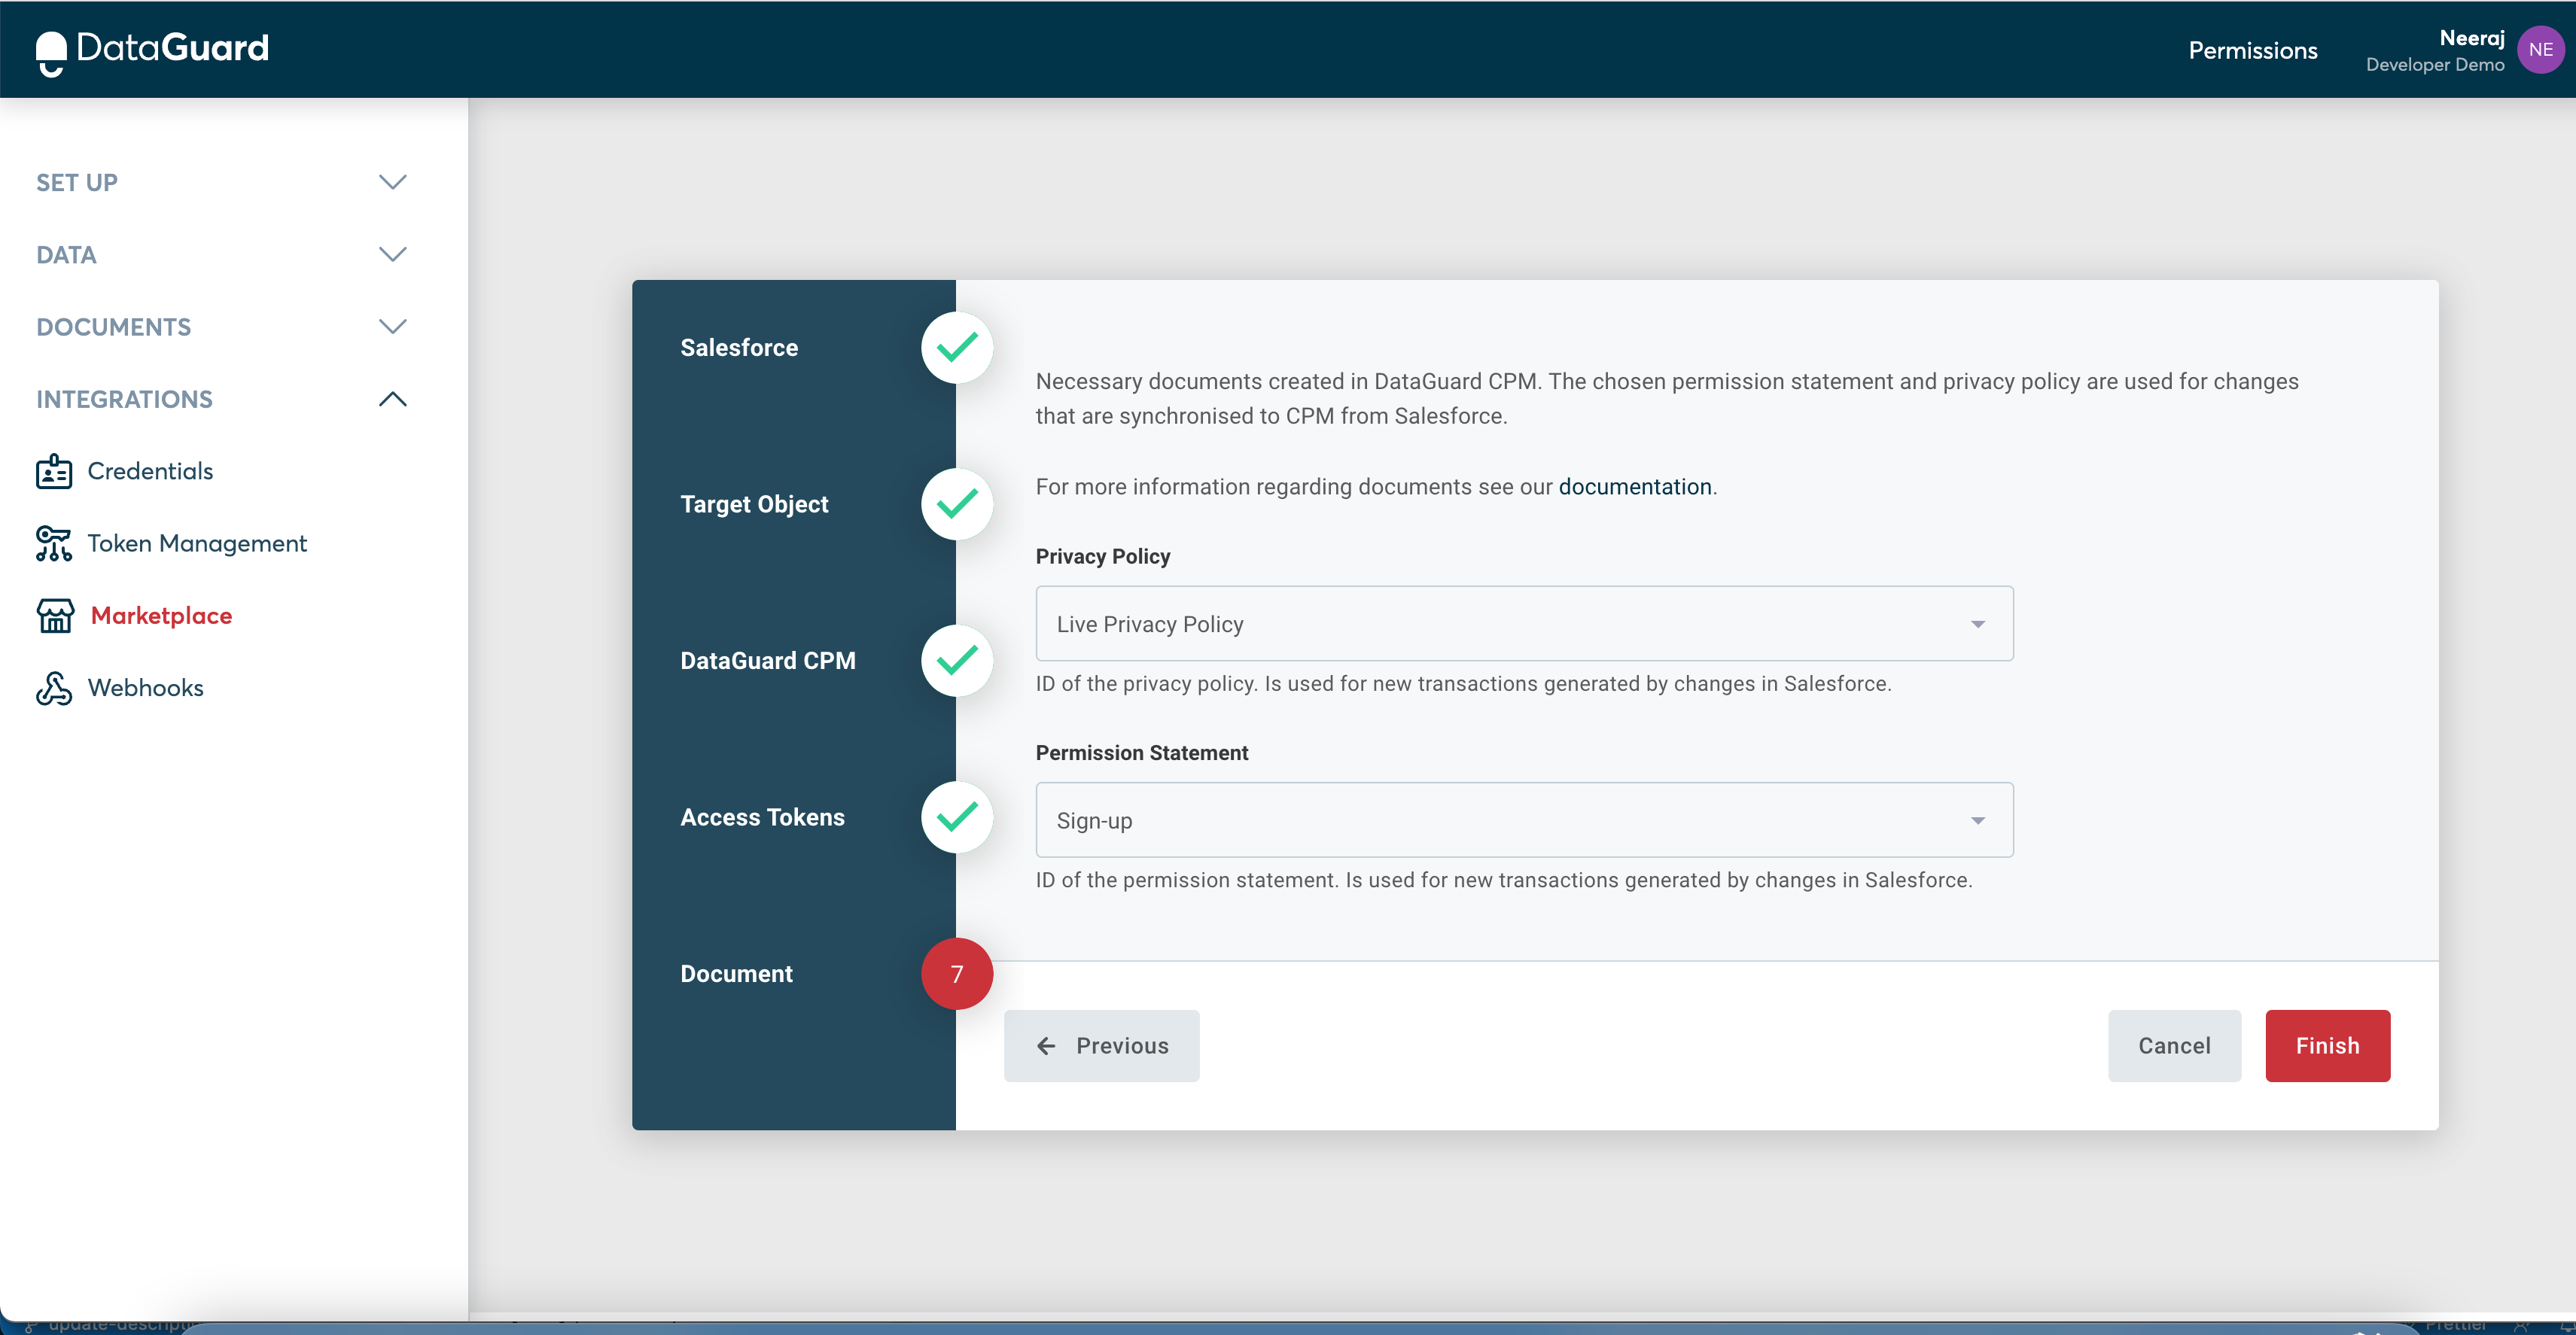
Step 6: Document Selection
- Choose the Privacy Policy and Permission Statement to be used for capturing new consents. Each Salesforce connector configuration requires a privacy policy and permission statement.
- Click Finish to complete the setup.
Post-Integration Steps in Salesforce
After configuring the integration, you may want to follow these steps to add interactive Consent and Preference fields to the Page Layout.
Add Custom CPM Fields to Page Layout
You might want to view the options being used to collect consent from citizens, in the page layout for the user in your Salesforce Object.
- After logging in to your Salesforce account, go to the Setup. You should have administrative access.
- Then navigate to Object Manager -> Target Object Name (Contact, Lead, etc.) -> Page layouts. Then click on the target object's layout.
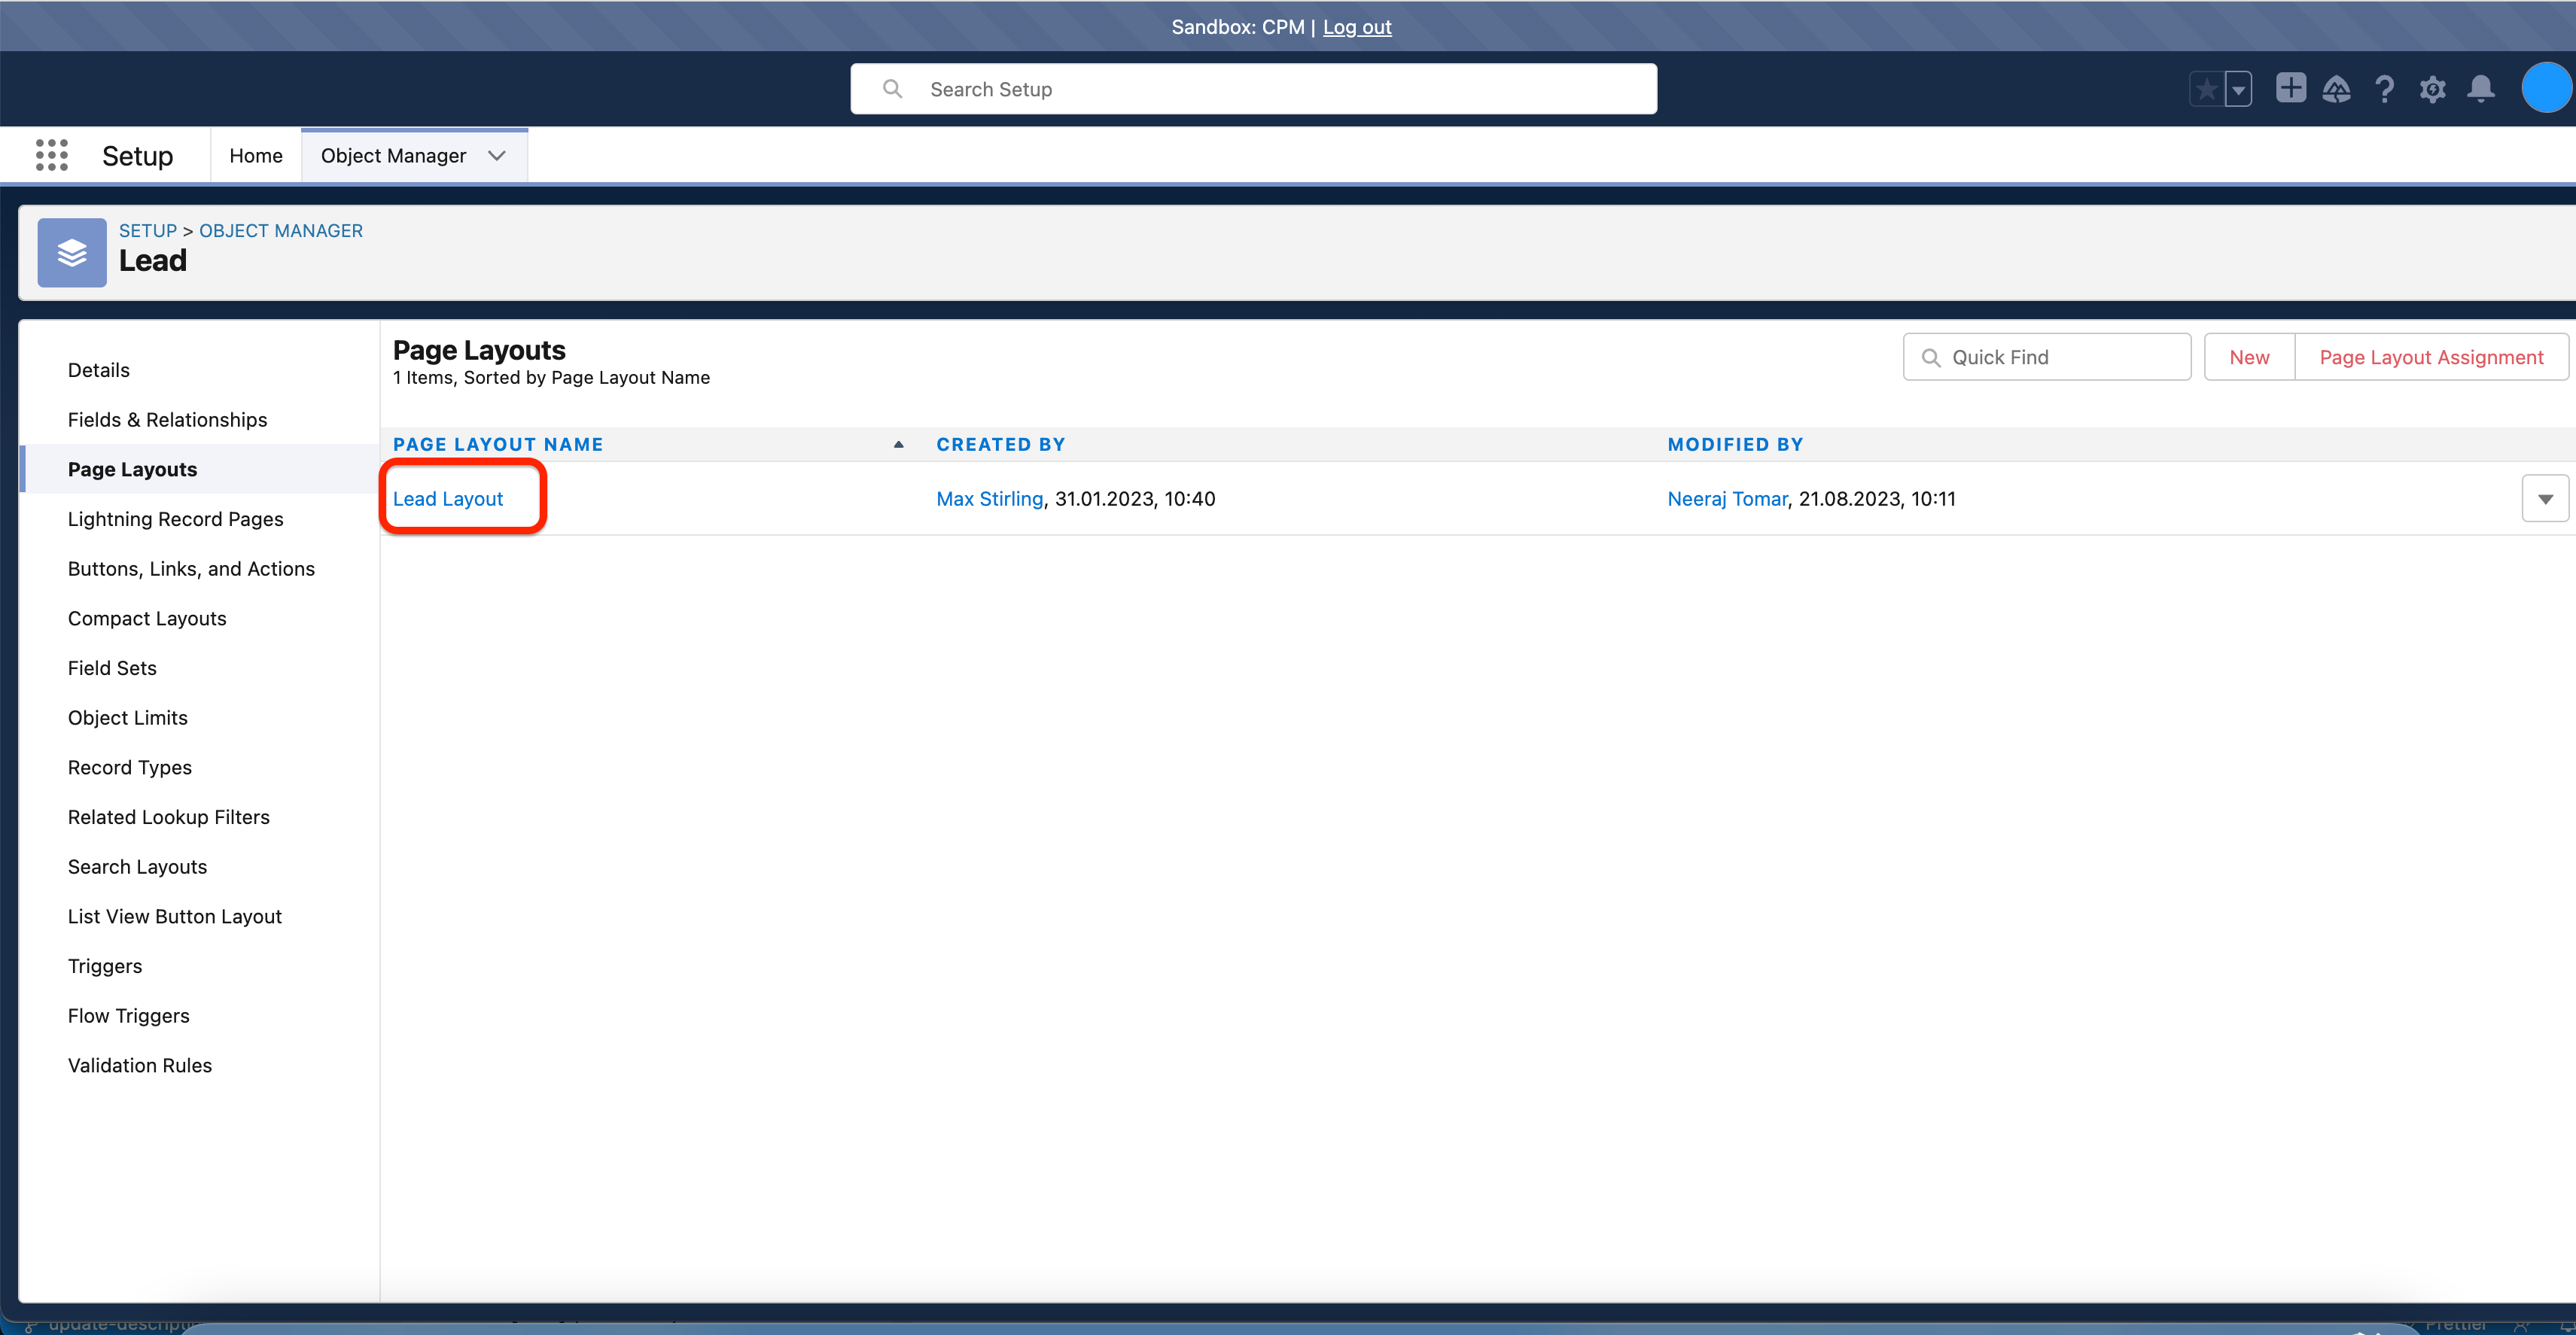
- Search for the fields that are being used to contain the consent data from Dataguard.
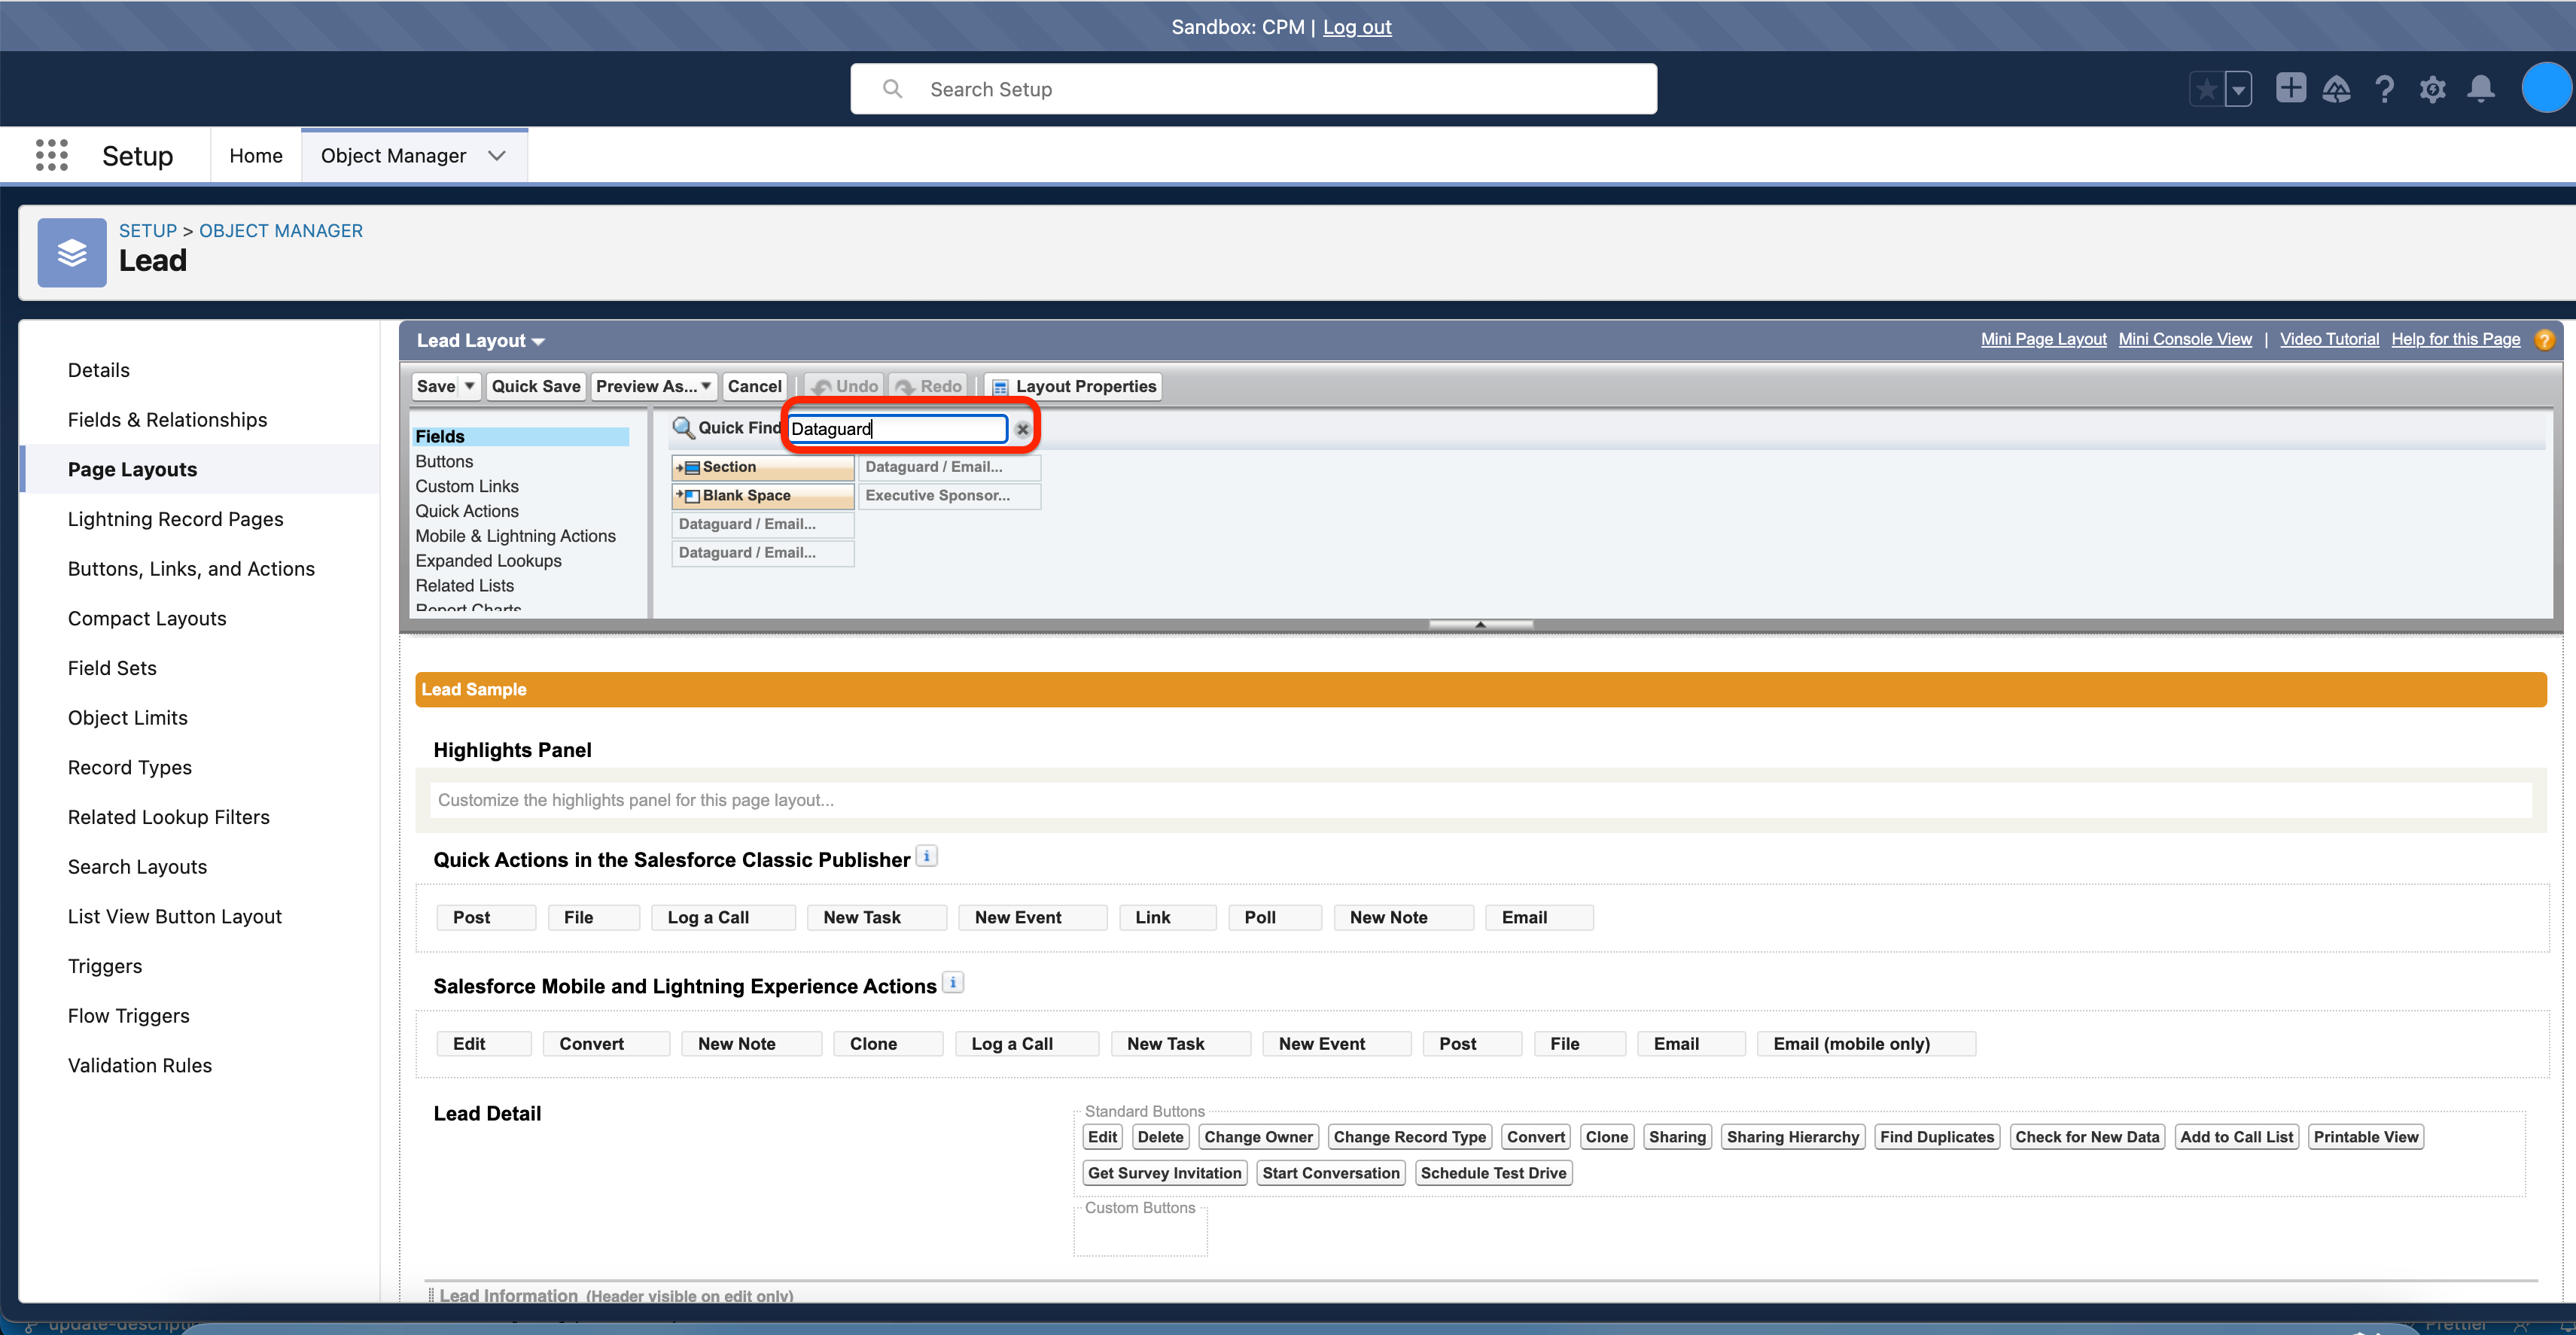
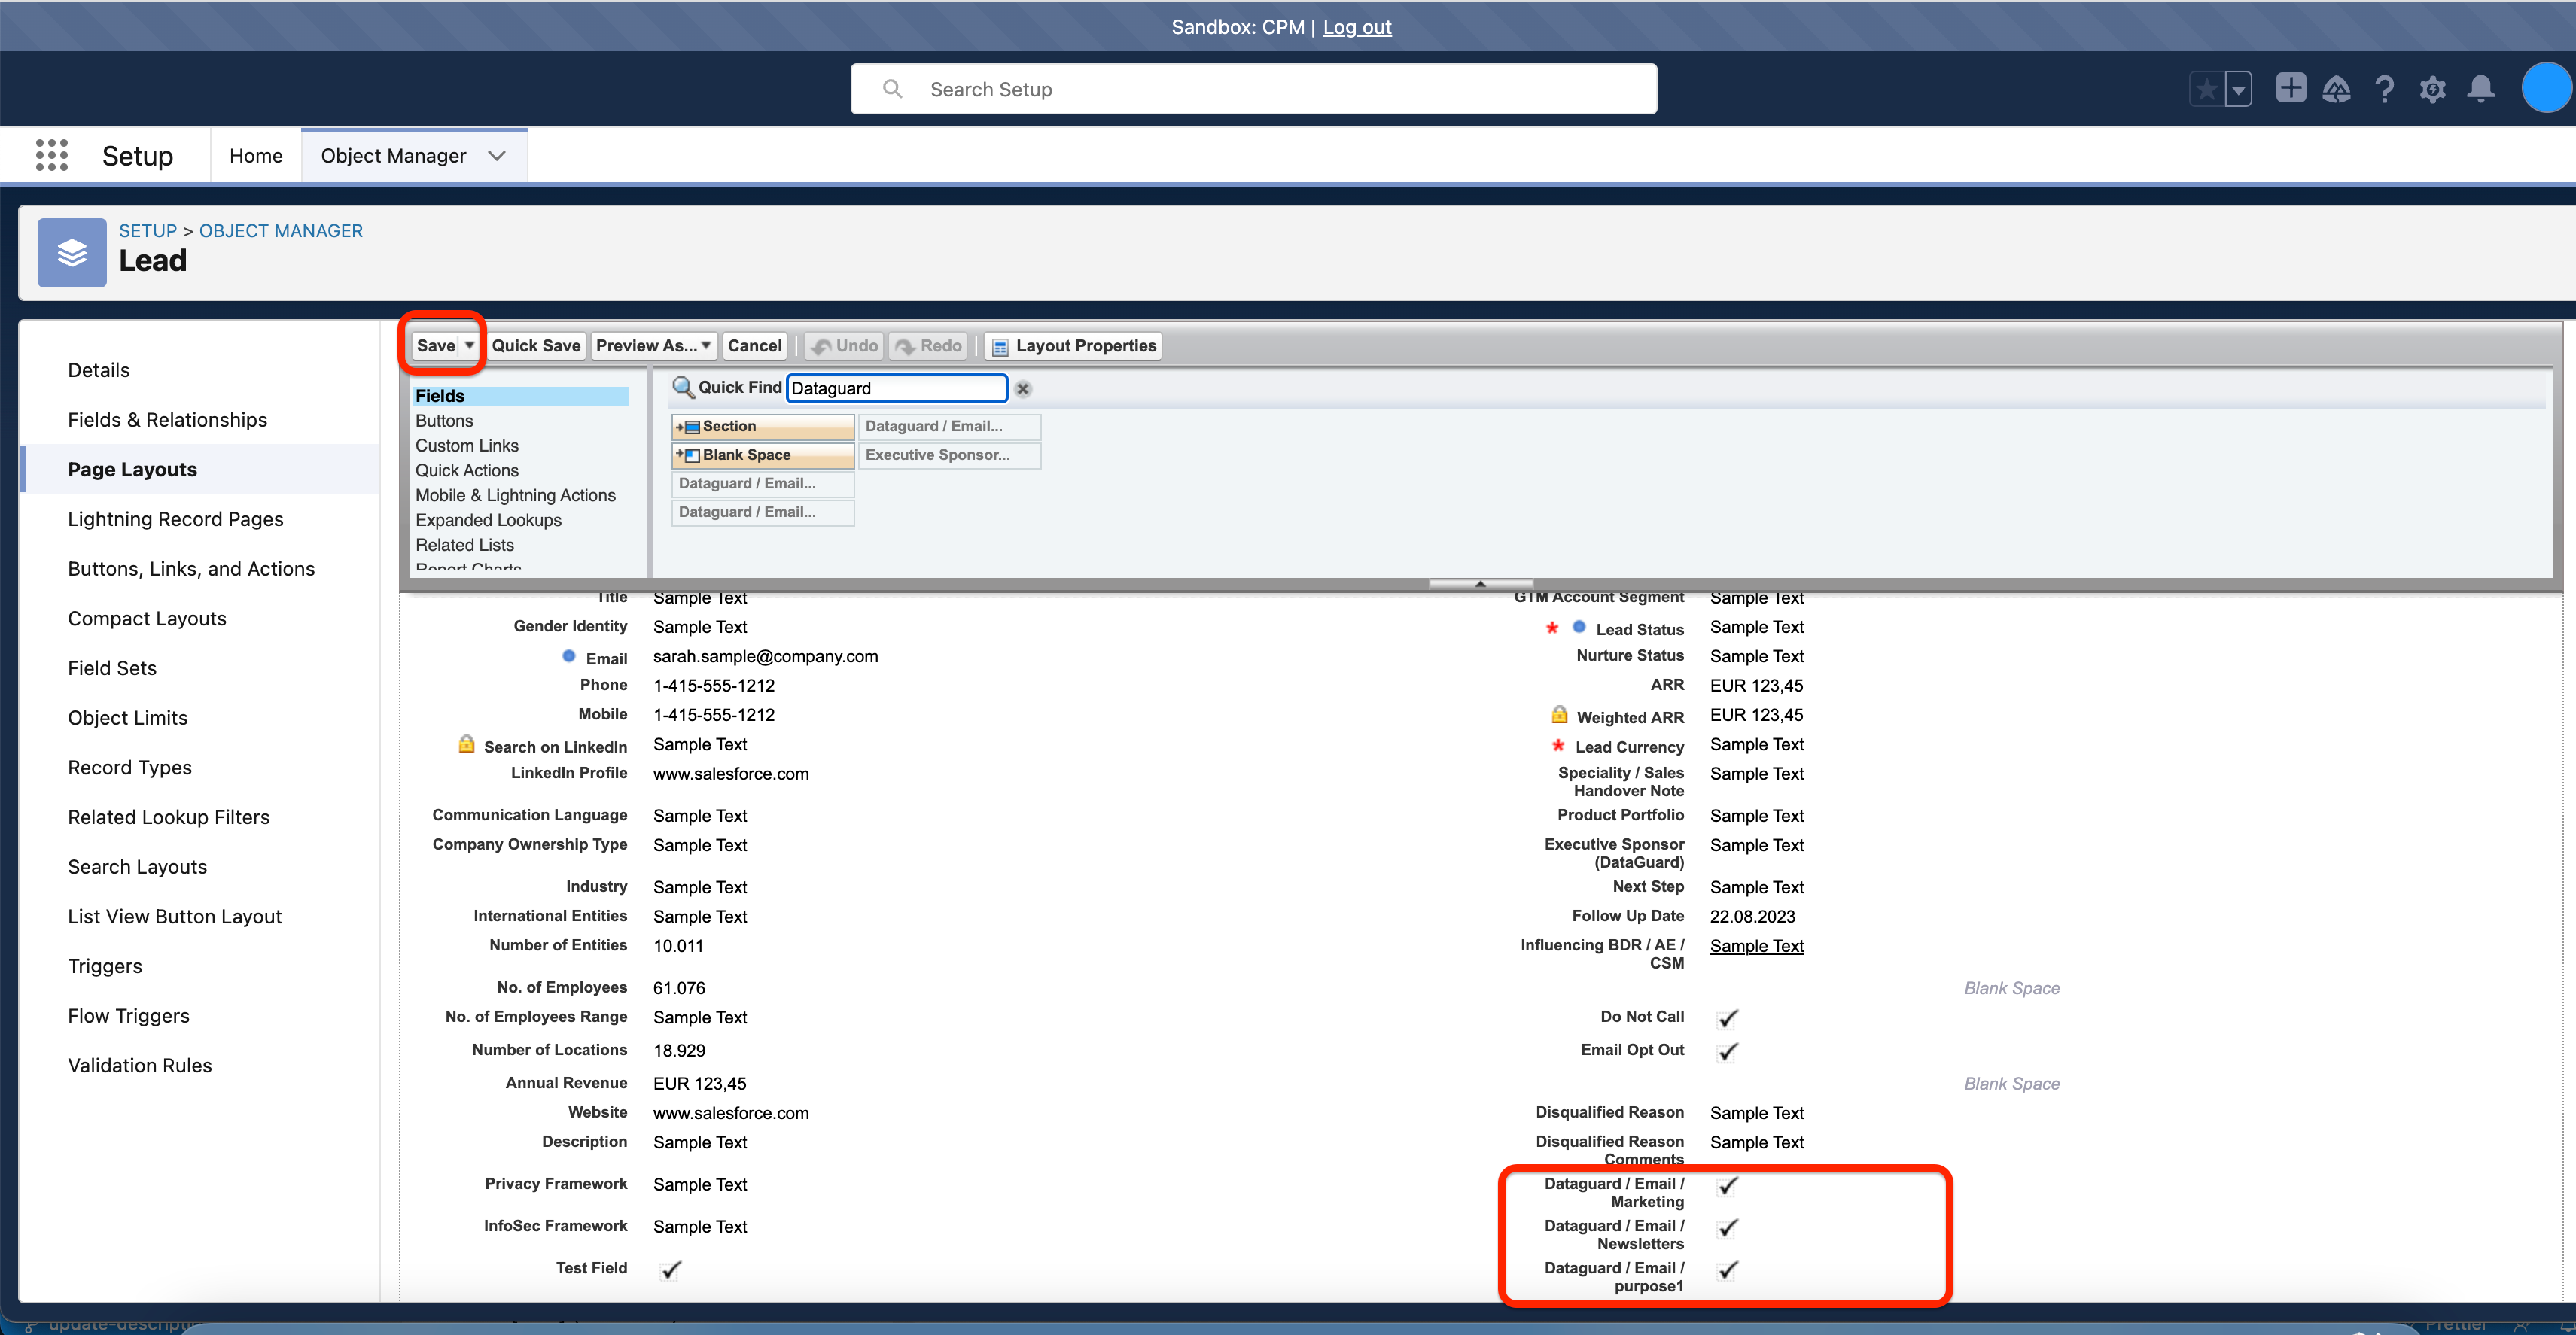
- Drag and drop the fields that you want to be shown on the object's view, to your preferred location on the page layout and click on Save.
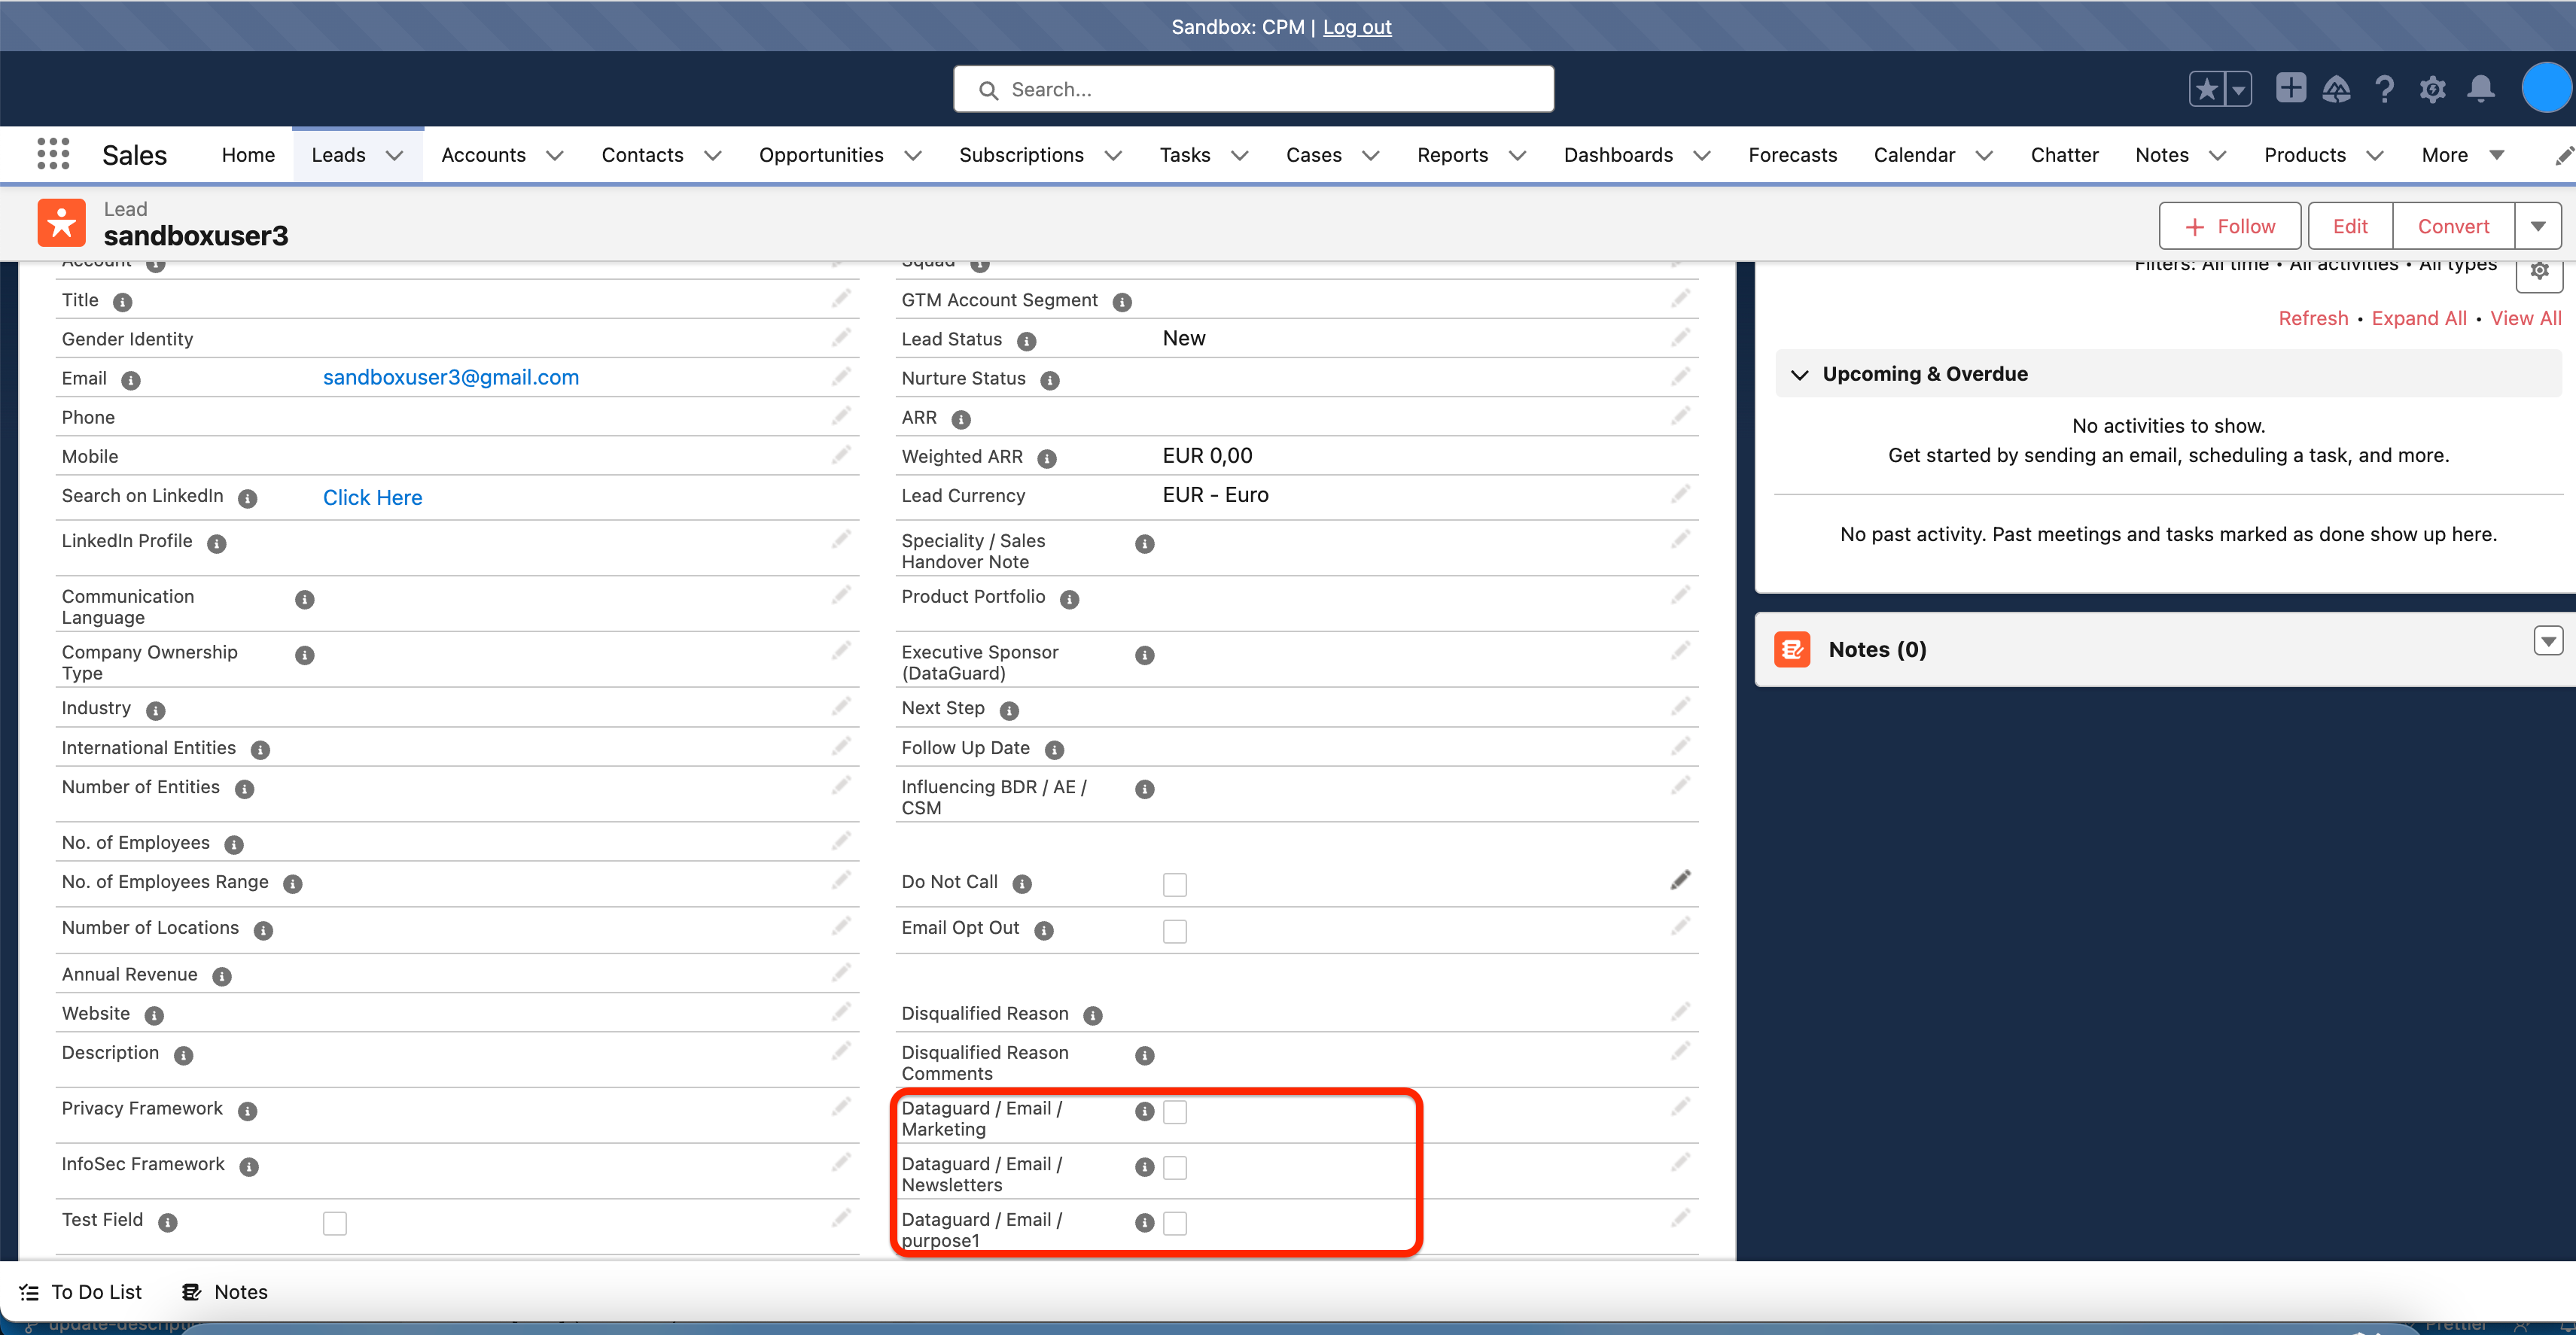
- The added fields will start appearing in your object view in your Salesforce target object (Contact/ Lead) after a minor wait time.
Add a Visual Force Page to Page Layout
The second option to view the options being used to collect consent from citizens, in the page layout for the user in your Salesforce Object can be done by adding visual page to the page layout.
- After logging in to your Salesforce account, go to the Setup. You should have administrative access.
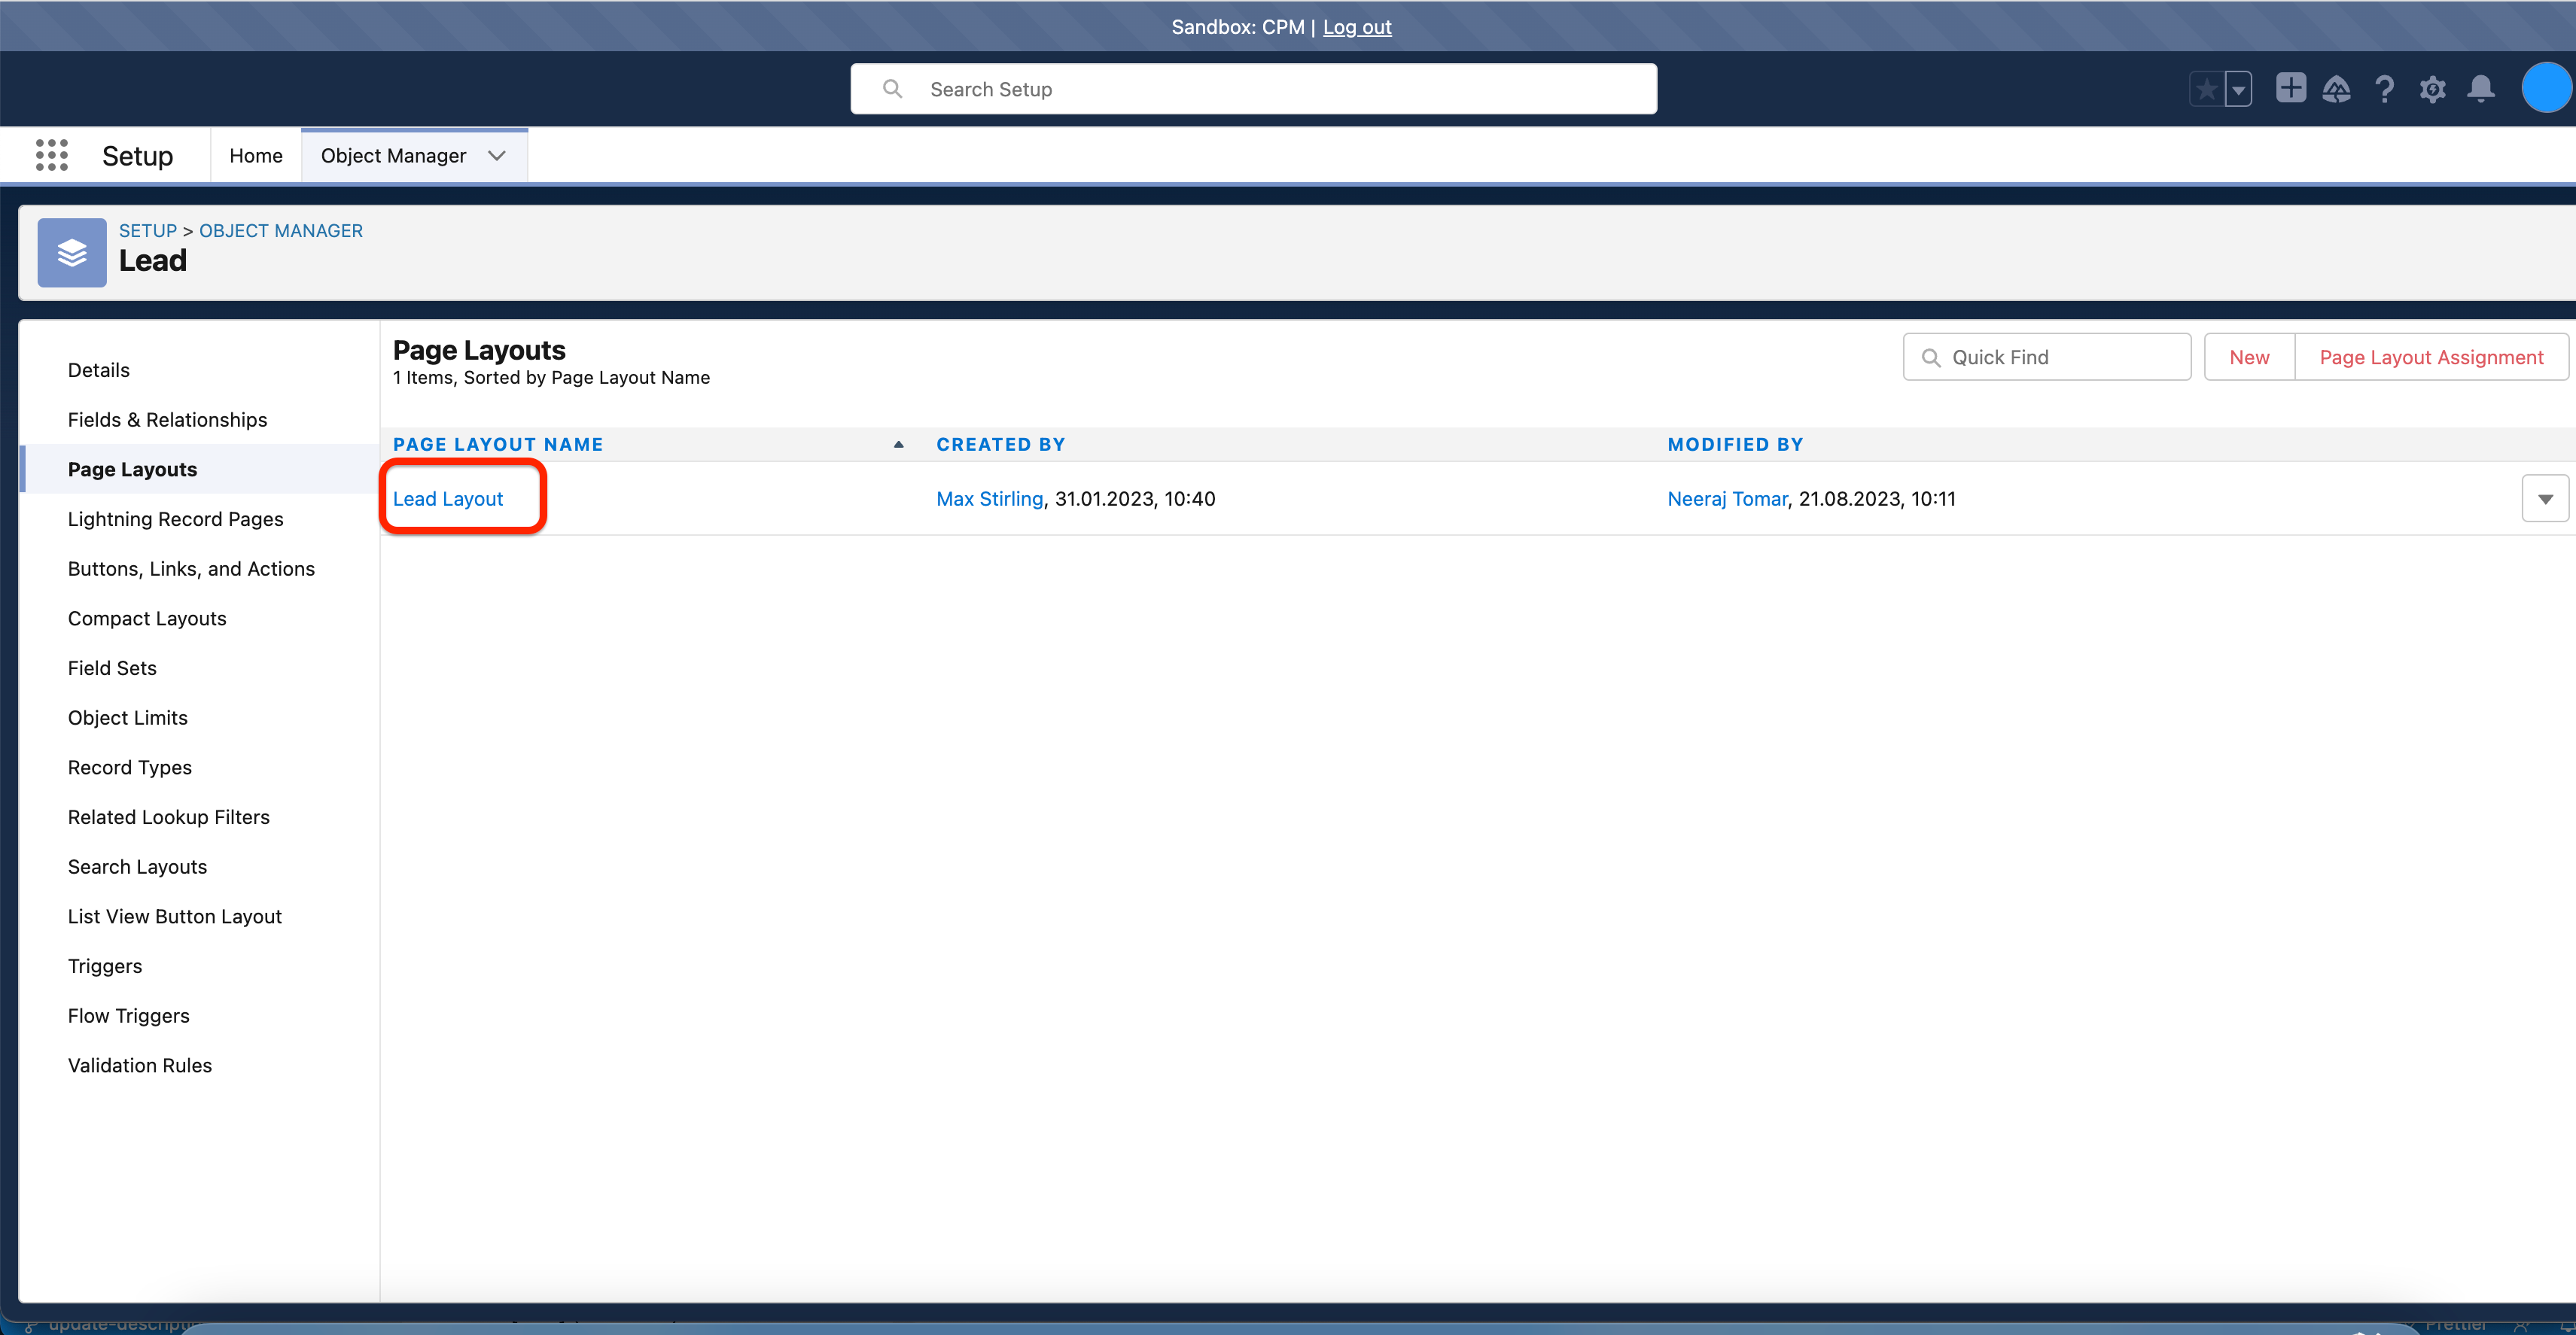
- Then navigate to Object Manager -> Target Object Name (Contact, Lead, etc.) -> Page layouts. Then click on the target object's layout.
- Select the Visualforce Pages section.
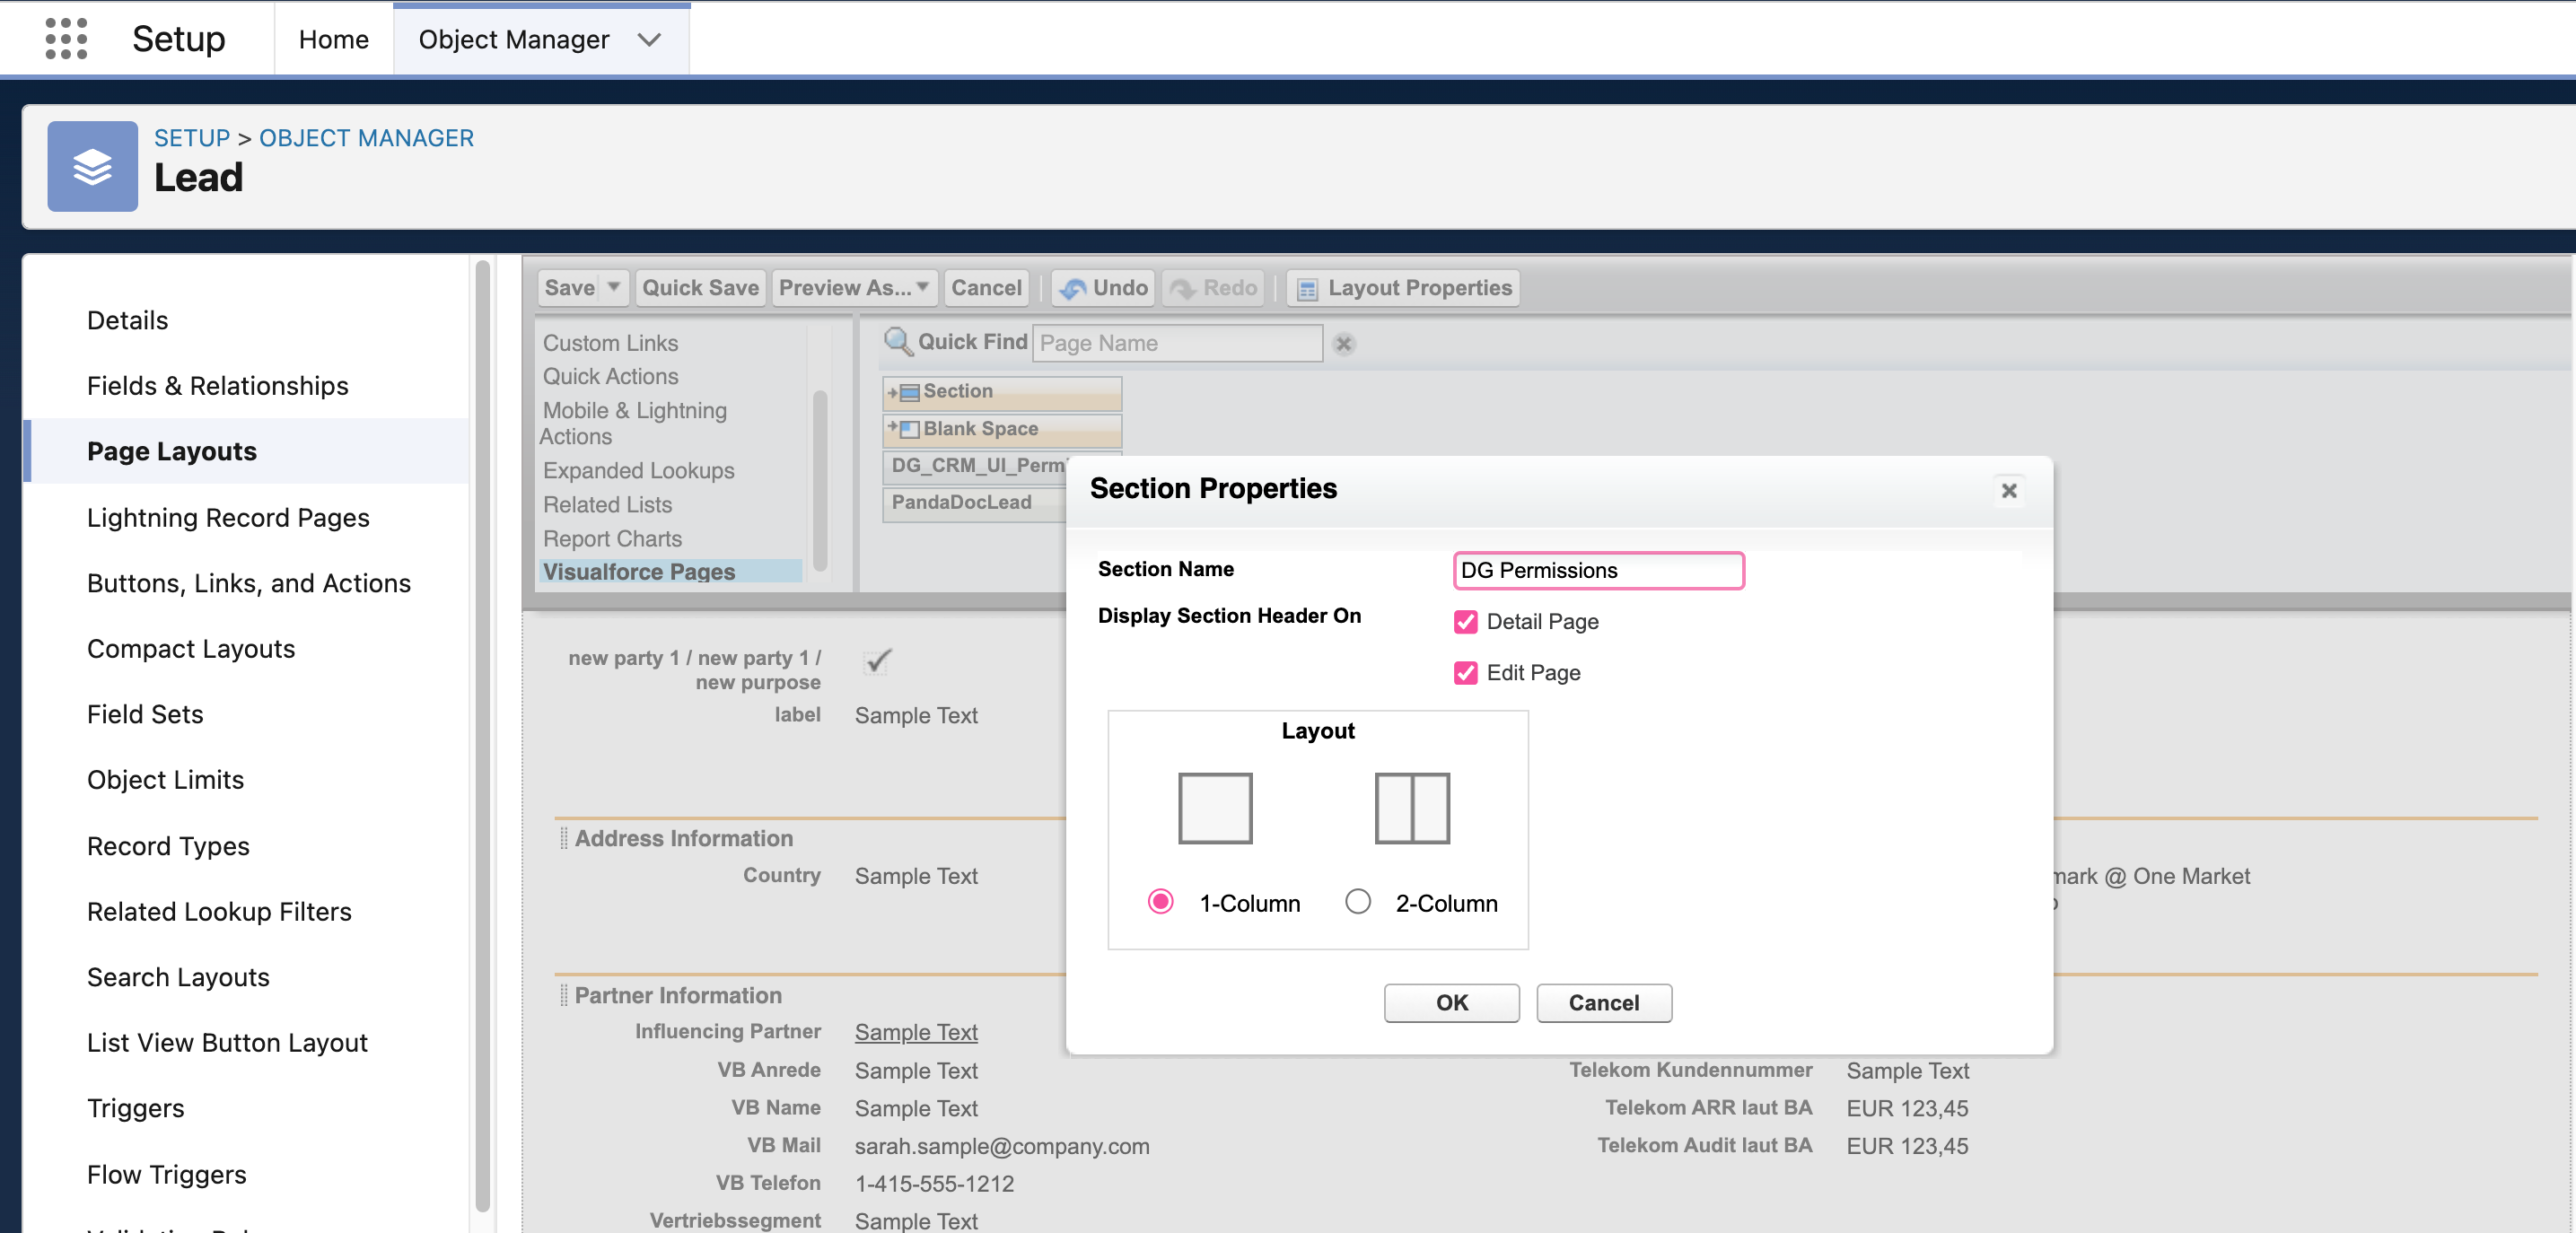
- Drag and drop a Section to your preferred location on the page layout. Give a name to the section and select 1-Column.
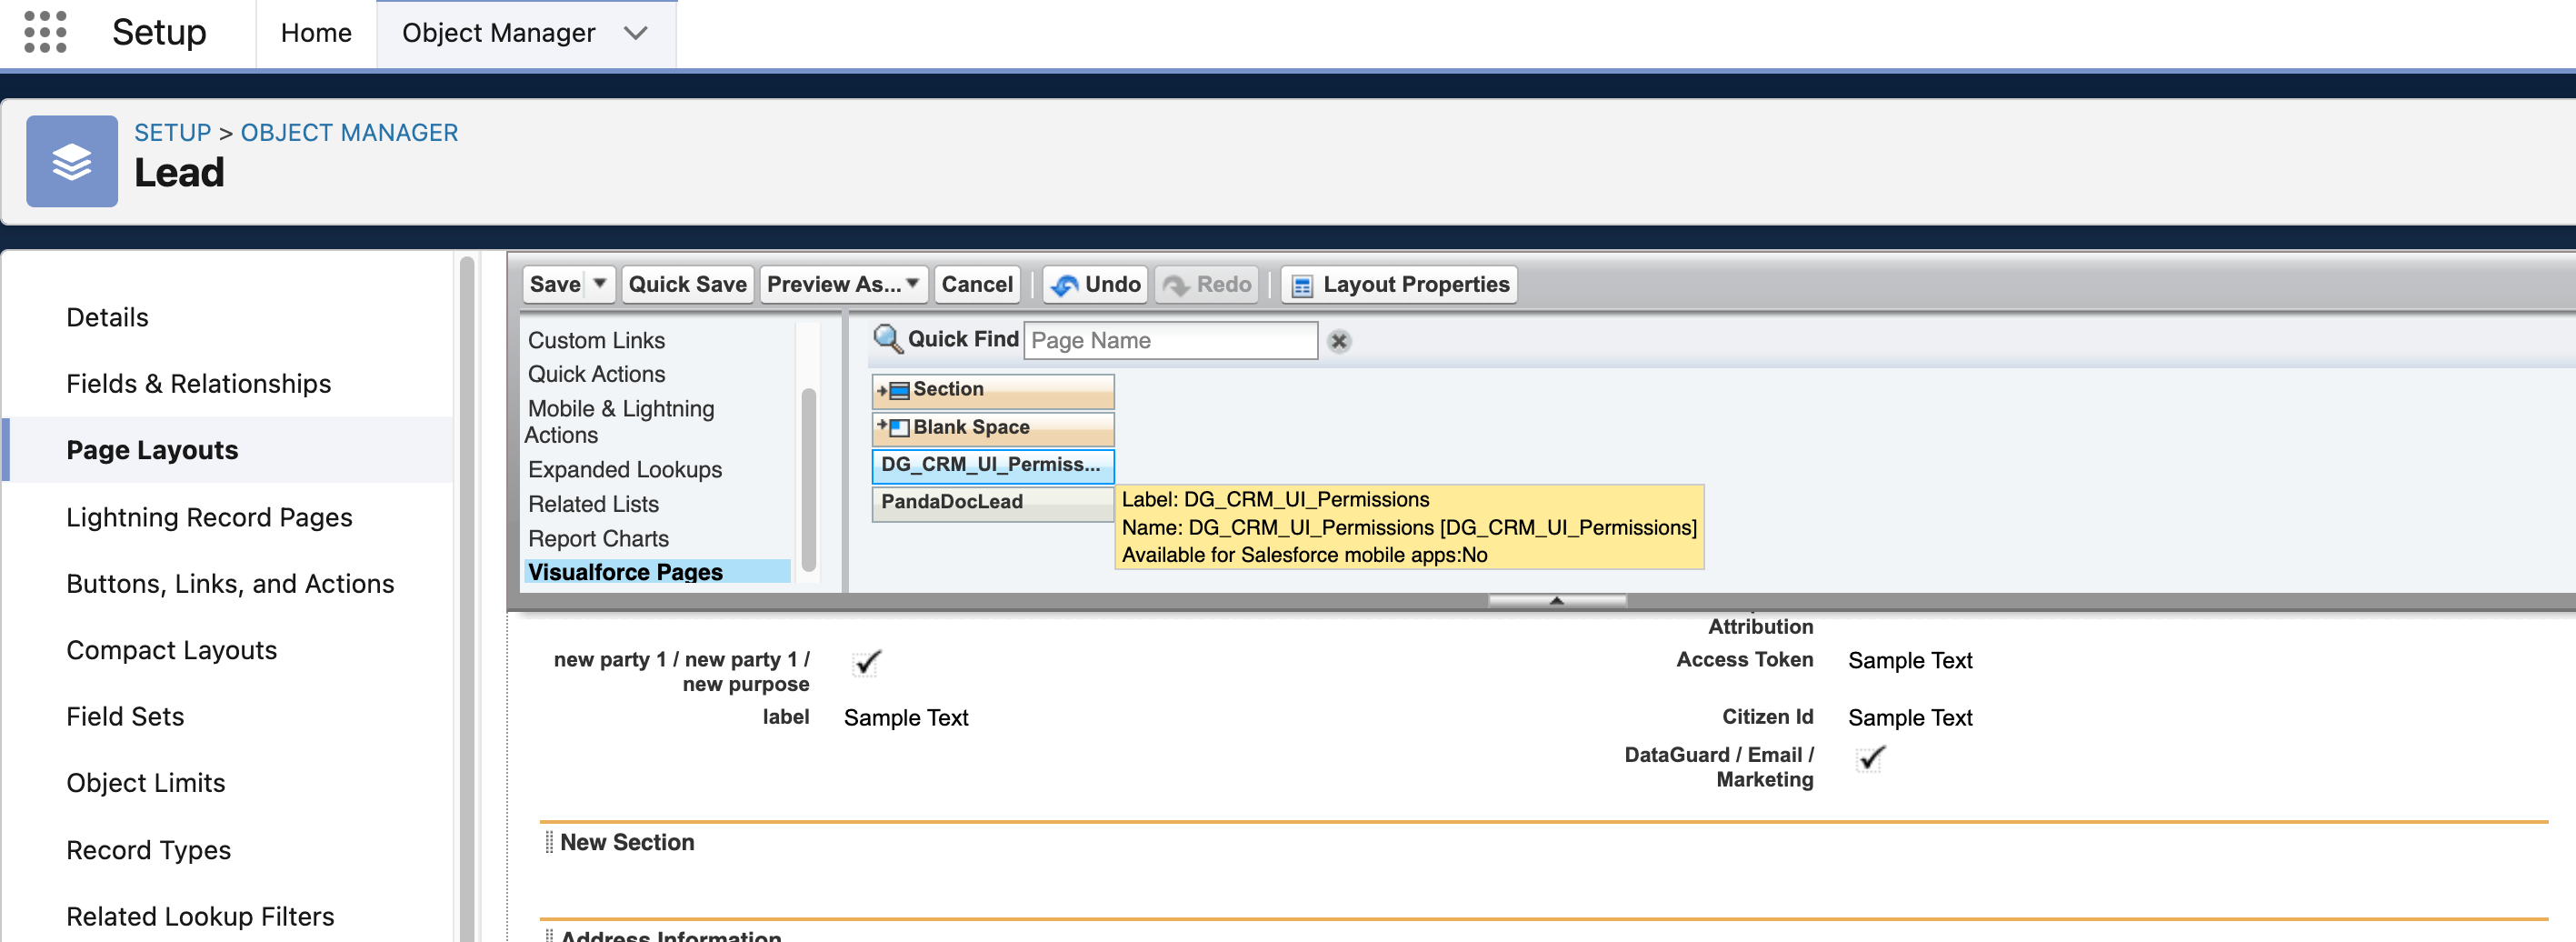
- Drag and drop DG_Permissions_UI visual force page into the newly created section.
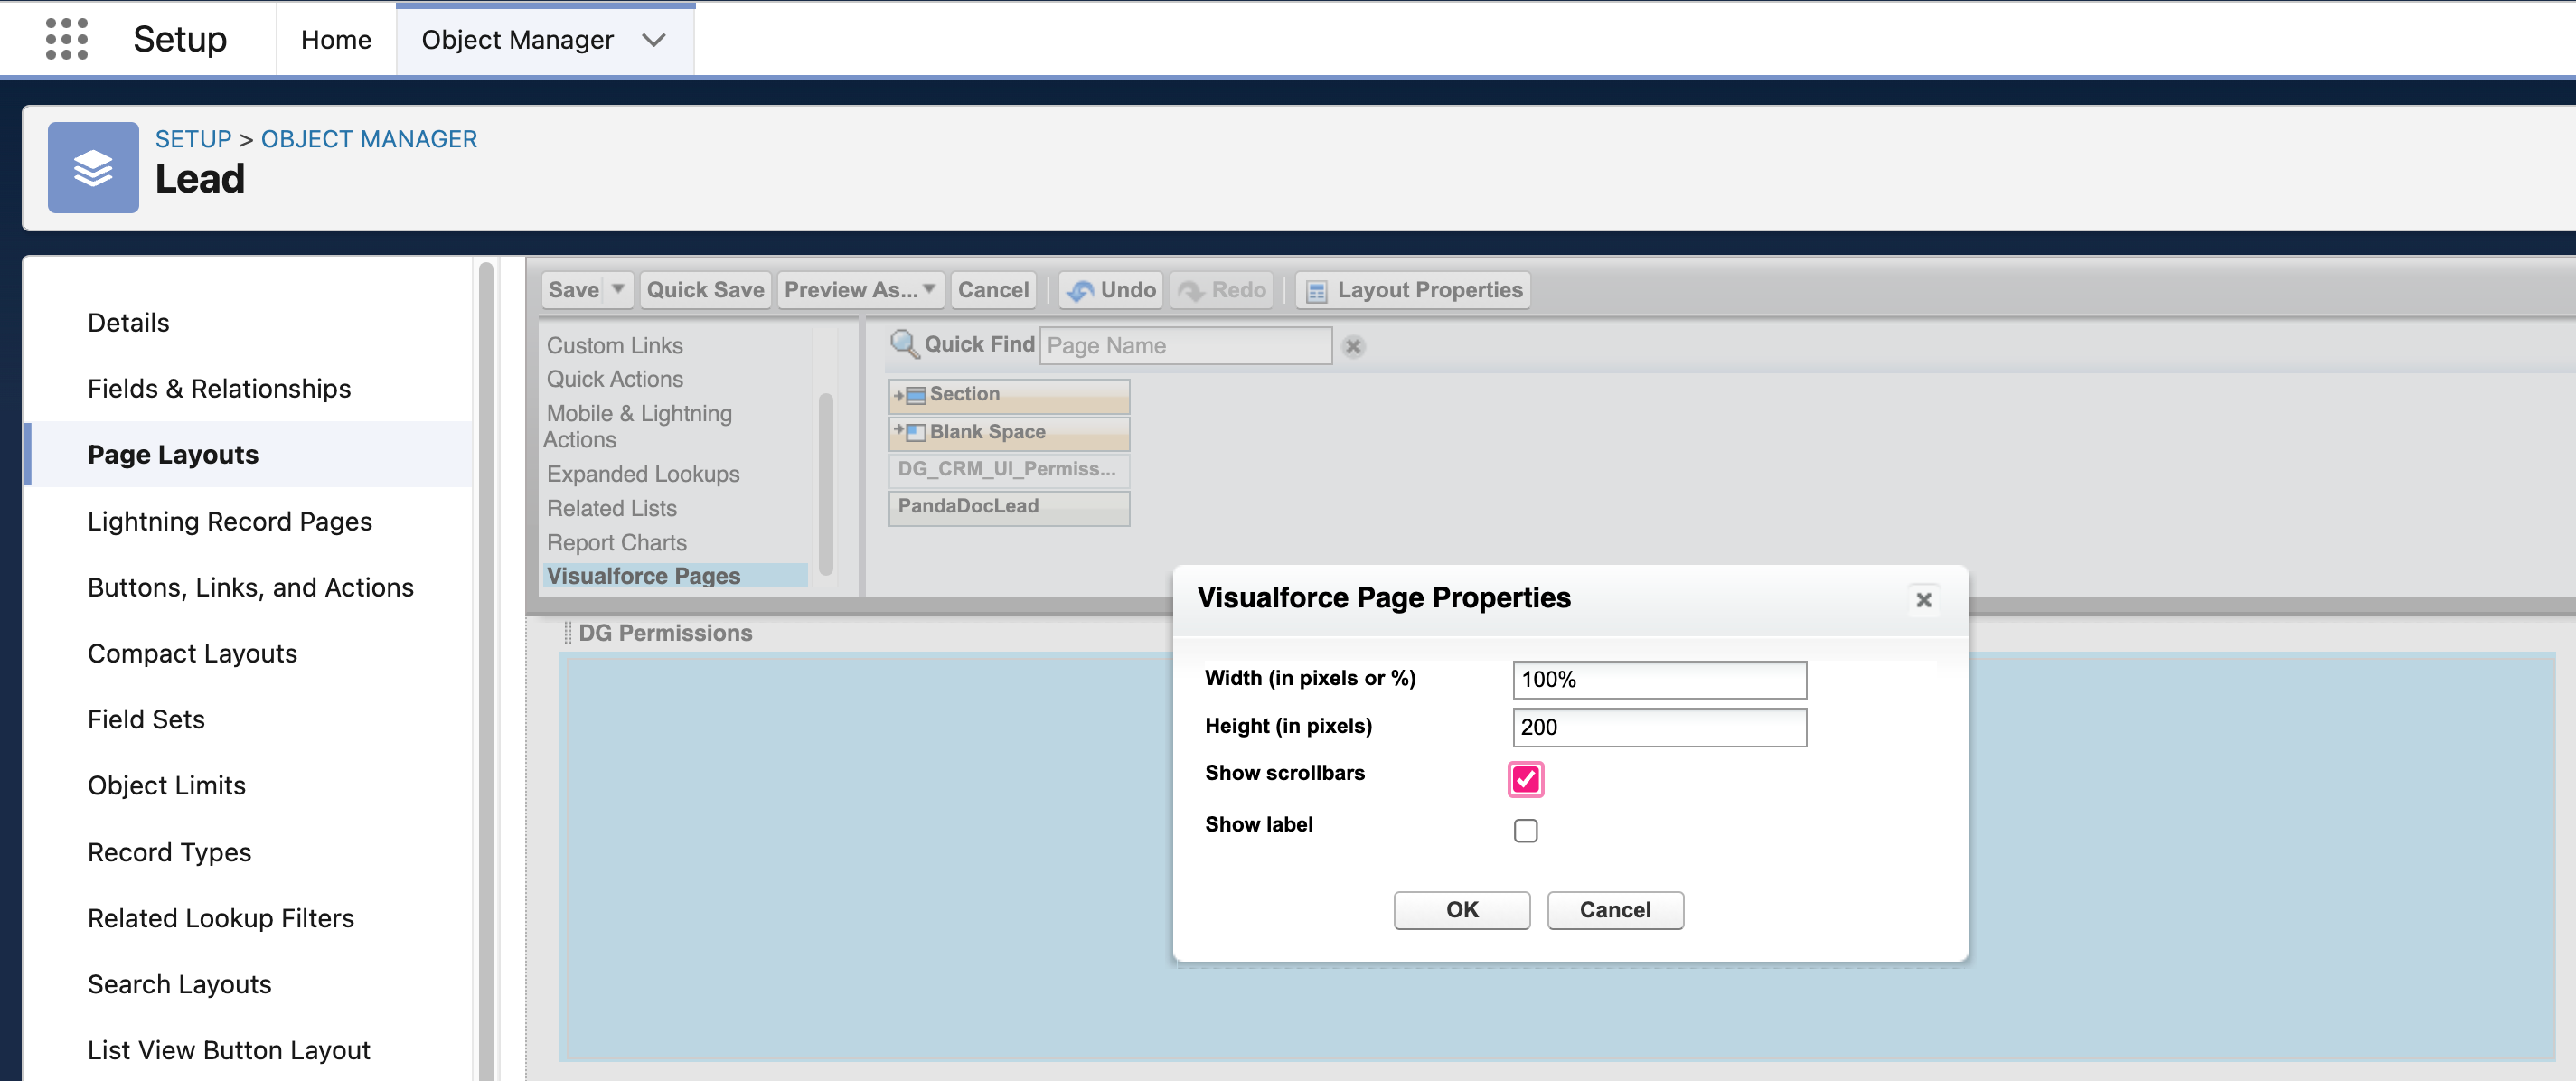
- When configuring the page, specify height a height of at least 400 and checkShow scrollbars.
- Click on Save.
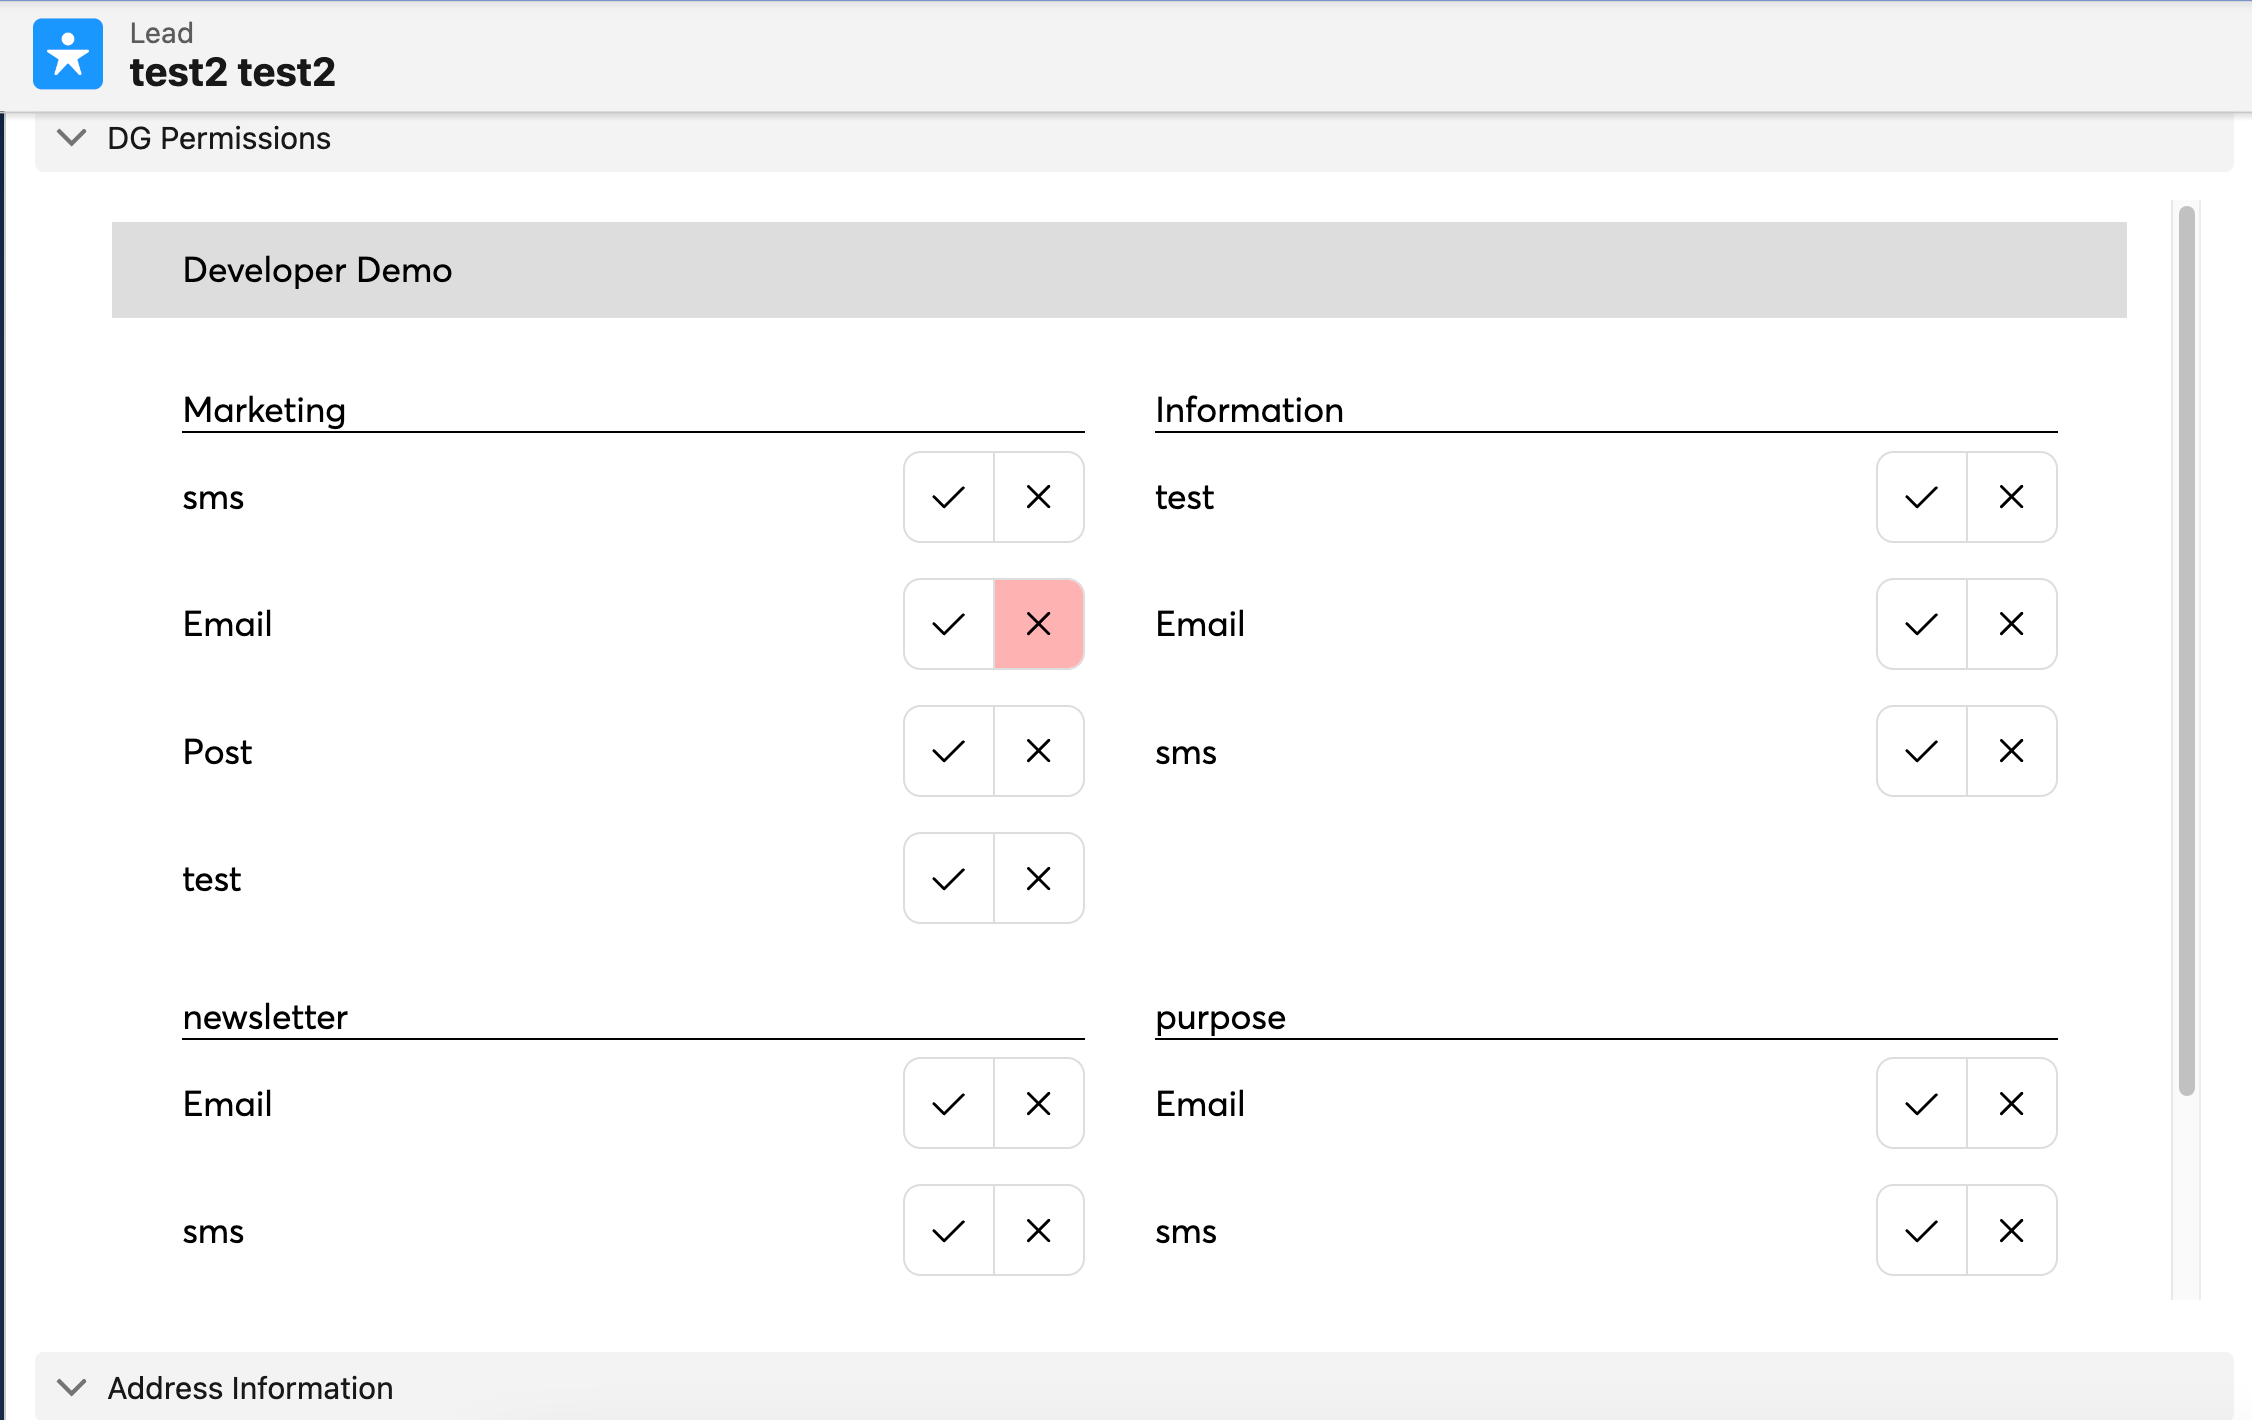
- The added visual force page will start appearing in your object view in your Salesforce target object (Contact/Lead) after a small wait time.
Conclusion
Your Salesforce integration with DataGuard CPM is now complete. Your data will be automatically synced, ensuring that your Salesforce CRM and DataGuard CPM stay aligned with the latest consent and preference information!
Updated about 1 year ago
