Salesforce Marketing Cloud
Salesforce Marketing Cloud is a powerful digital marketing platform designed to help businesses create personalized and automated marketing campaigns across various channels, including email, social media, mobile, and web. The integration between Salesforce Marketing Cloud and DataGuard CPM enables smooth synchronization of consent and preference data, ensuring that your marketing efforts are aligned with the latest customer preferences and compliance requirements. This ensures your marketing messages are always targeted and compliant, enhancing customer engagement and trust.
Prerequisites
Before you begin, ensure you have the following:
- Access to the DataGuard CPM Platform.
- Administrative access to a Salesforce Marketing account to set up the integration.
If you don't have access to the DataGuard CPM Platform, please contact us.
Salesforce Marketing Cloud Setup
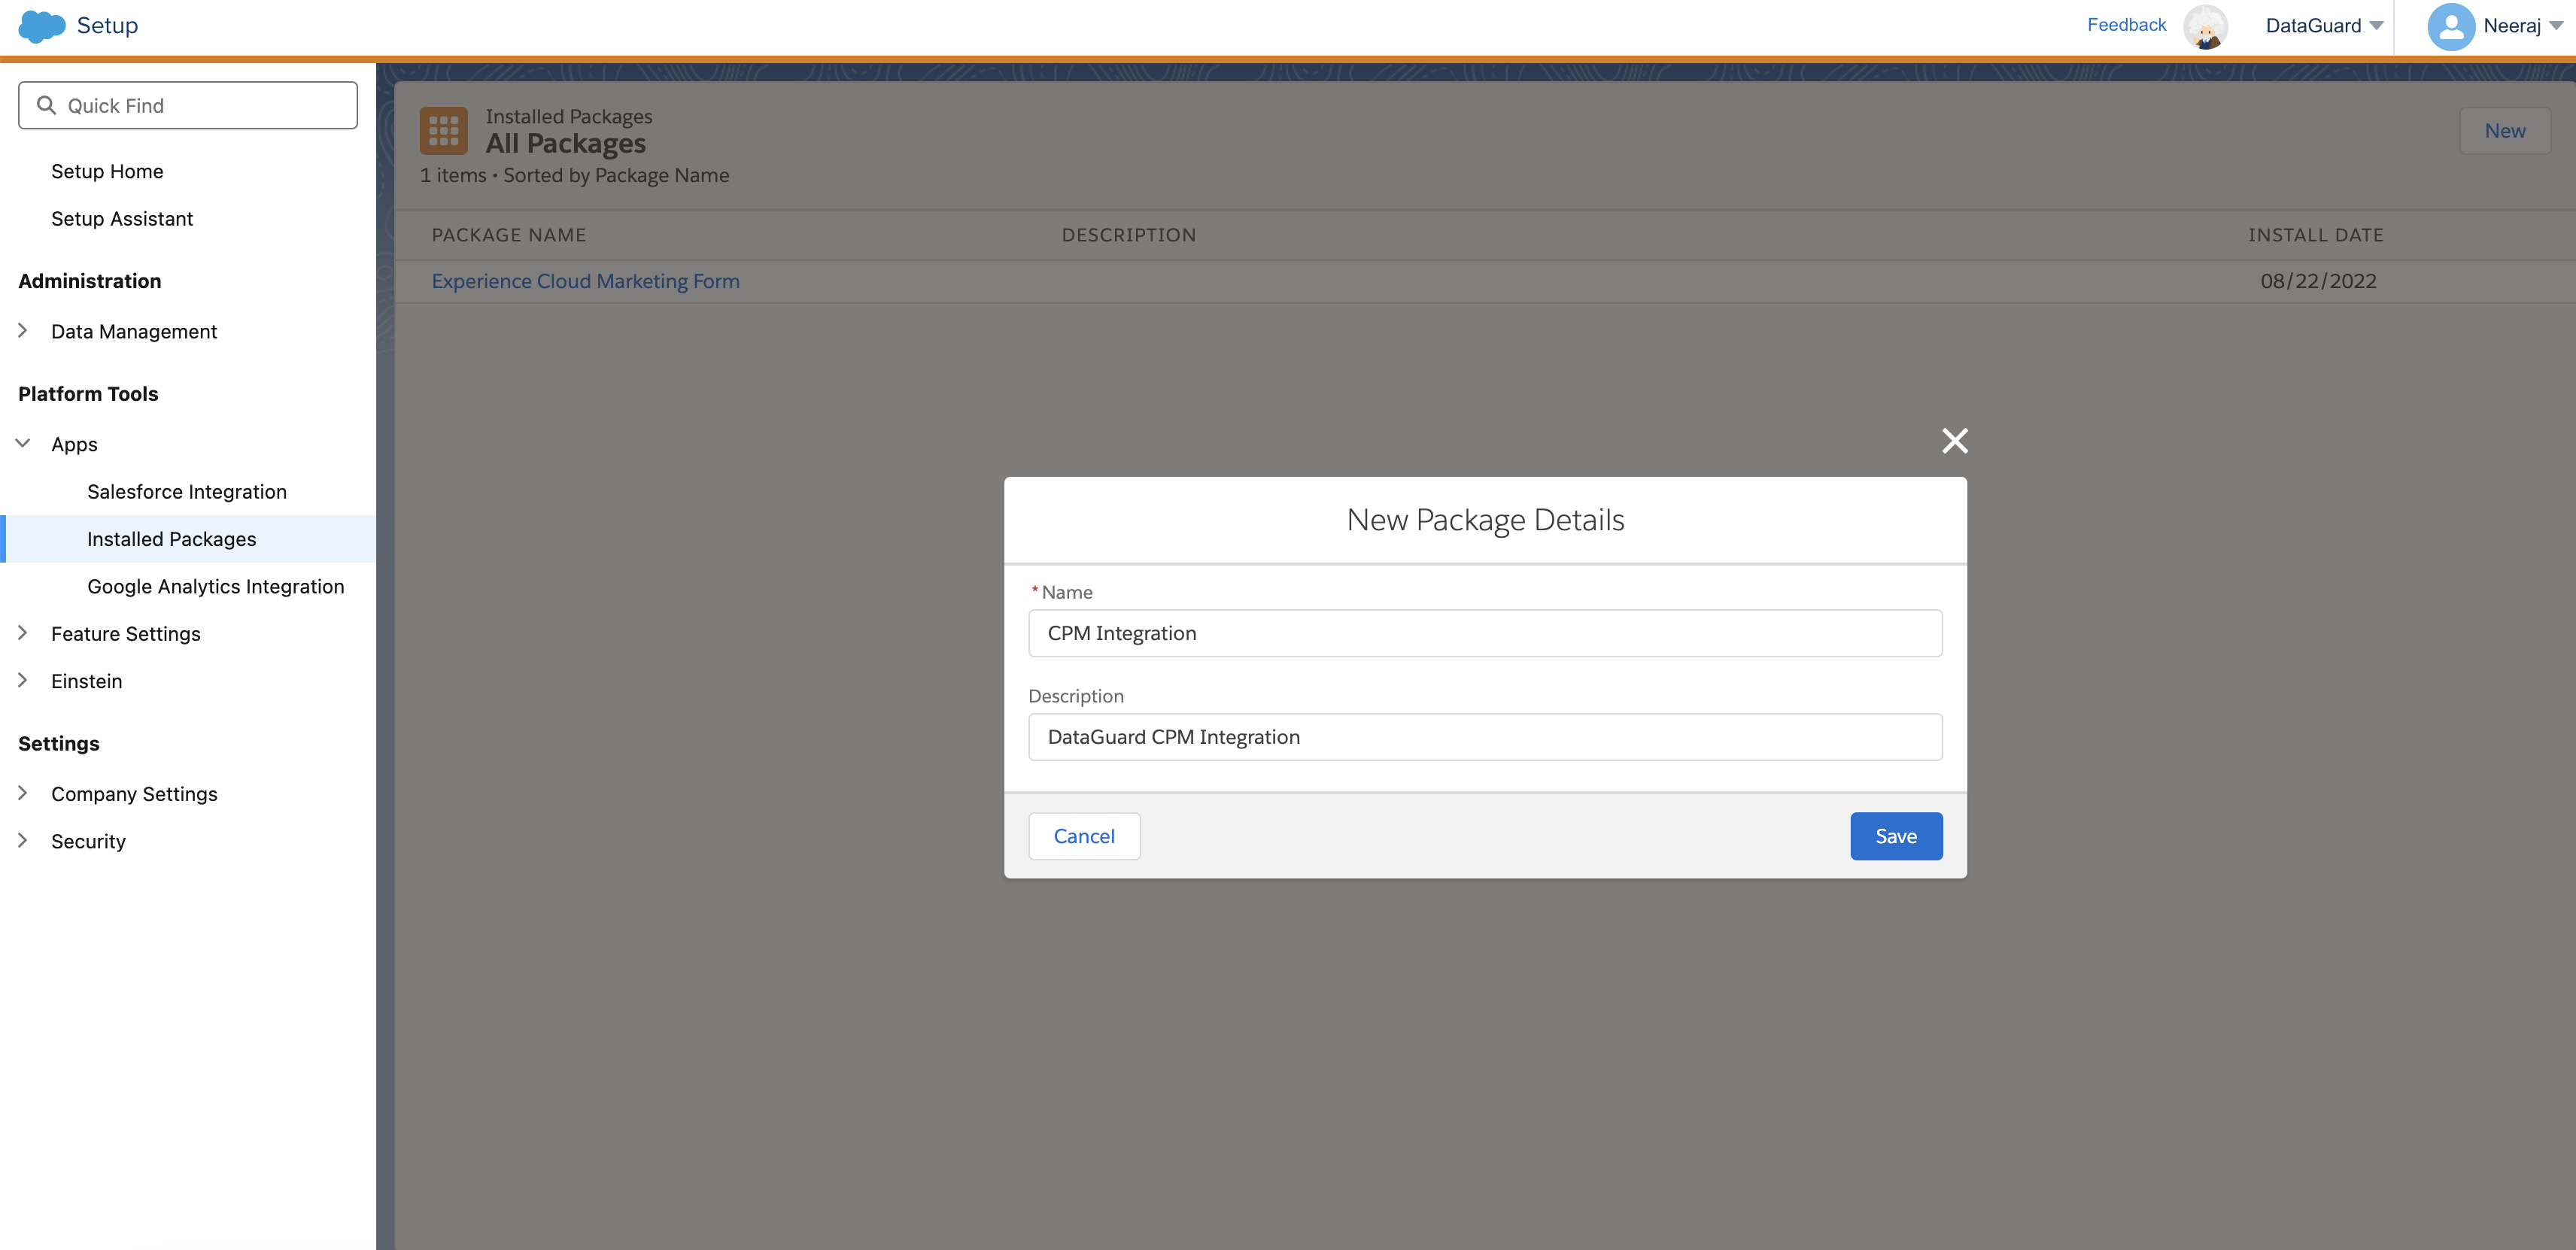
Step 1: Create a Salesforce Marketing Installed package
-
Log in to Salesforce marketing cloud.
-
Navigate to the Salesforce Marketing setup page.
-
Go to Platform Tools > Apps > Installed Packages.
-
Click on New.
-
Please complete the required fields, such as "Installed Package Name" (e.g., "DG CPM Integration"), and "Description."
-
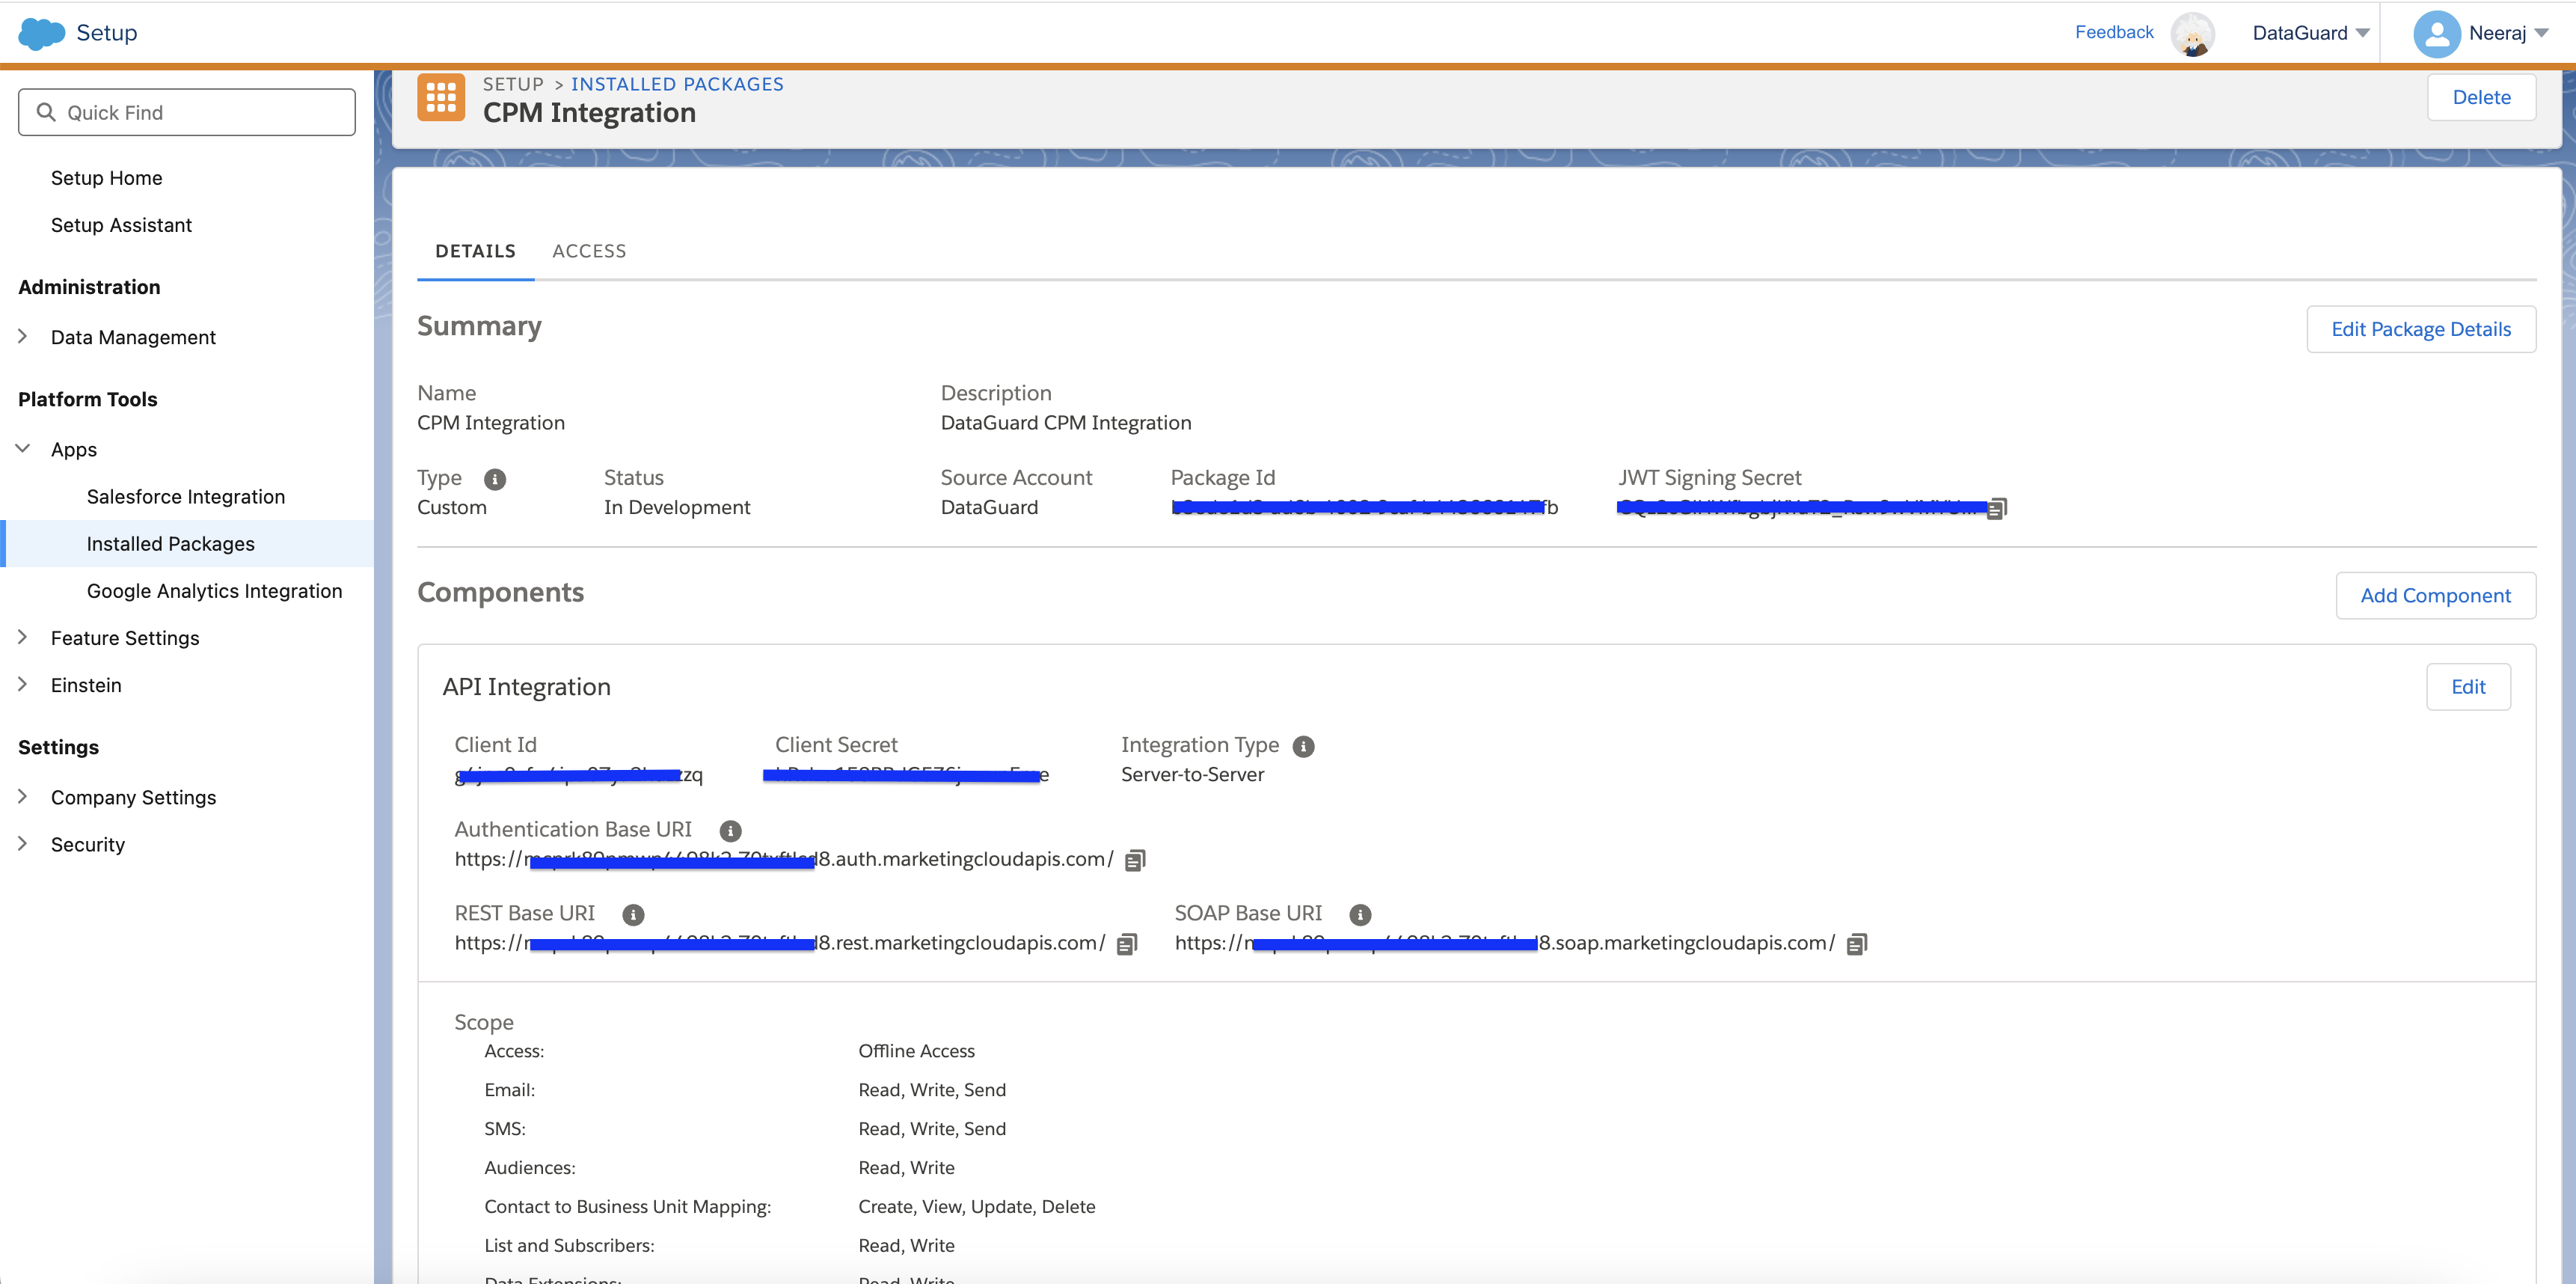
Save the package. After the package is saved, you can view the package details. See Installed Packages Definitions for more information about each field. You see the Package ID, JWT Signing Secret, and Source Account only for packages created in your account
-
Under Components, click Add Component, and select the component type “API Integration”. Please note, you can have only one api integration at a time.
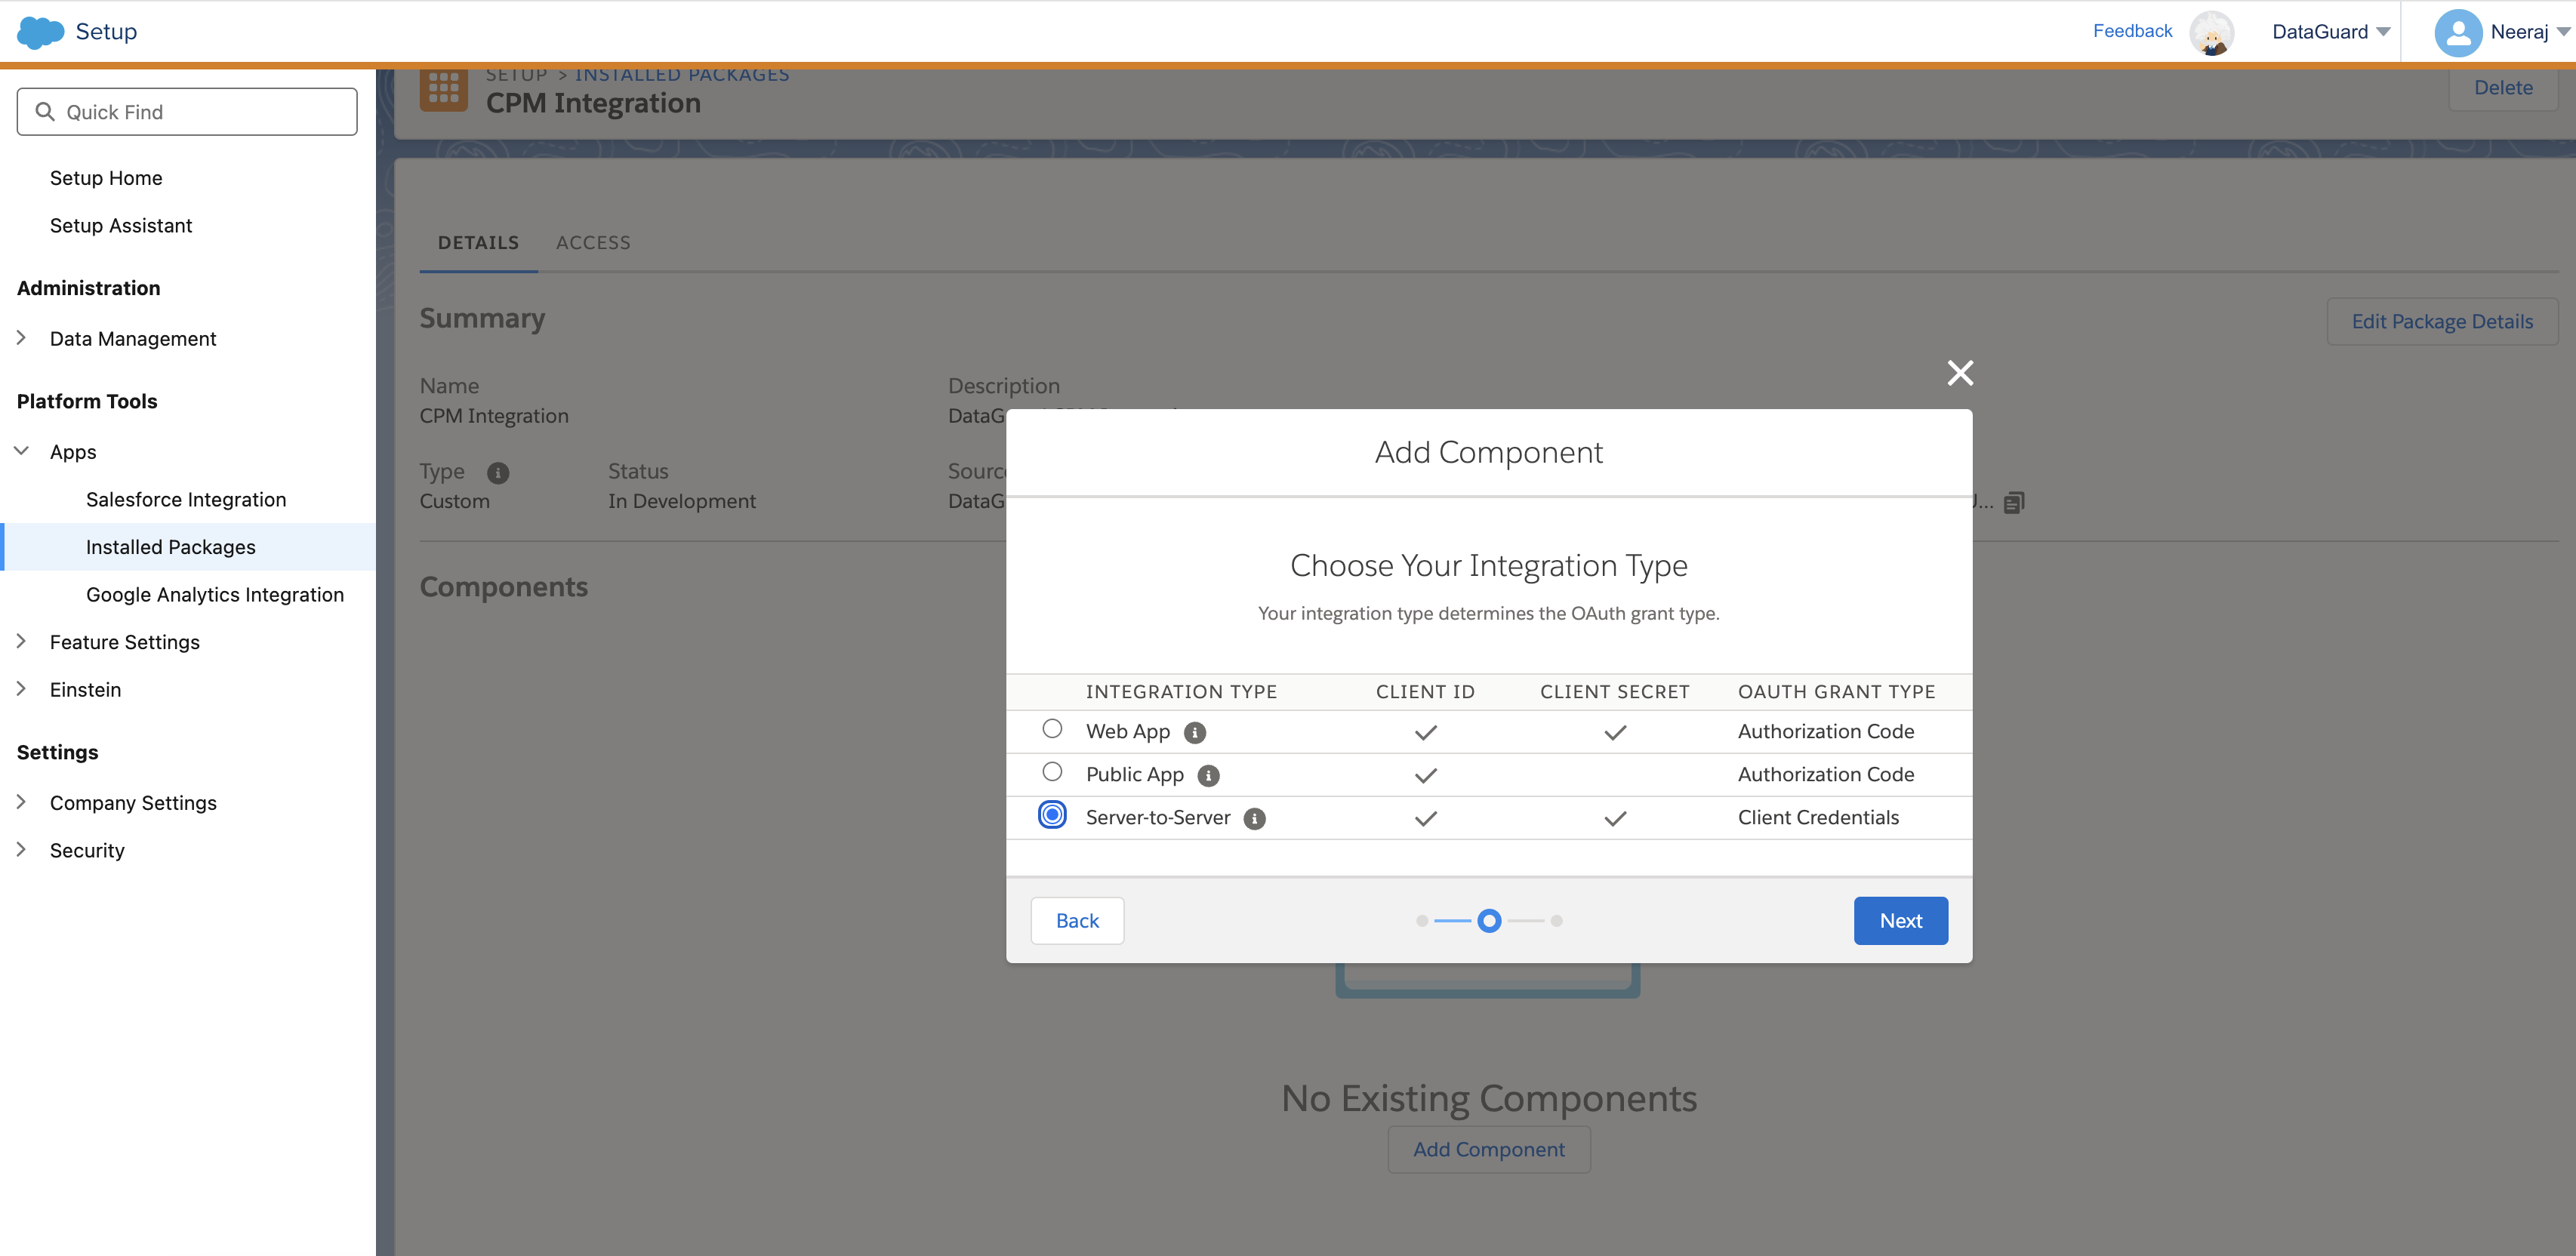
- Enable relevant scopes for Channels, Contacts and Data.
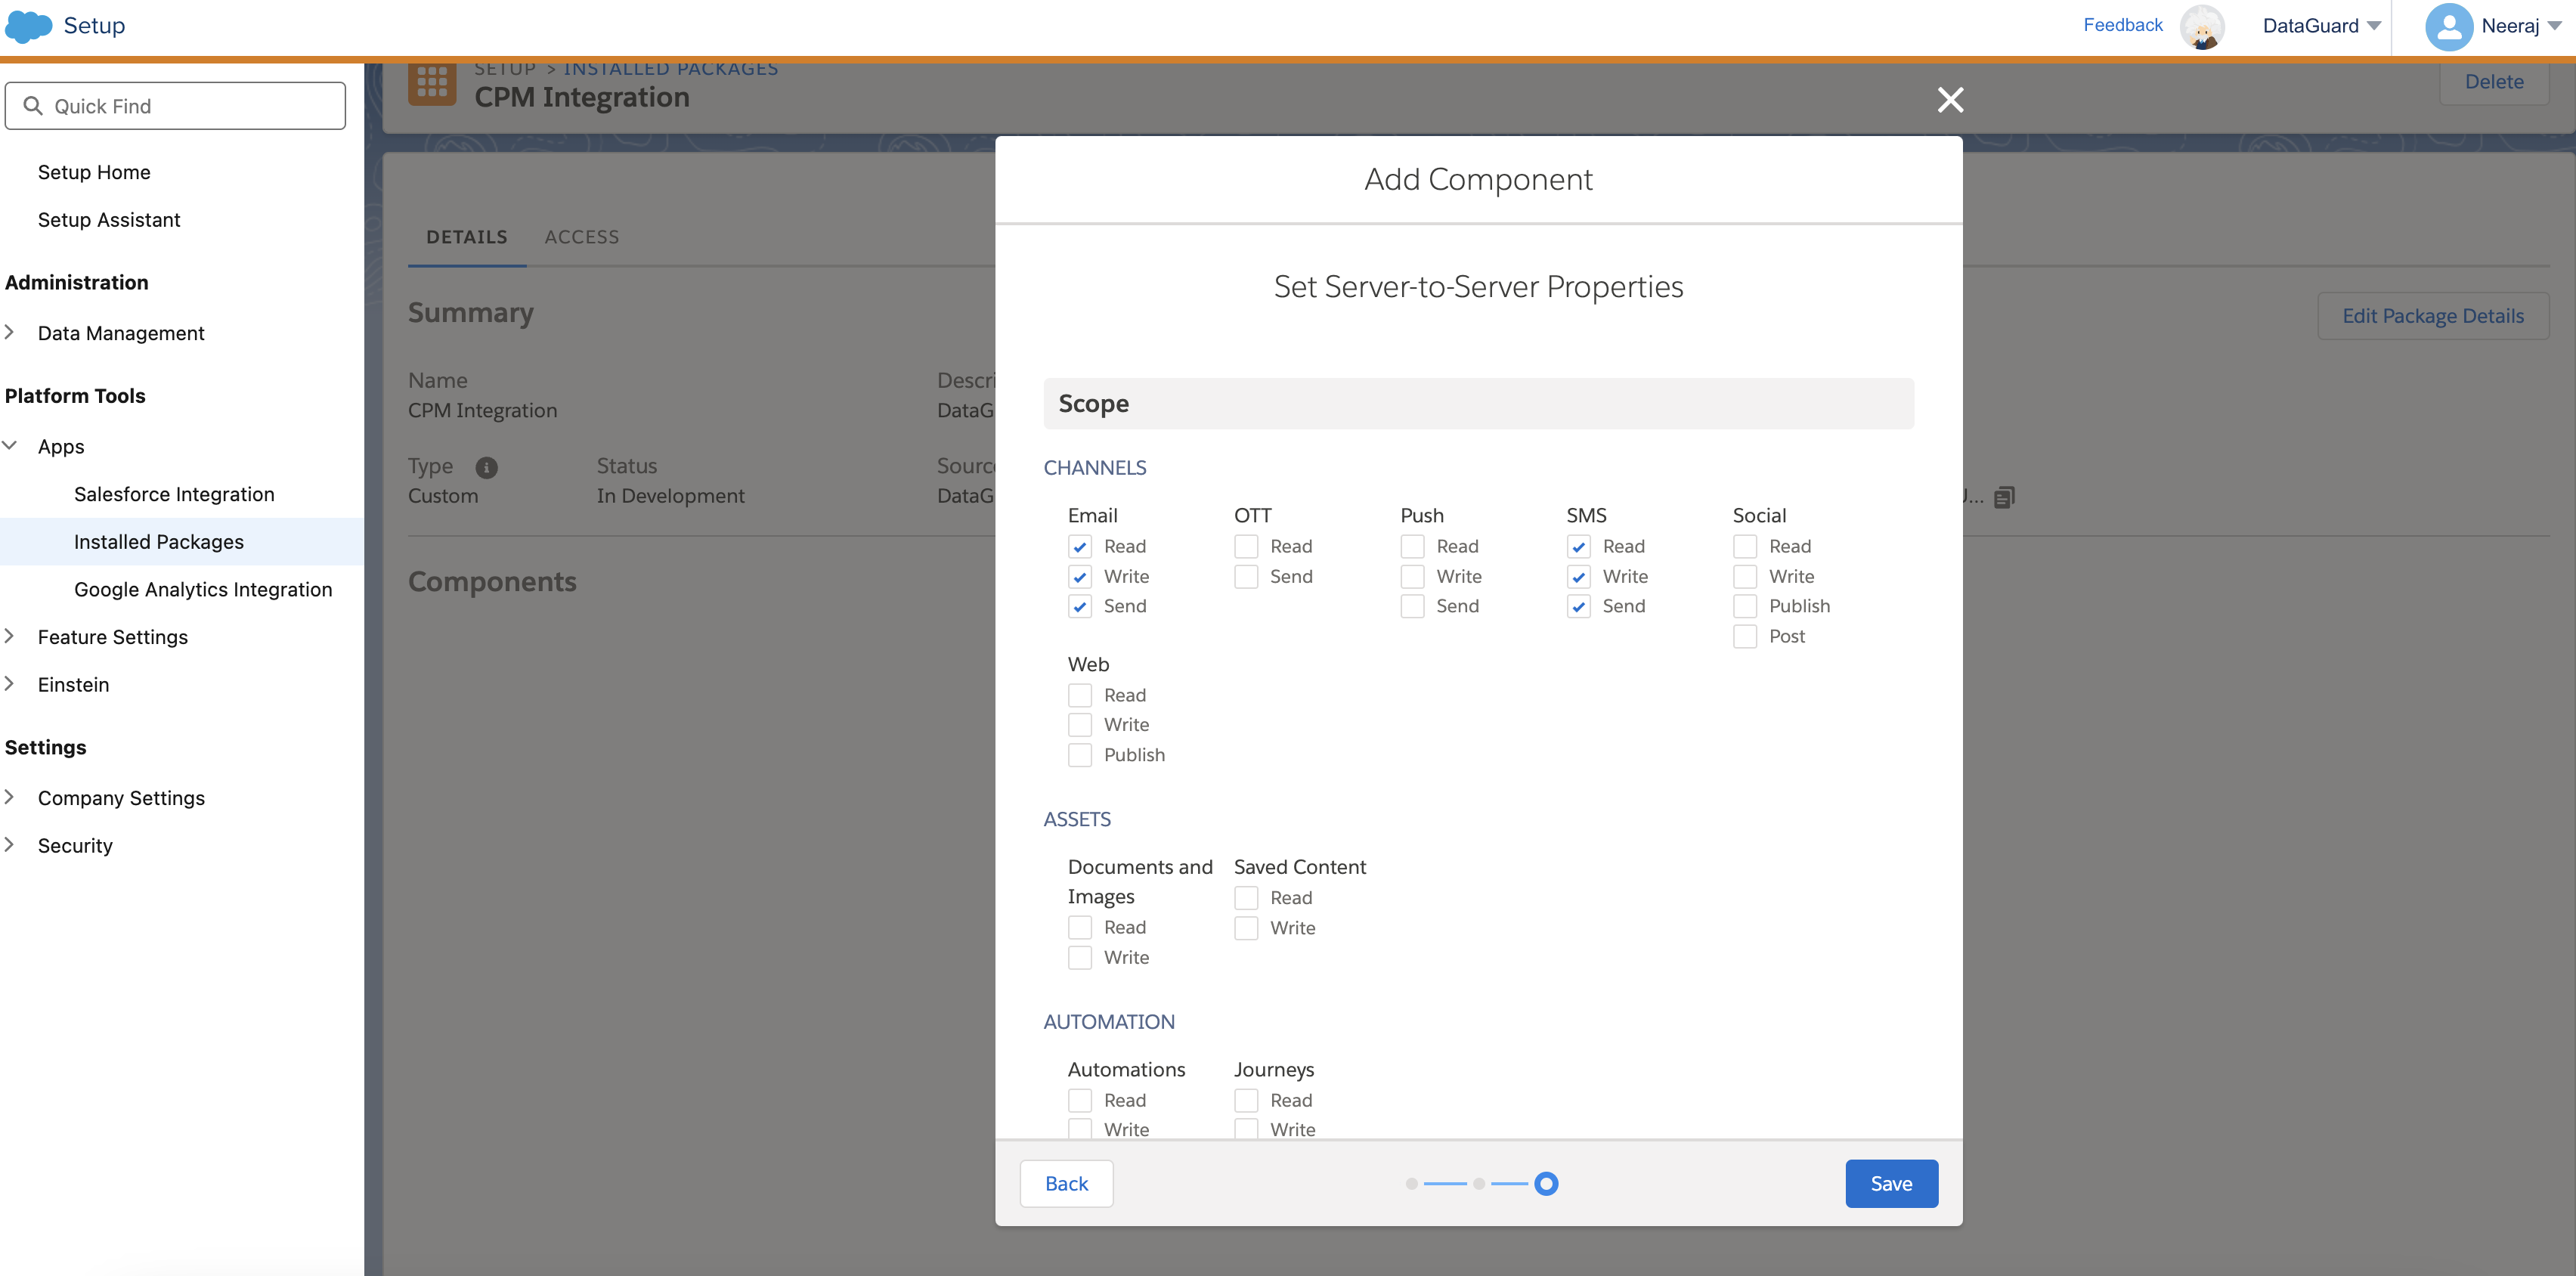
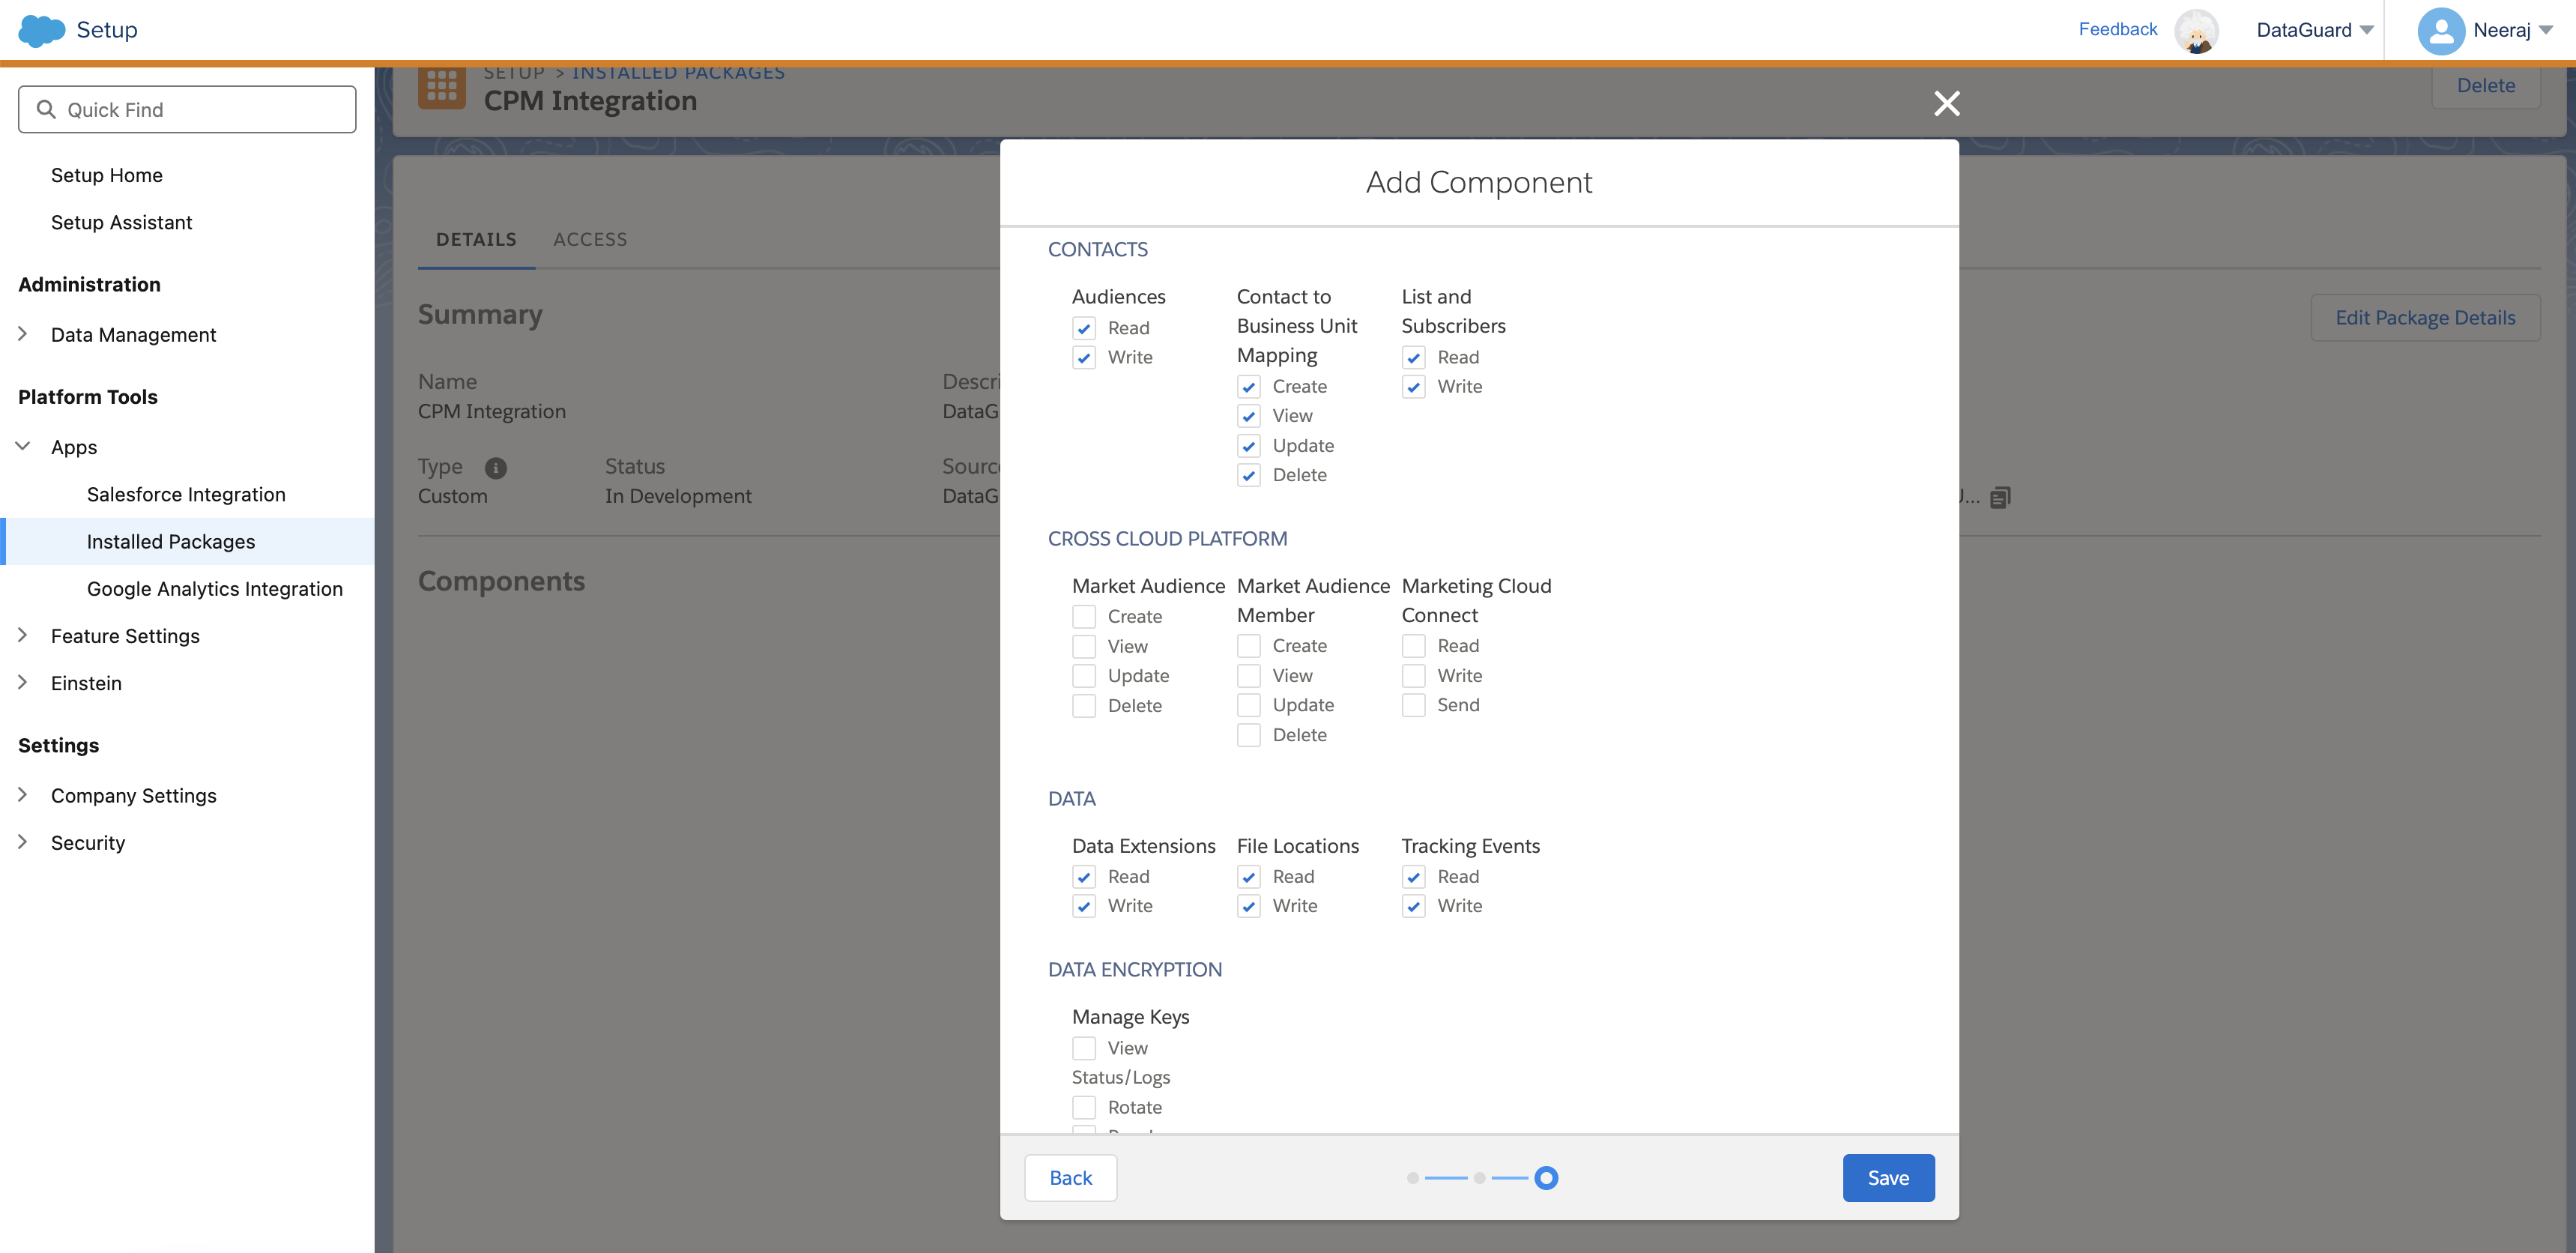
- Click Save to finish adding the Component.
- After creating the Installed Package App, Salesforce will generate a Consumer Key and Consumer Secret along with some URLs. Keep these details secure as you will need them later in the DataGuard CPM setup.
Step 2: Create a Data Extension
A Data Extension in Salesforce Marketing Cloud is a customizable storage container used to organize and manage customer and marketing data. It allows businesses to store detailed information such as customer profiles, purchase history, or preferences.
To create a new data extension
-
Go Audience Builder > Contact Builder
-
Click on Data Extension tab. Under this tab you can view all the existing Data Extensions including shared items.
-
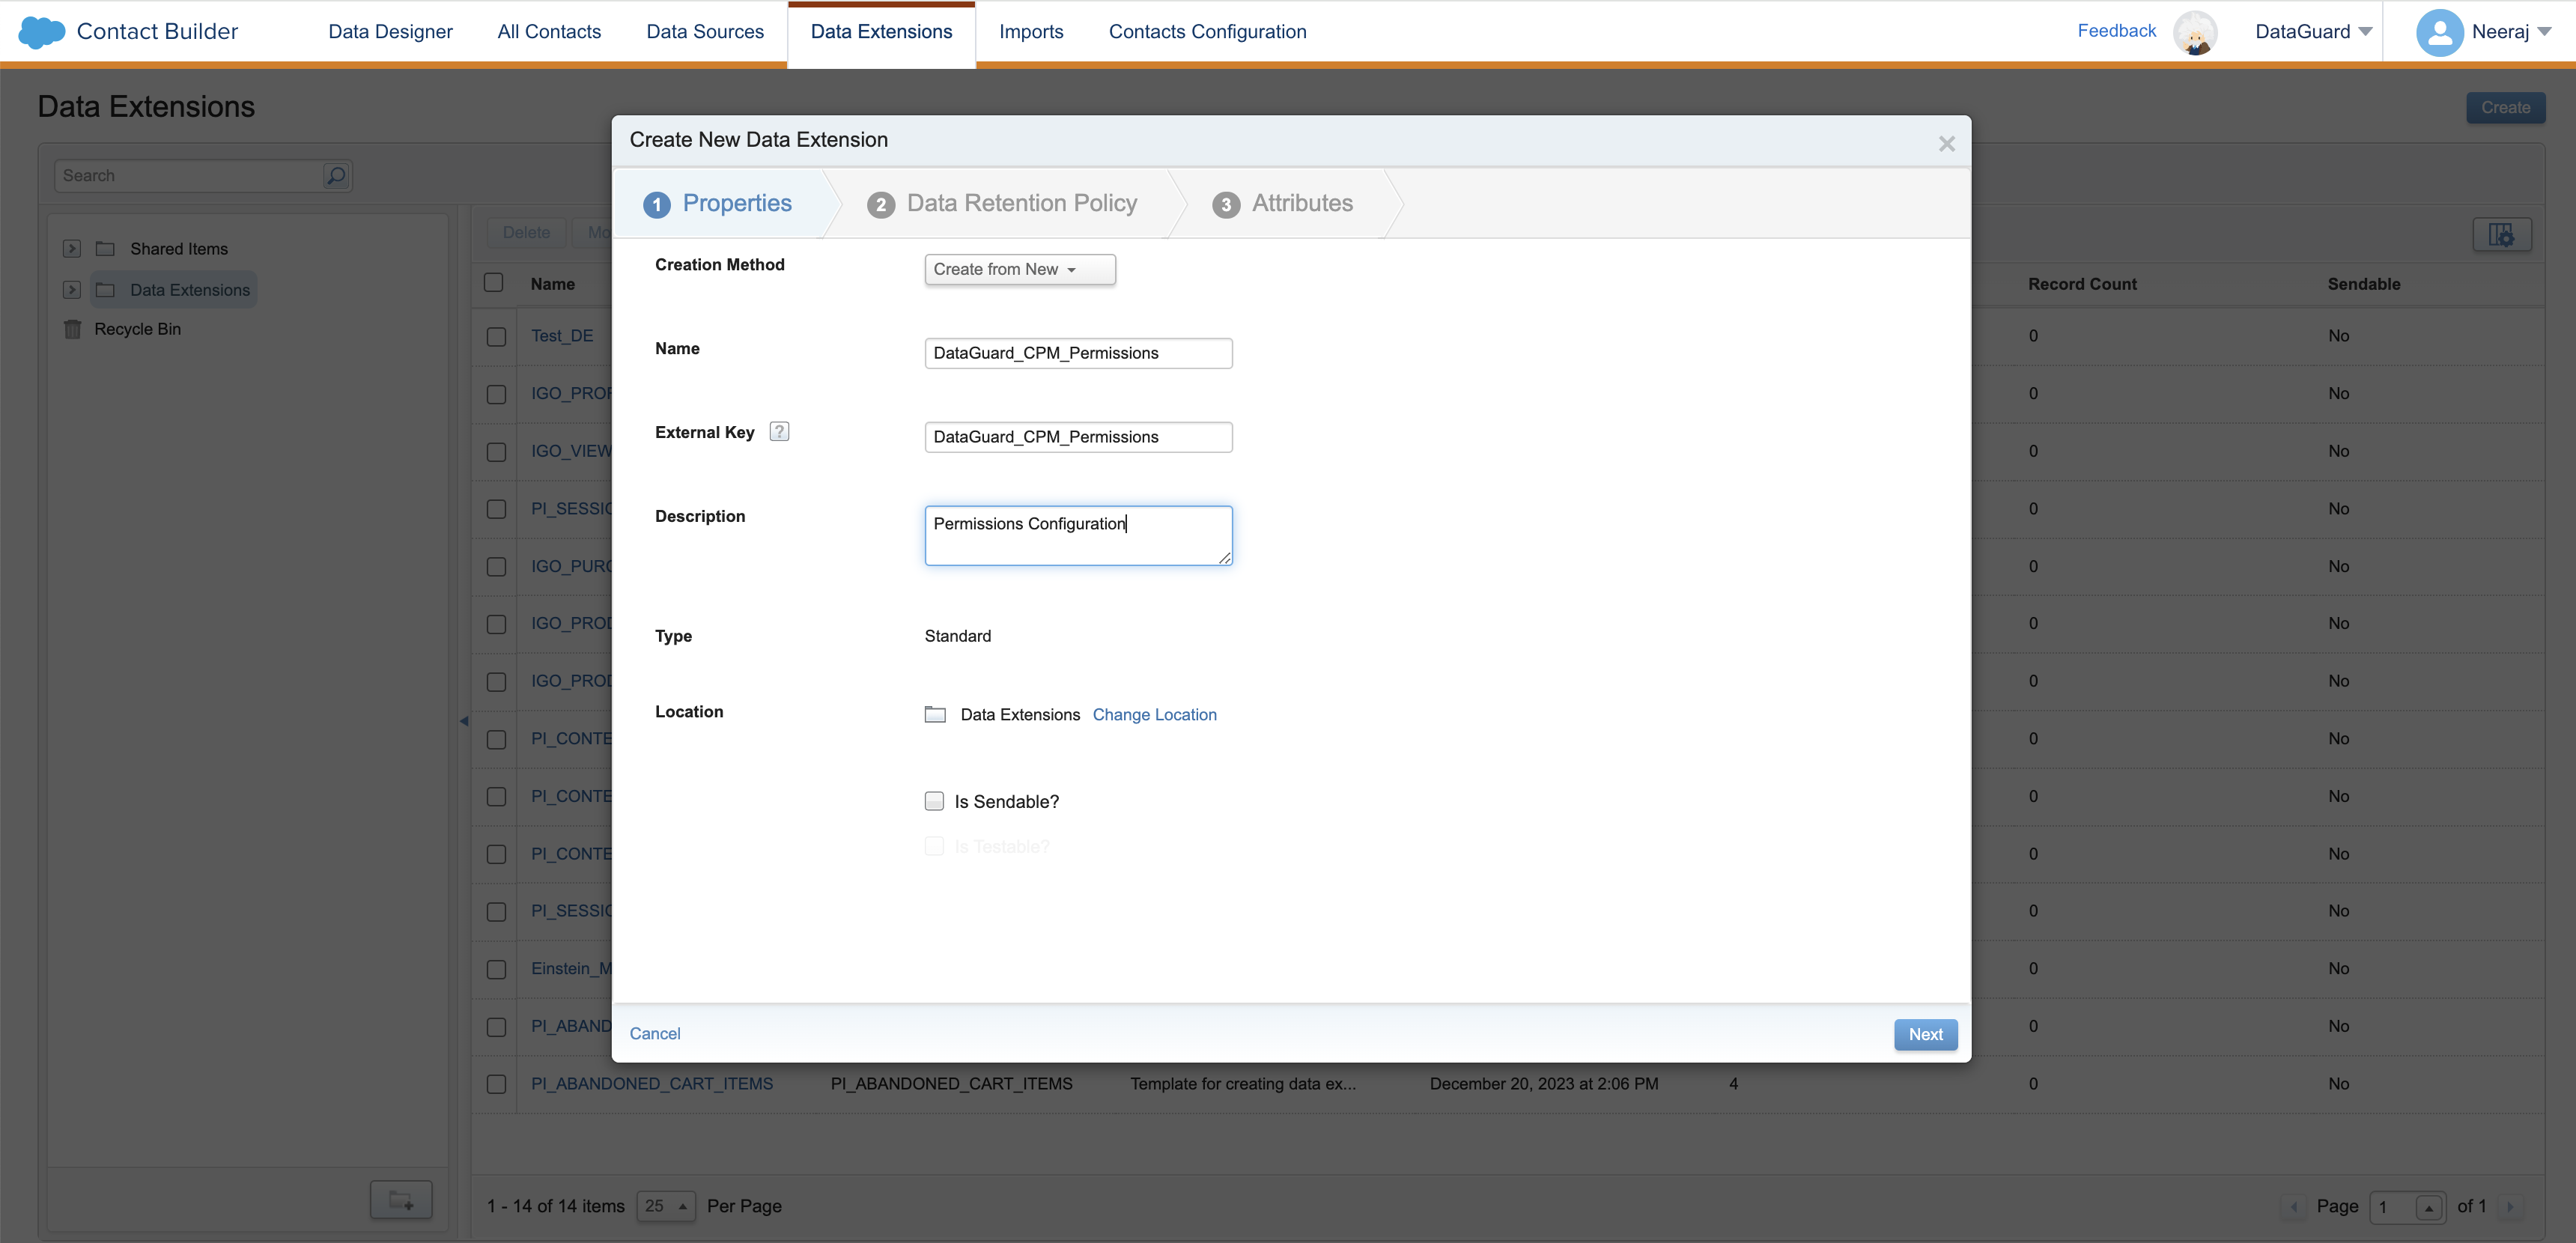
Click Create button on the top right corner to create a new Data Extension
-
Fill up the fields in the pop-up form
- Name: DataGuard_CPM_Permissions
- External Key: DataGuard_CPM_Permissions
- Description: Permissions Configuration
- Type: Standard
- Location: Data Extensions
-
Click Next
-
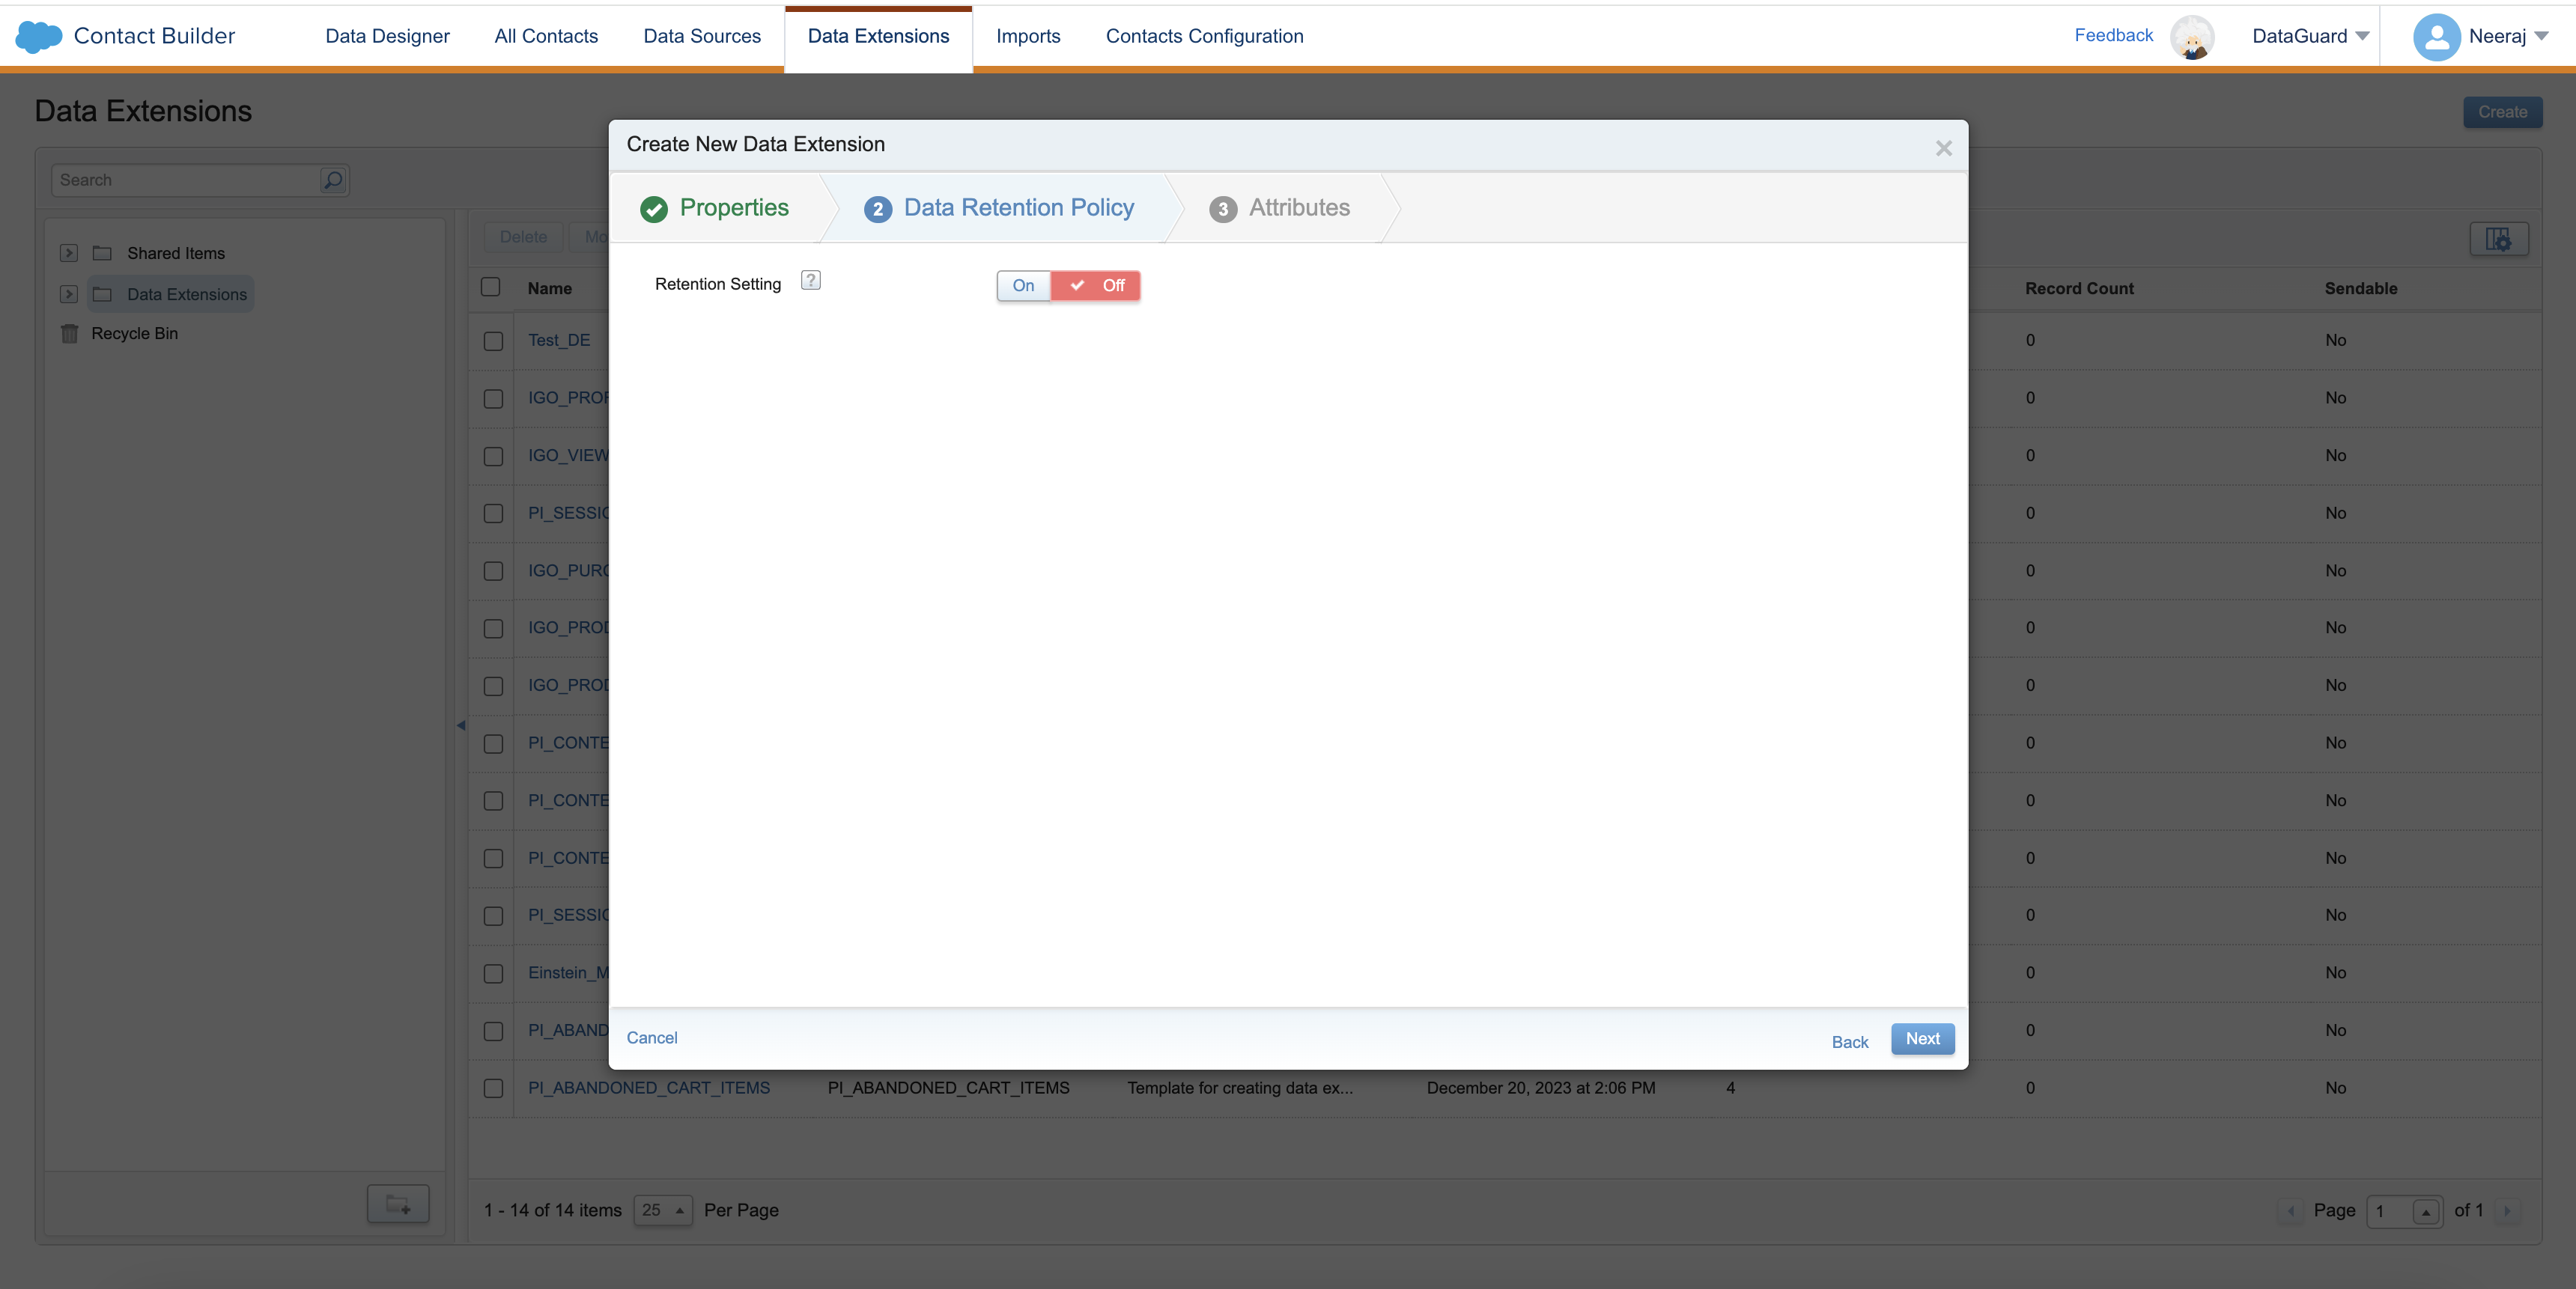
Keep retention policy off and click Next
-
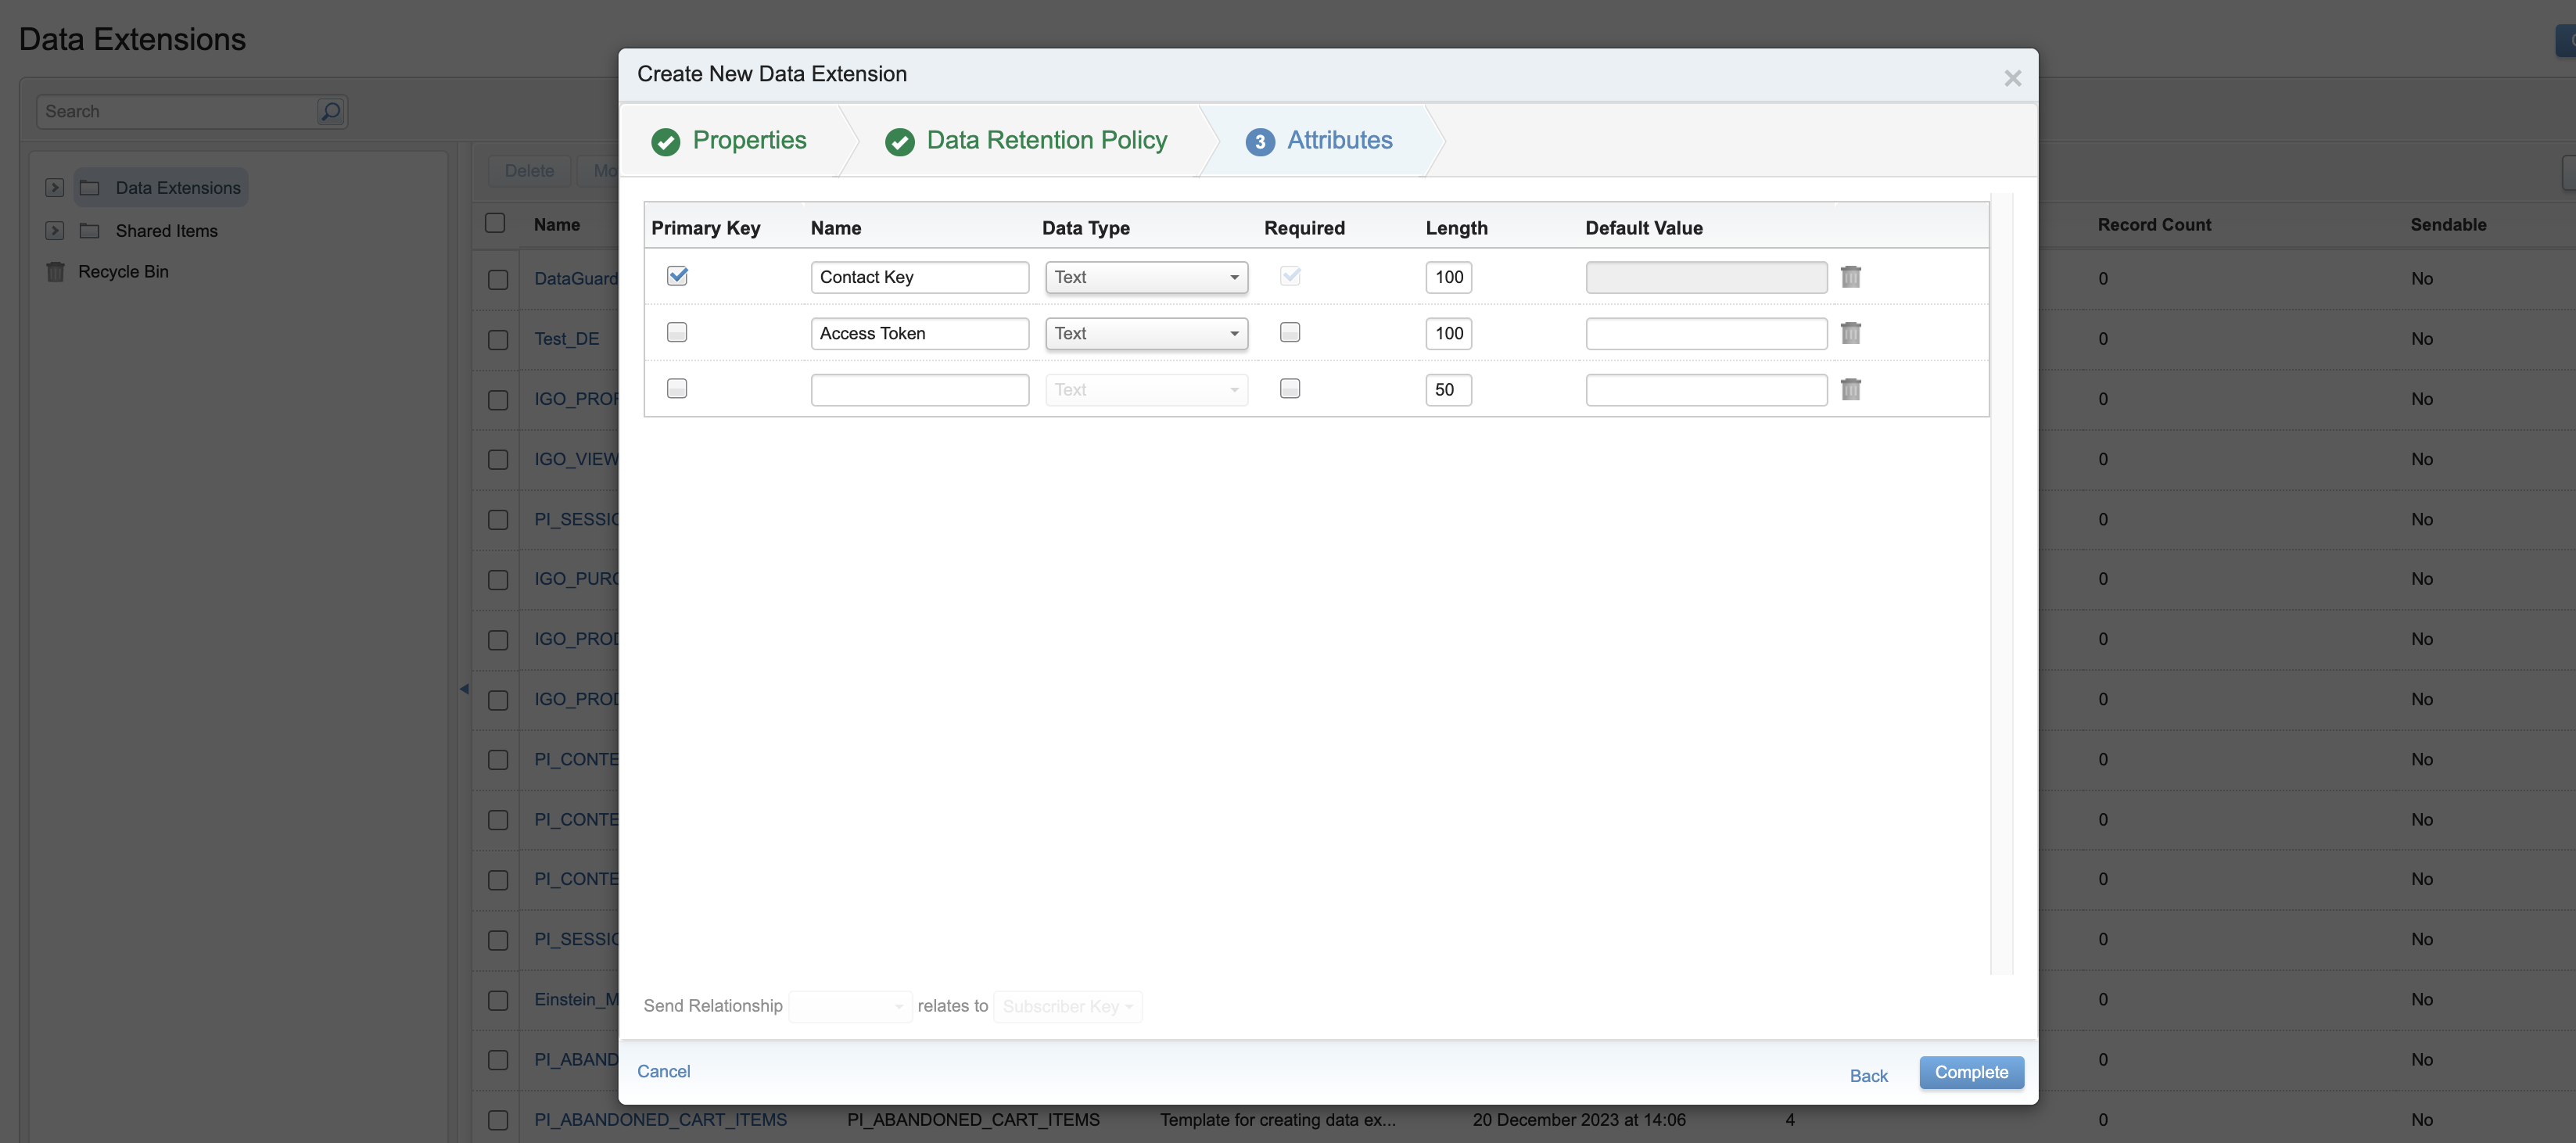
Add a primary key attribute "Contact Key"
- Primary Key: This checkbox should be checked
- Name: Contact Key
- Data Type: Text
- Required: Checked
- Required Length: 100
-
Add an attribute "Access Token"
-
Primary Key: This uncheckbox should be unchecked
-
Name: Acces Token
-
Data Type: Text
-
Required: Unchecked
-
Required Length: 100
-
-
Click Complete

Step 3: Create an Attribute Group
An Attribute Group in Salesforce Marketing Cloud is a structured collection used to organize and group related Data Extensions and their fields (or attributes). It acts as a container for data, helping to logically categorize information based on specific business needs or purposes.
To create an attribute group, follow the steps:
-
Log into Salesforce Marketing Cloud
-
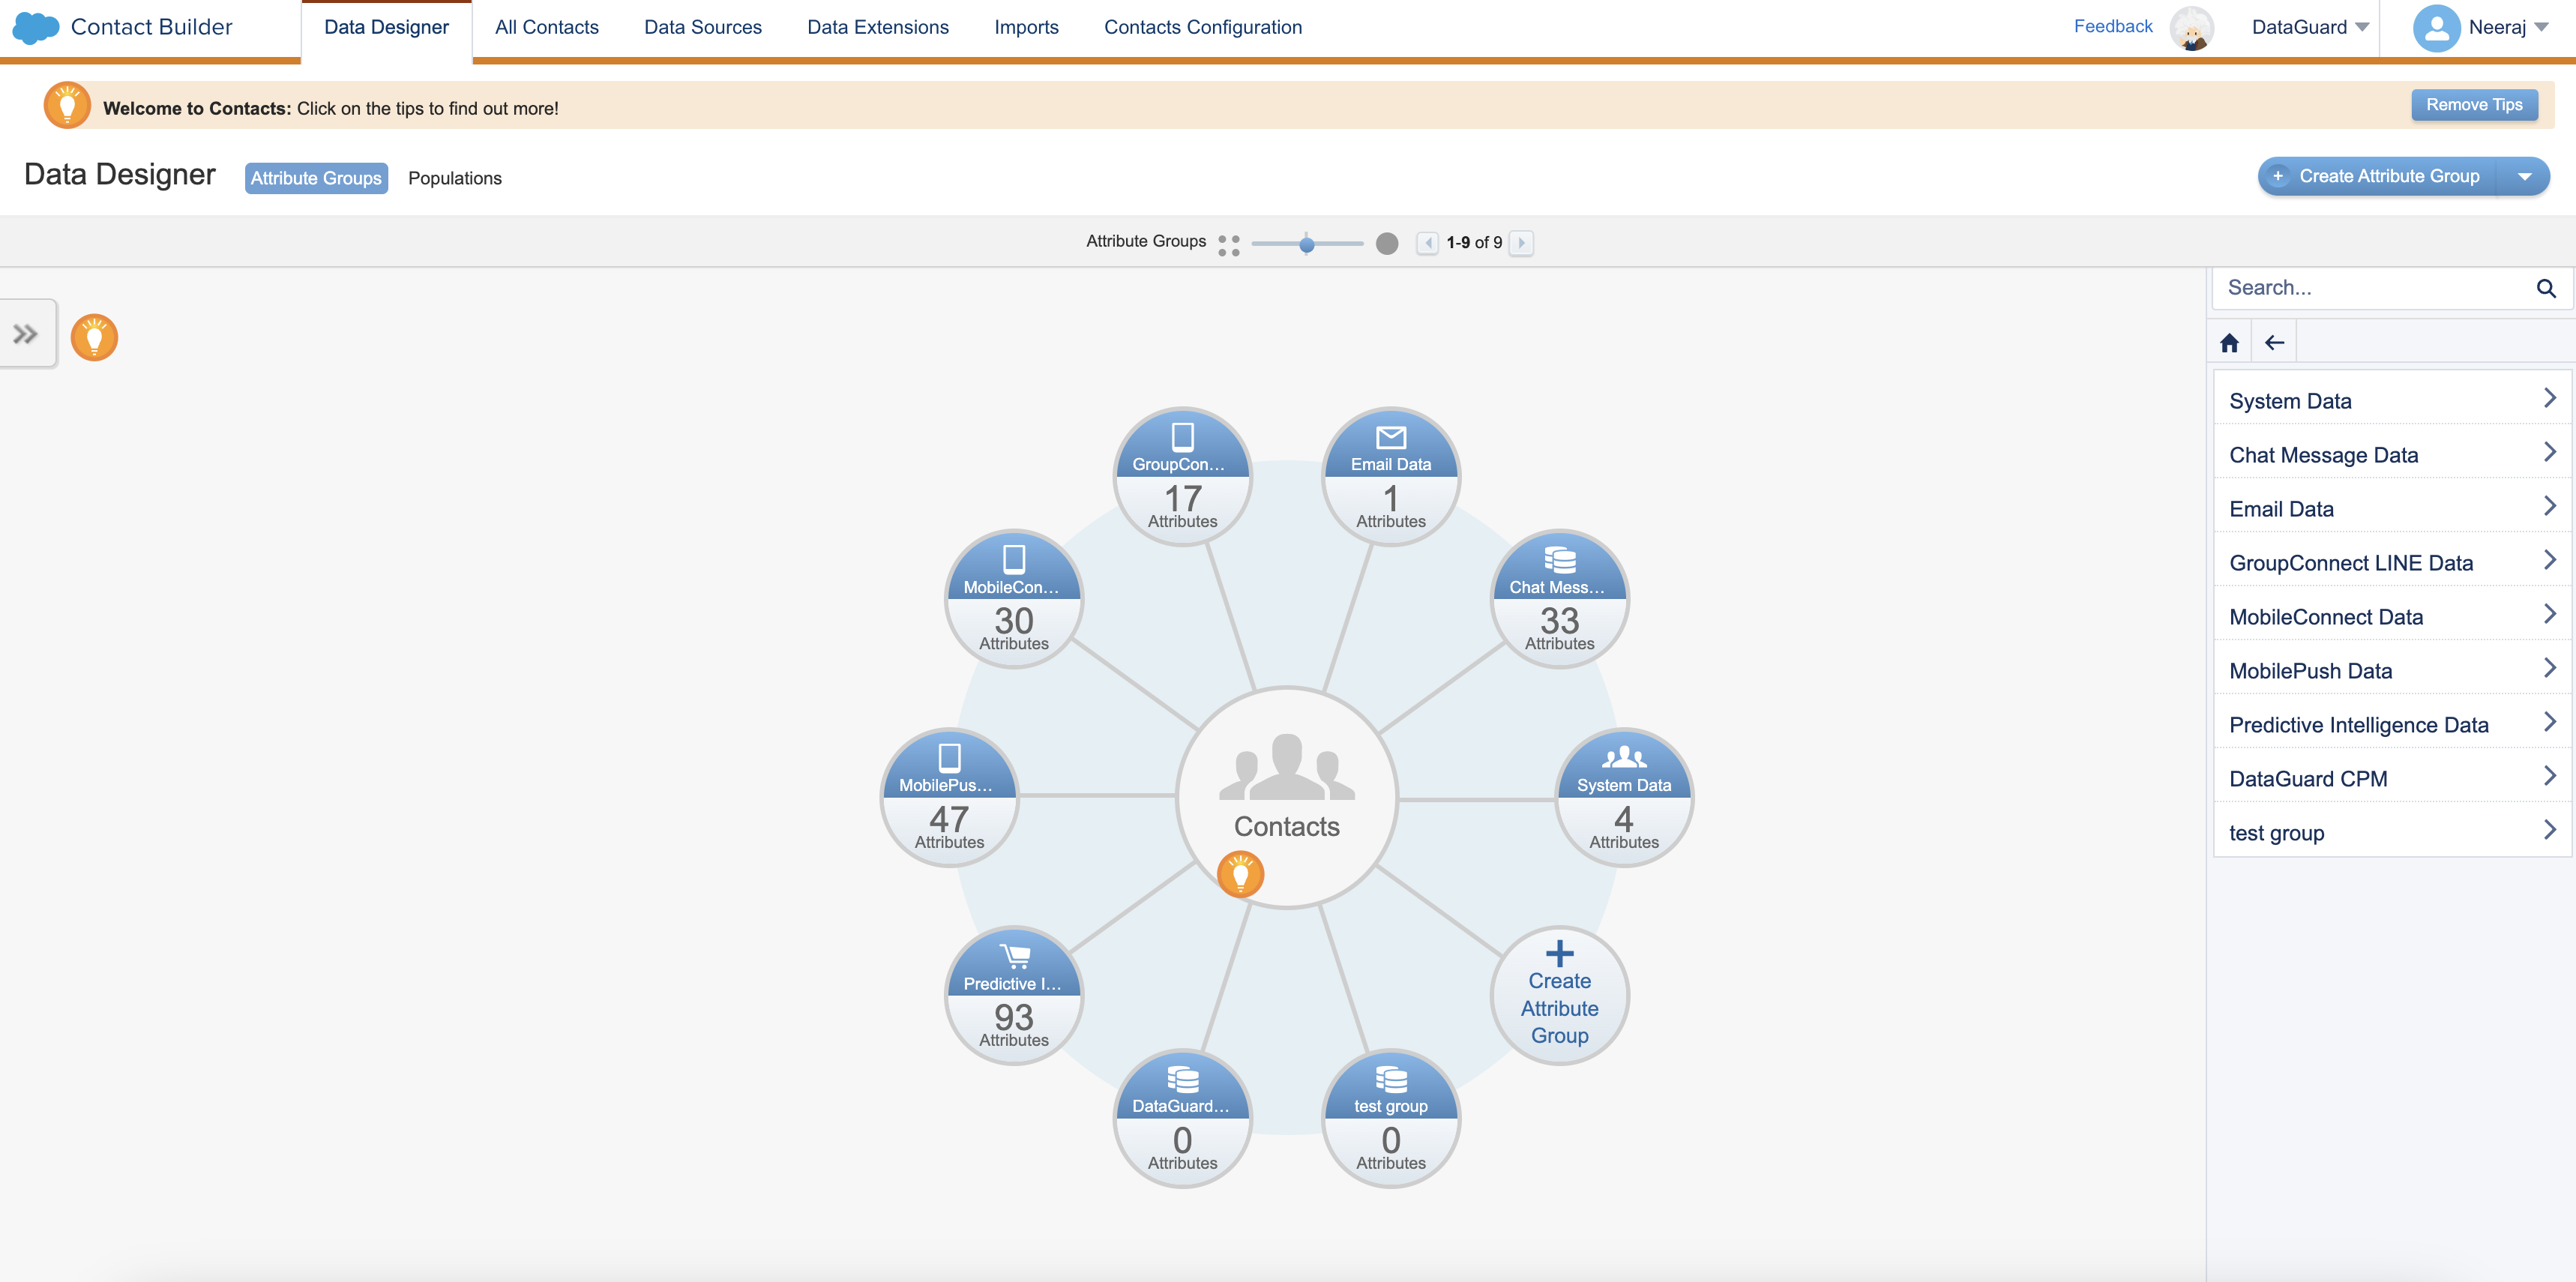
Navigate to Contact Builder > Data Designer tab. This will open a view where you can see and manage all the data-related components.
-
Click the Create Attribute Group button
-
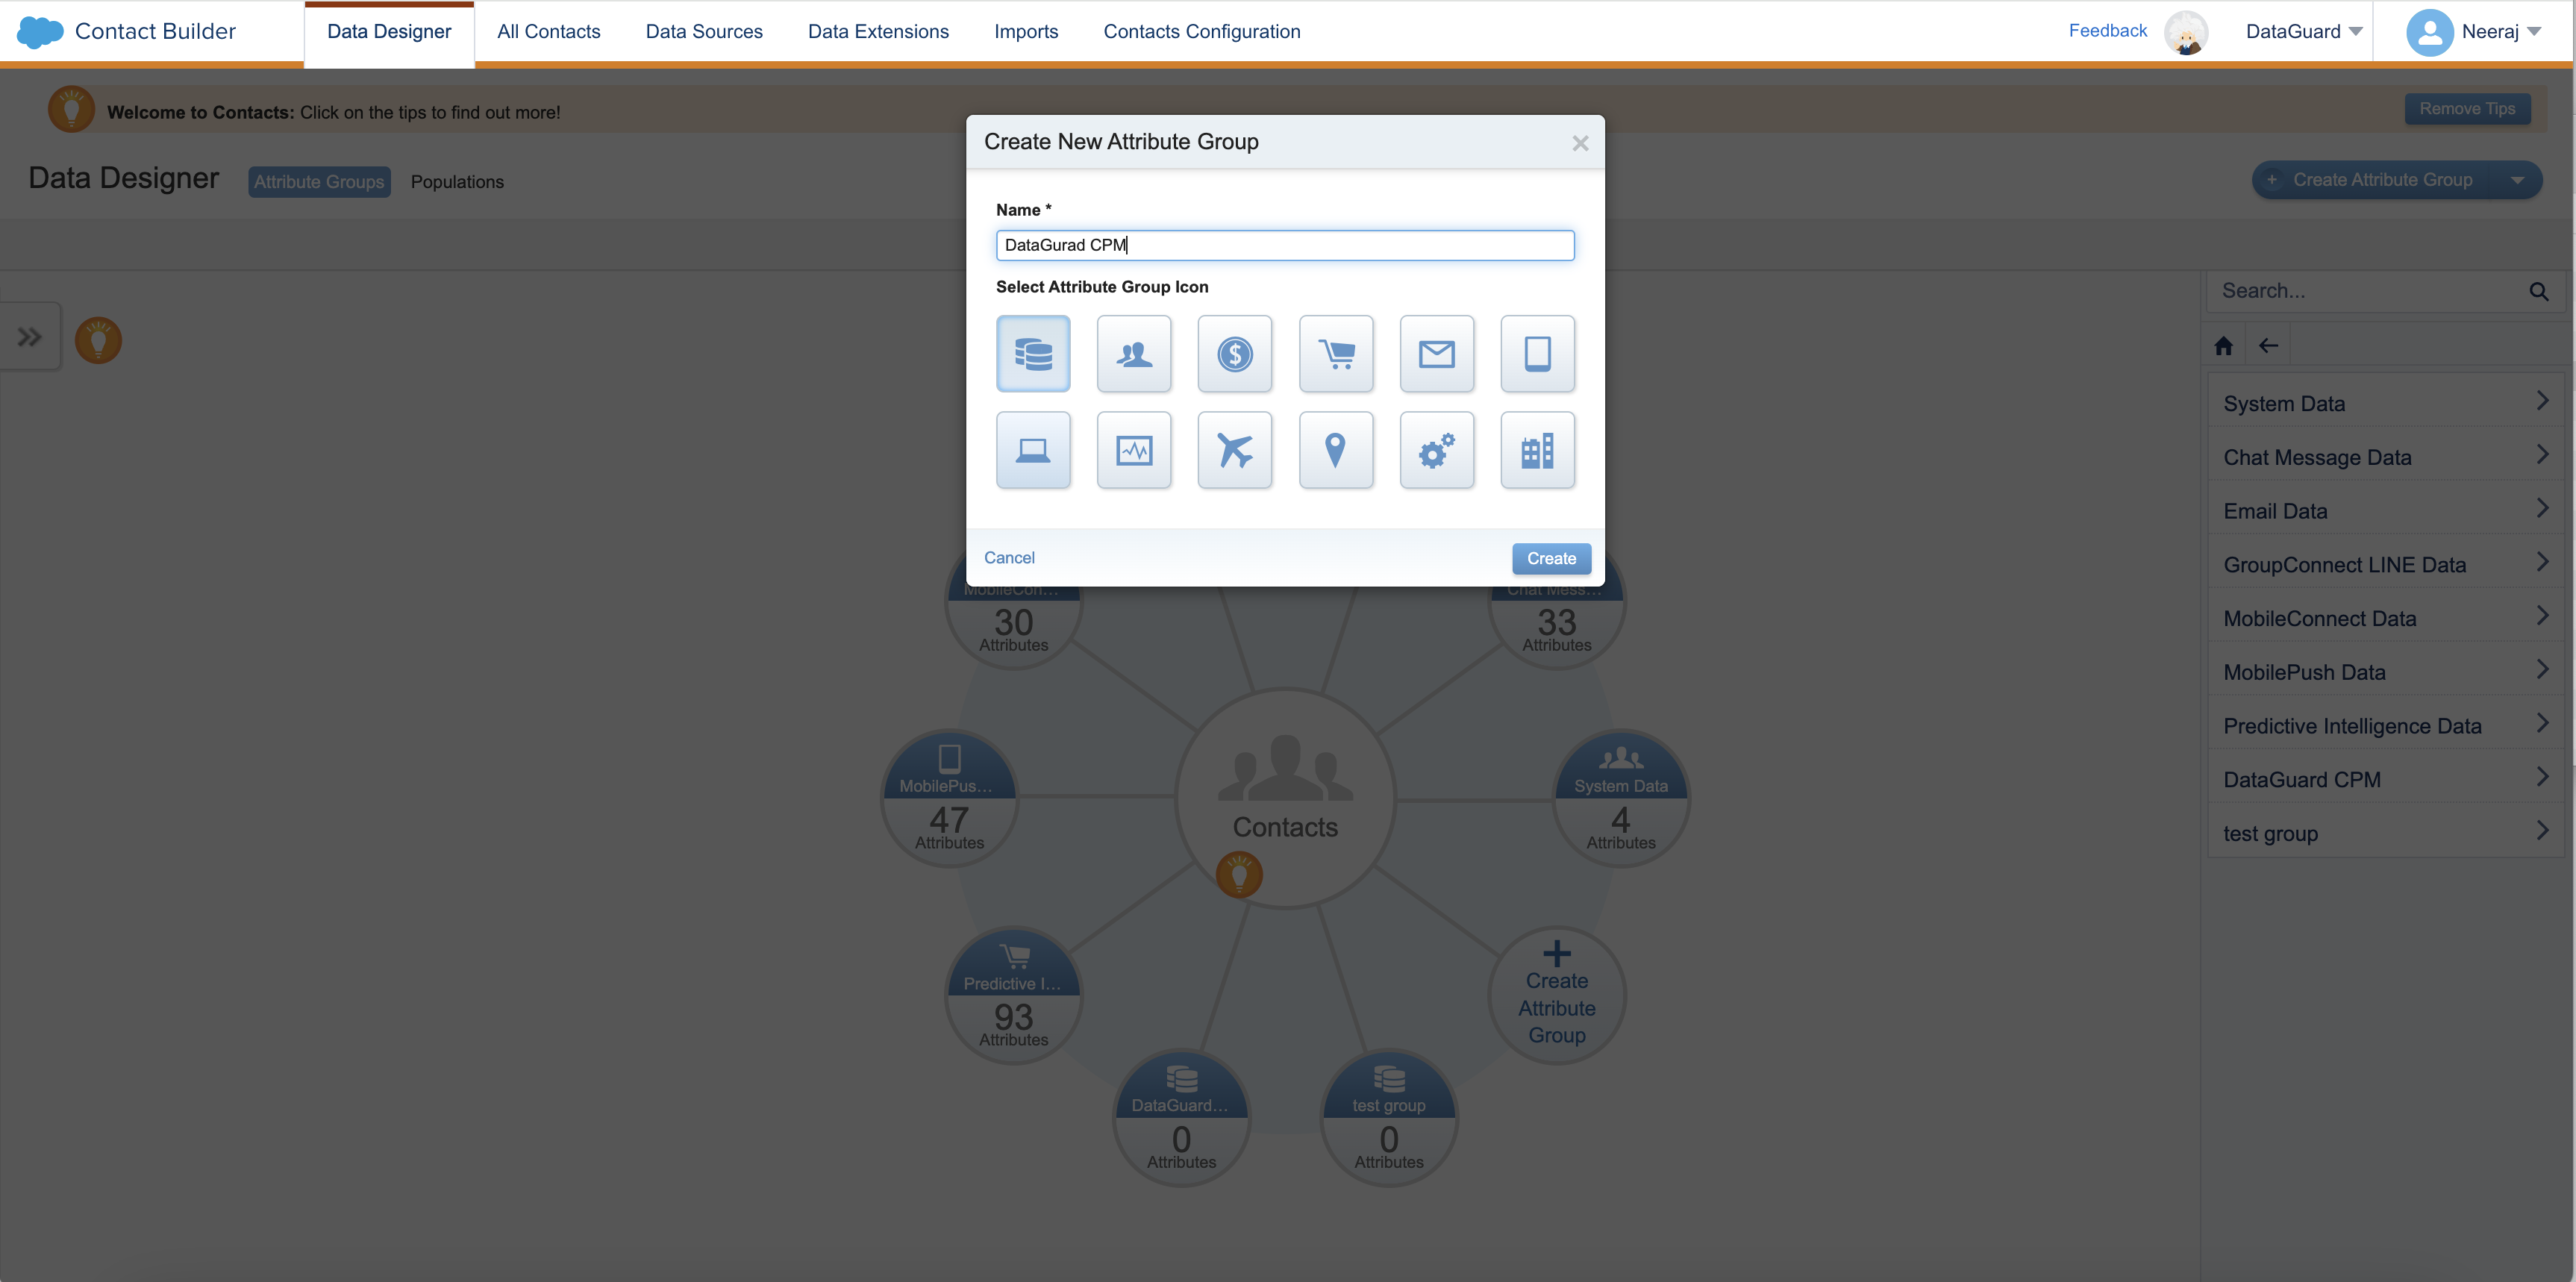
In the pop-up window that appears, enter “DataGuard CPM” as name for your new Attribute Group. Optionally, you can provide an attribute group icon.
-
Click Create to complete the creation of attribute group.
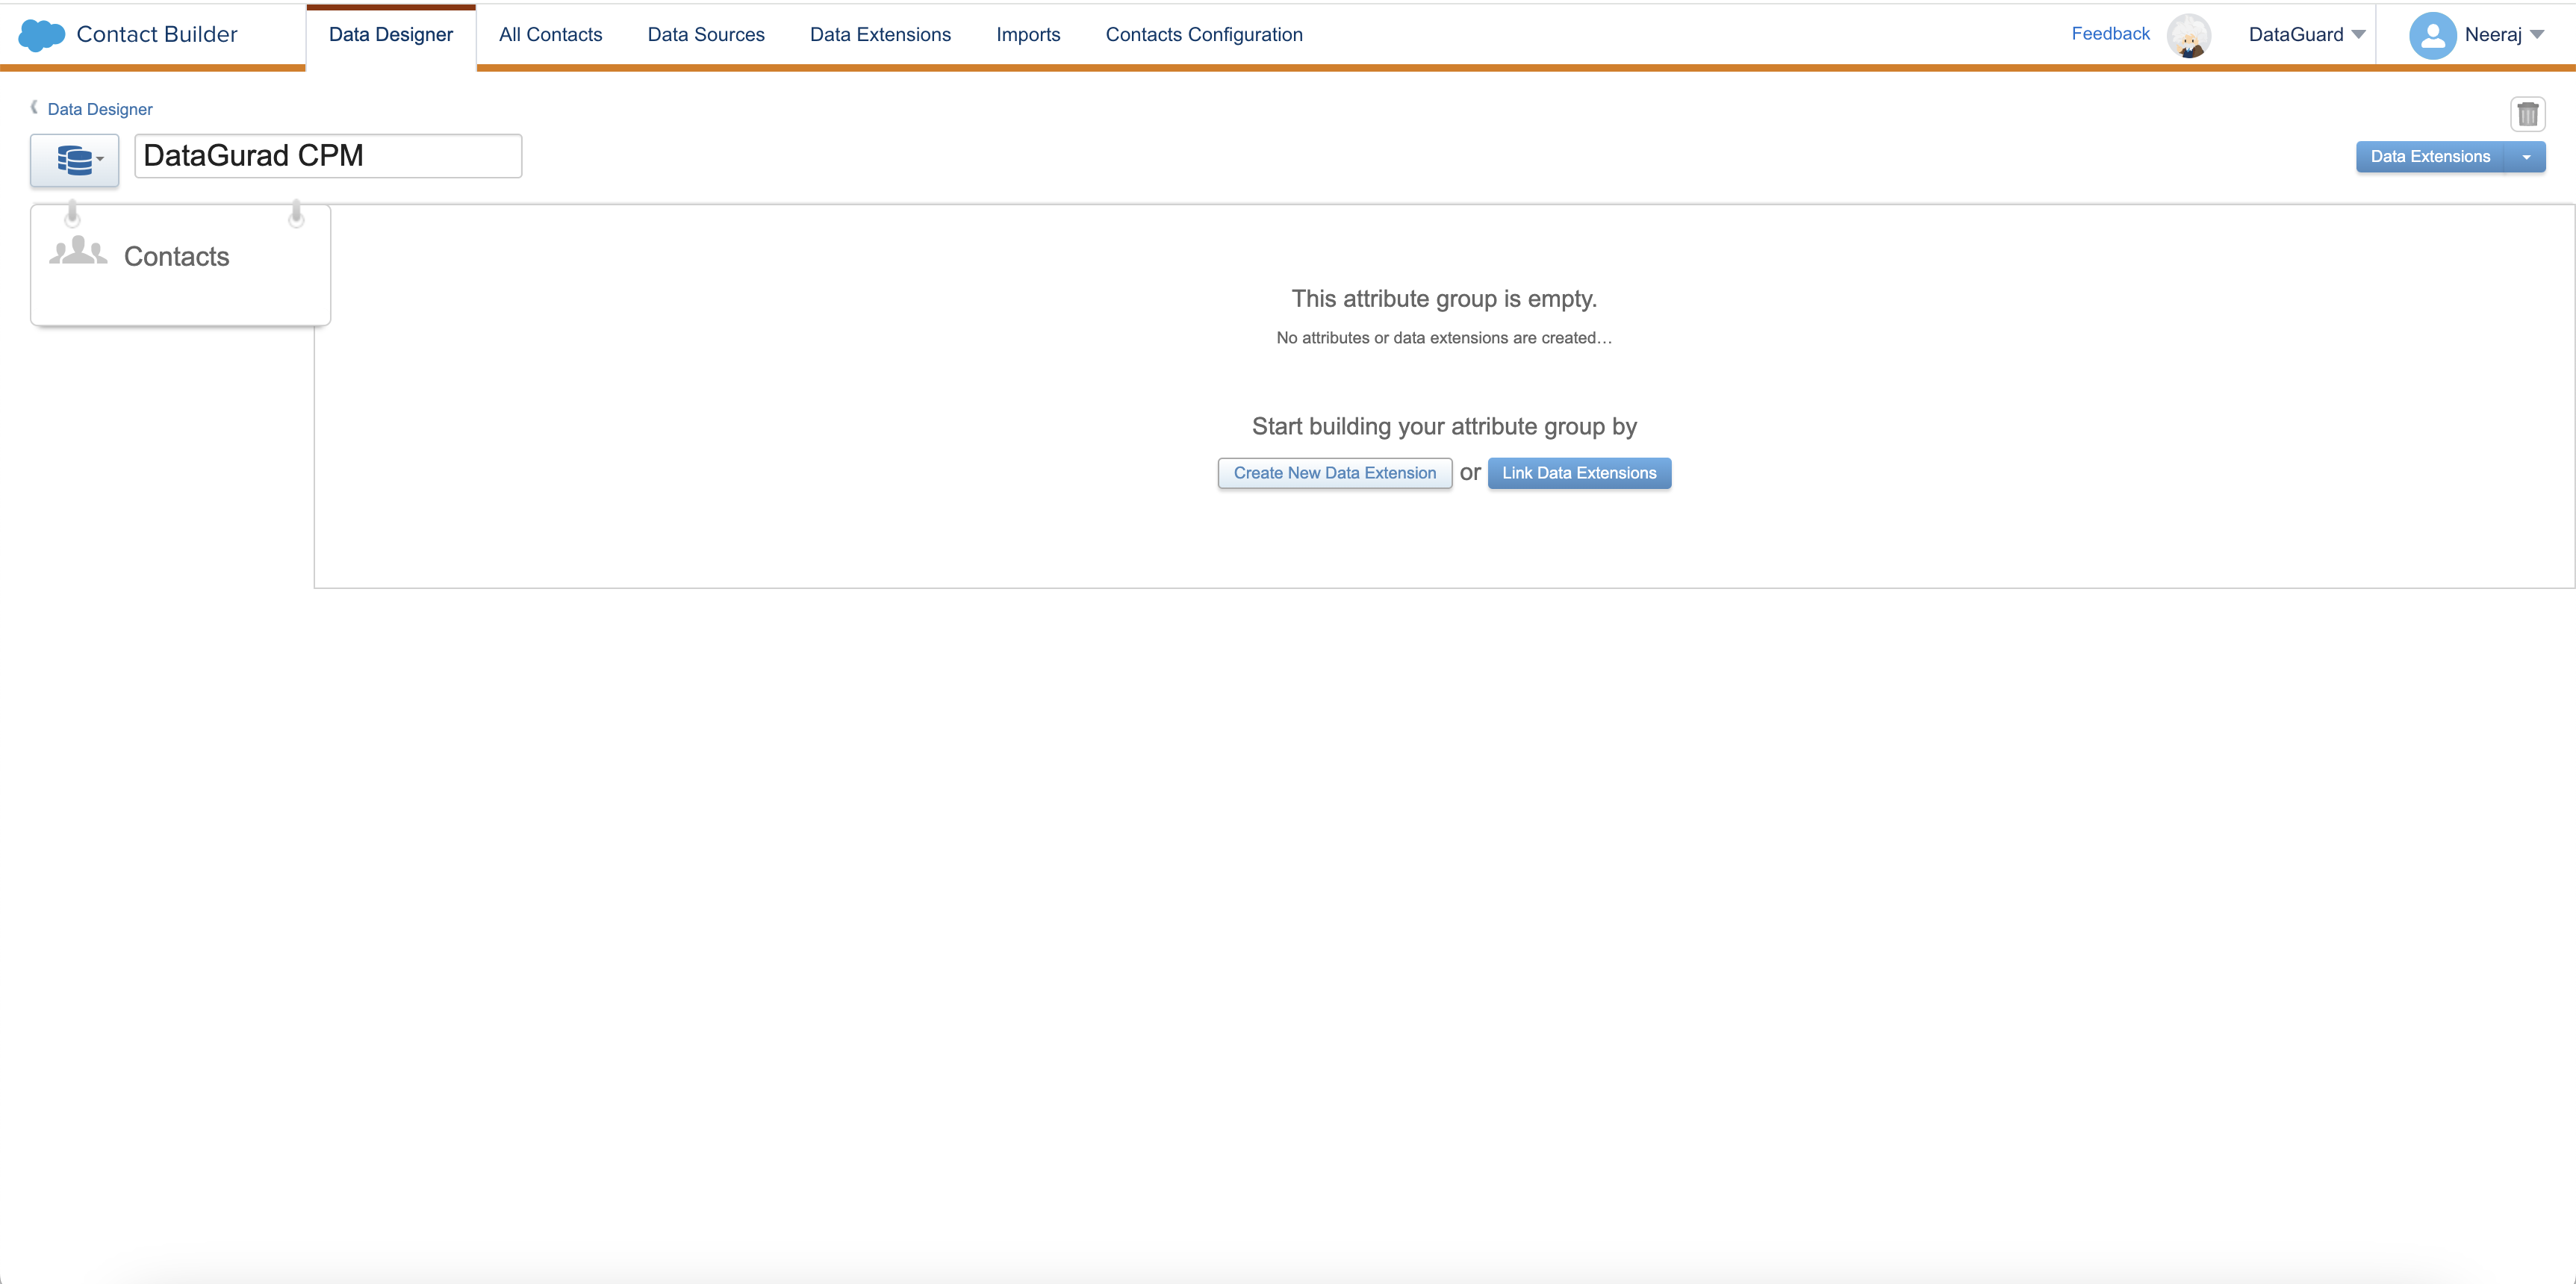
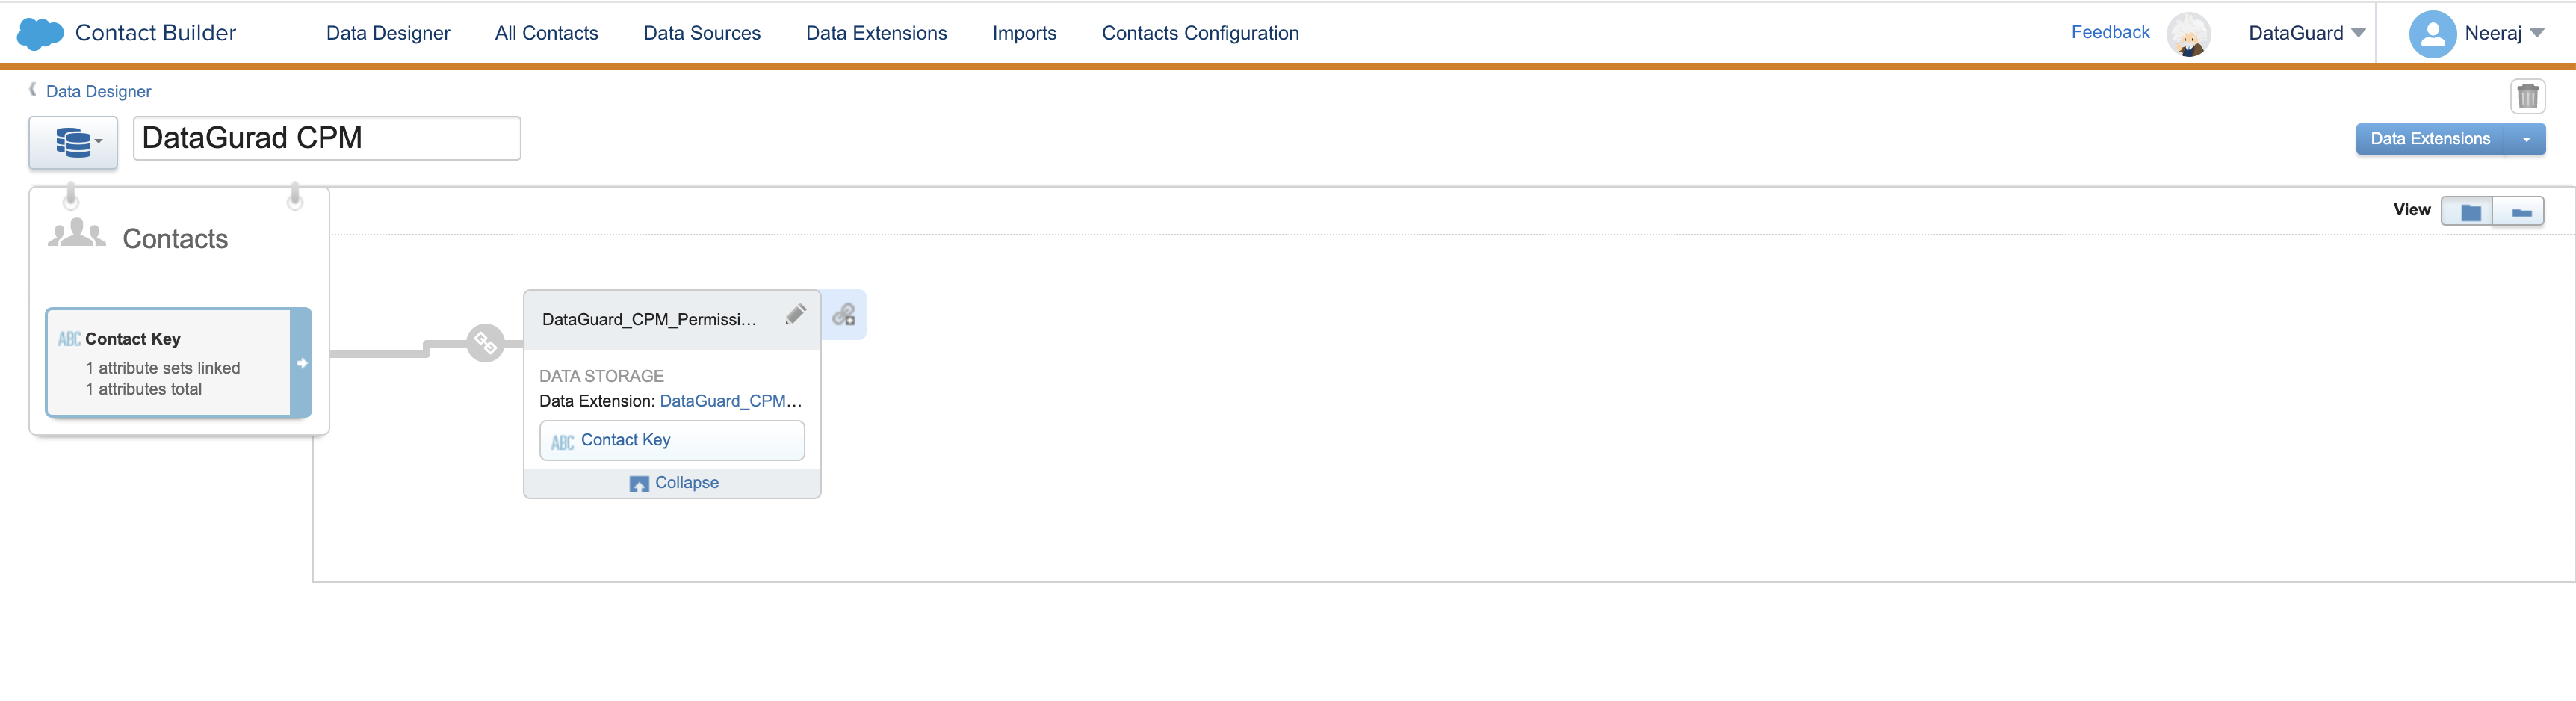
Step 4: Add Data Extension to Attribute Group
Linking Data Extensions (DEs) to Contacts in an Attribute Group is crucial for personalized marketing and accurate segmentation. It ensures that customer data is correctly associated with contact records, enabling targeted communication and maintaining data integrity for effective marketing.
To add Data Extensions to the Attribute group,
-
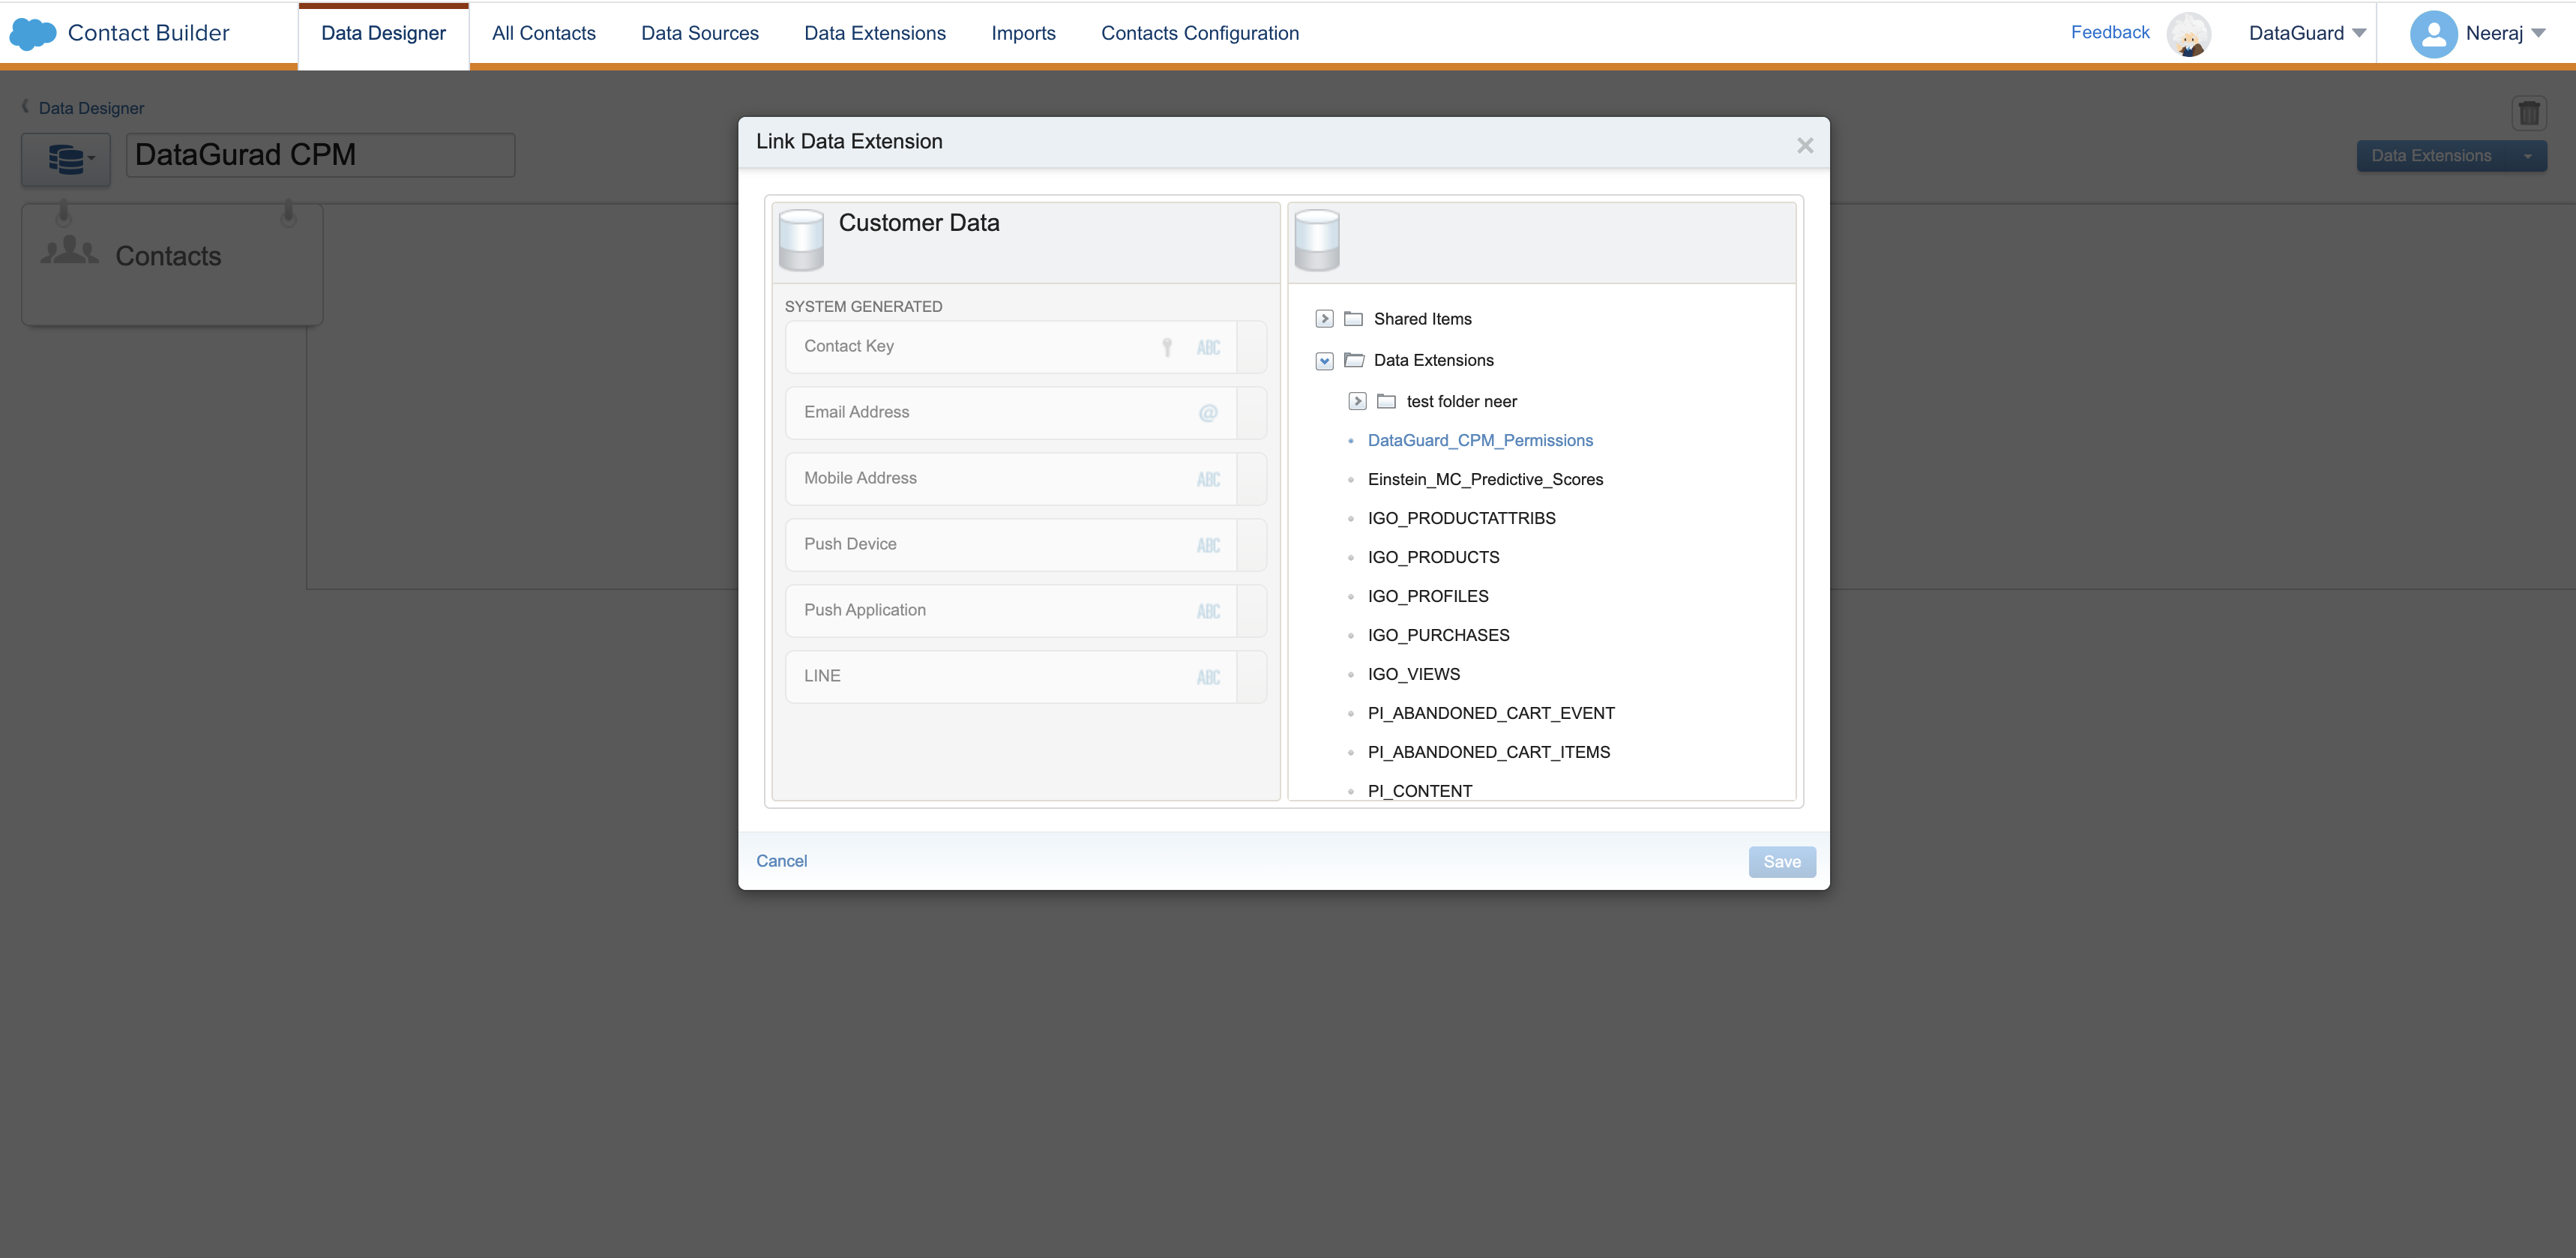
Click Link Data Extensions. You can also do it by clicking Data Extensions > Link button on the top right corner of the screen if the attribute group already has Data Extension/s.
-
Select the previously created Data extension named “DataGuard_CPM_Permissions”.
-
We need to set up a relationship between the Data Extensions within the Attribute Group. So we link DataGuard_CPM_Permissions to Contact using a common field “Contact Key”
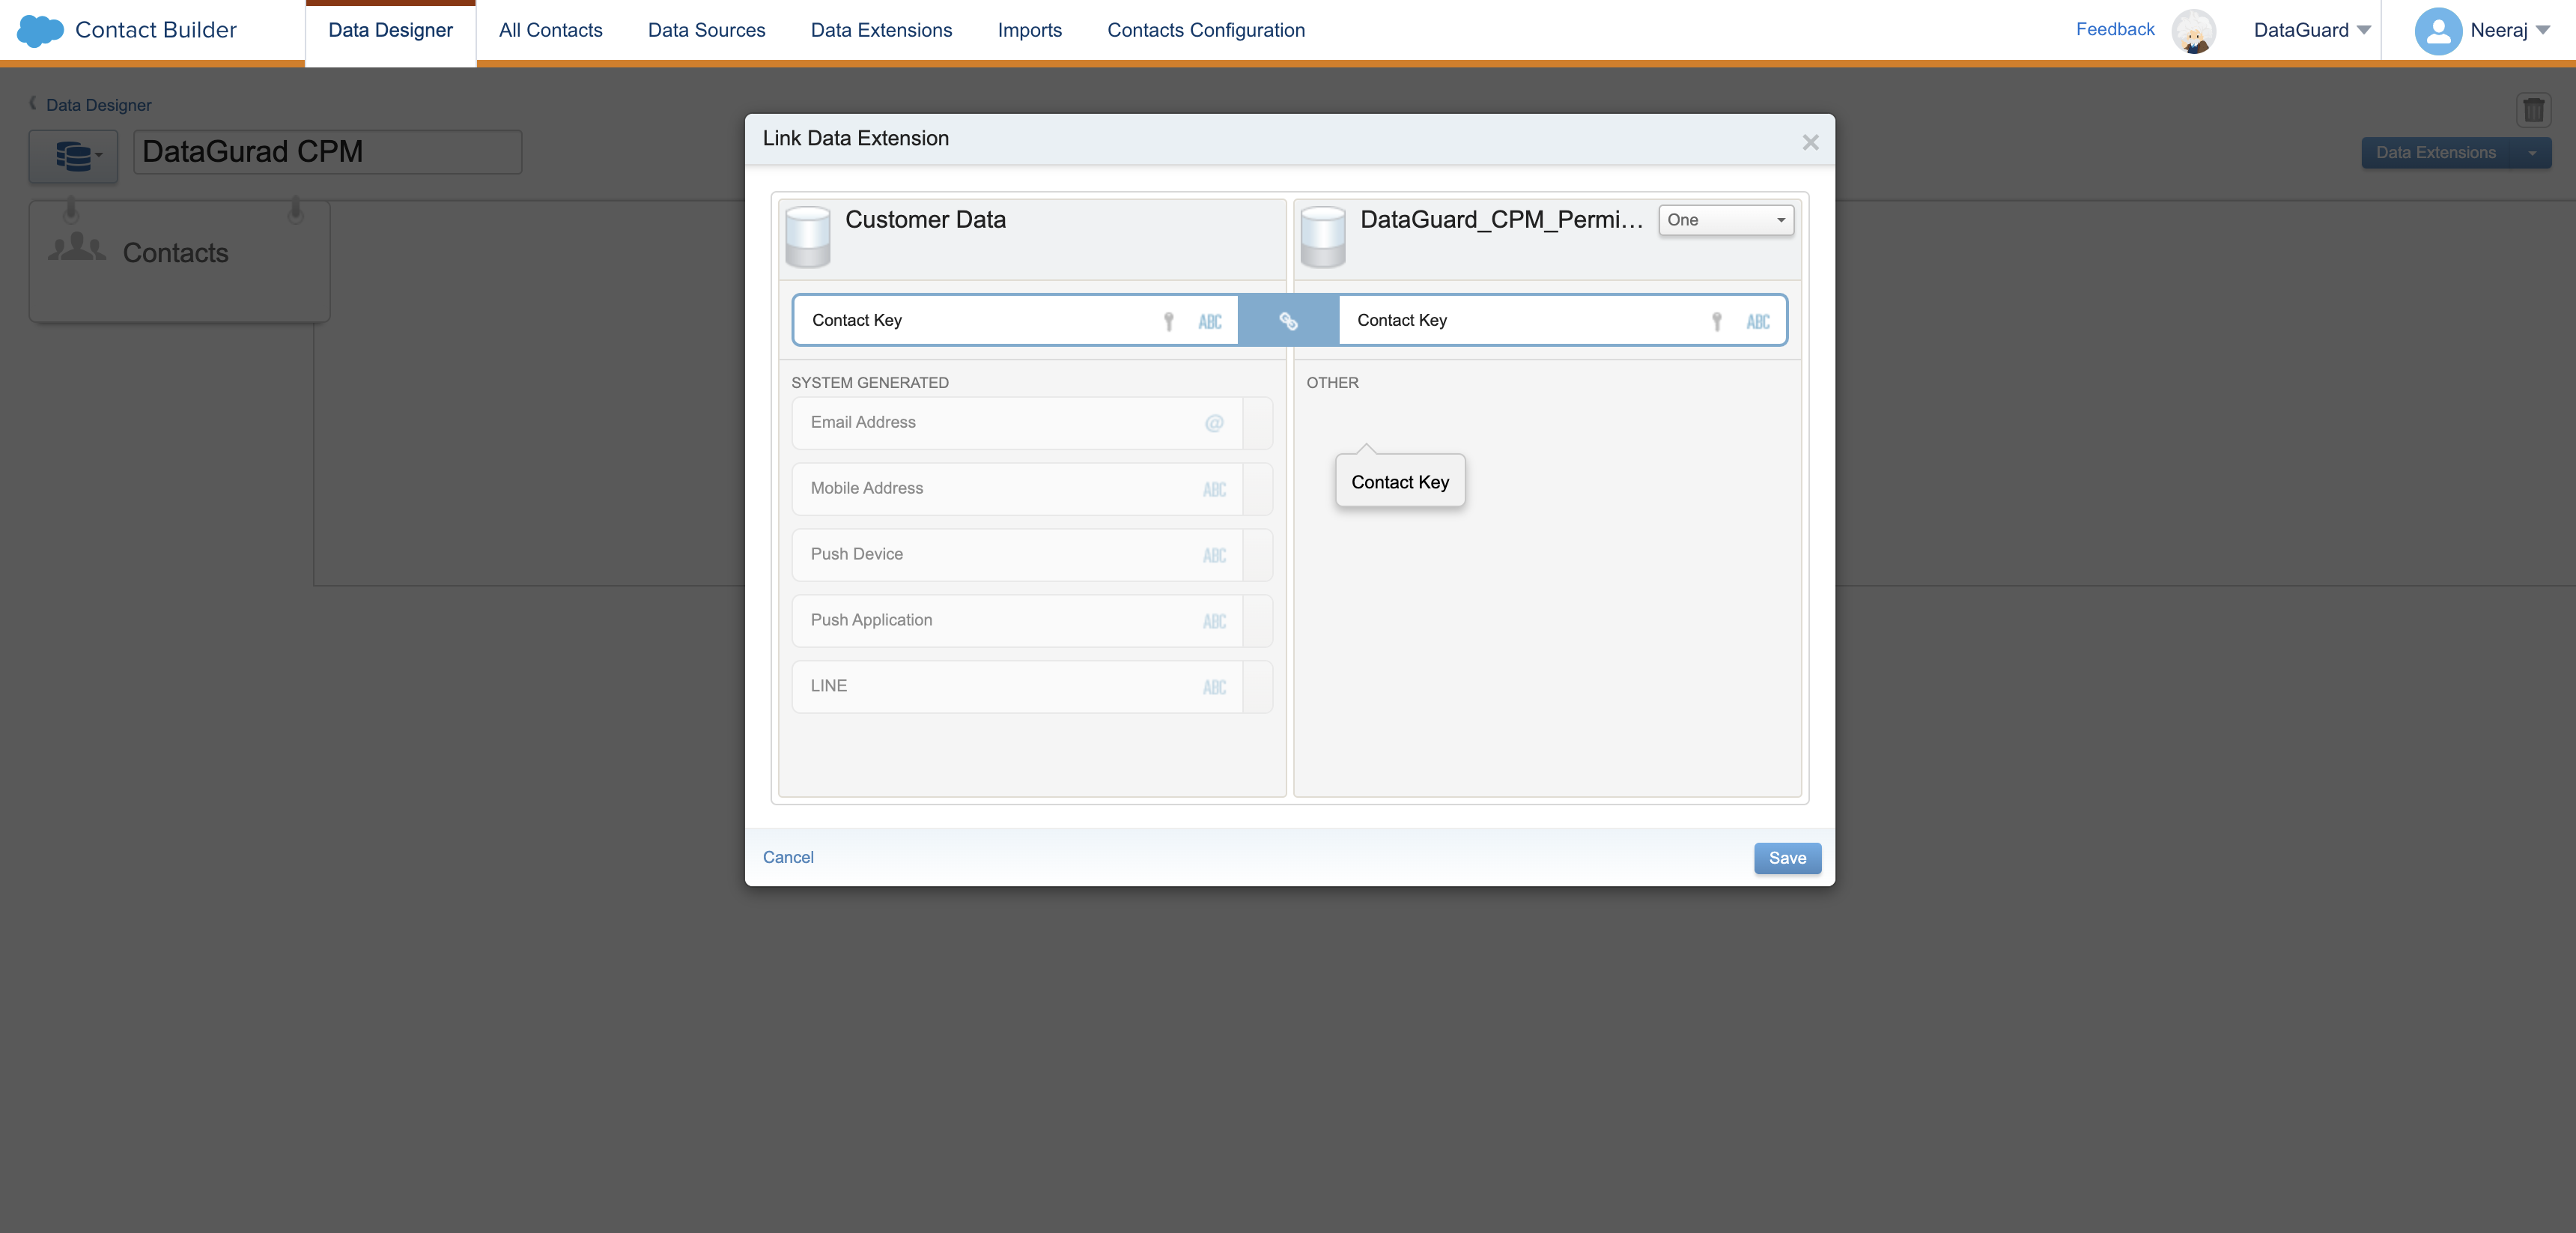
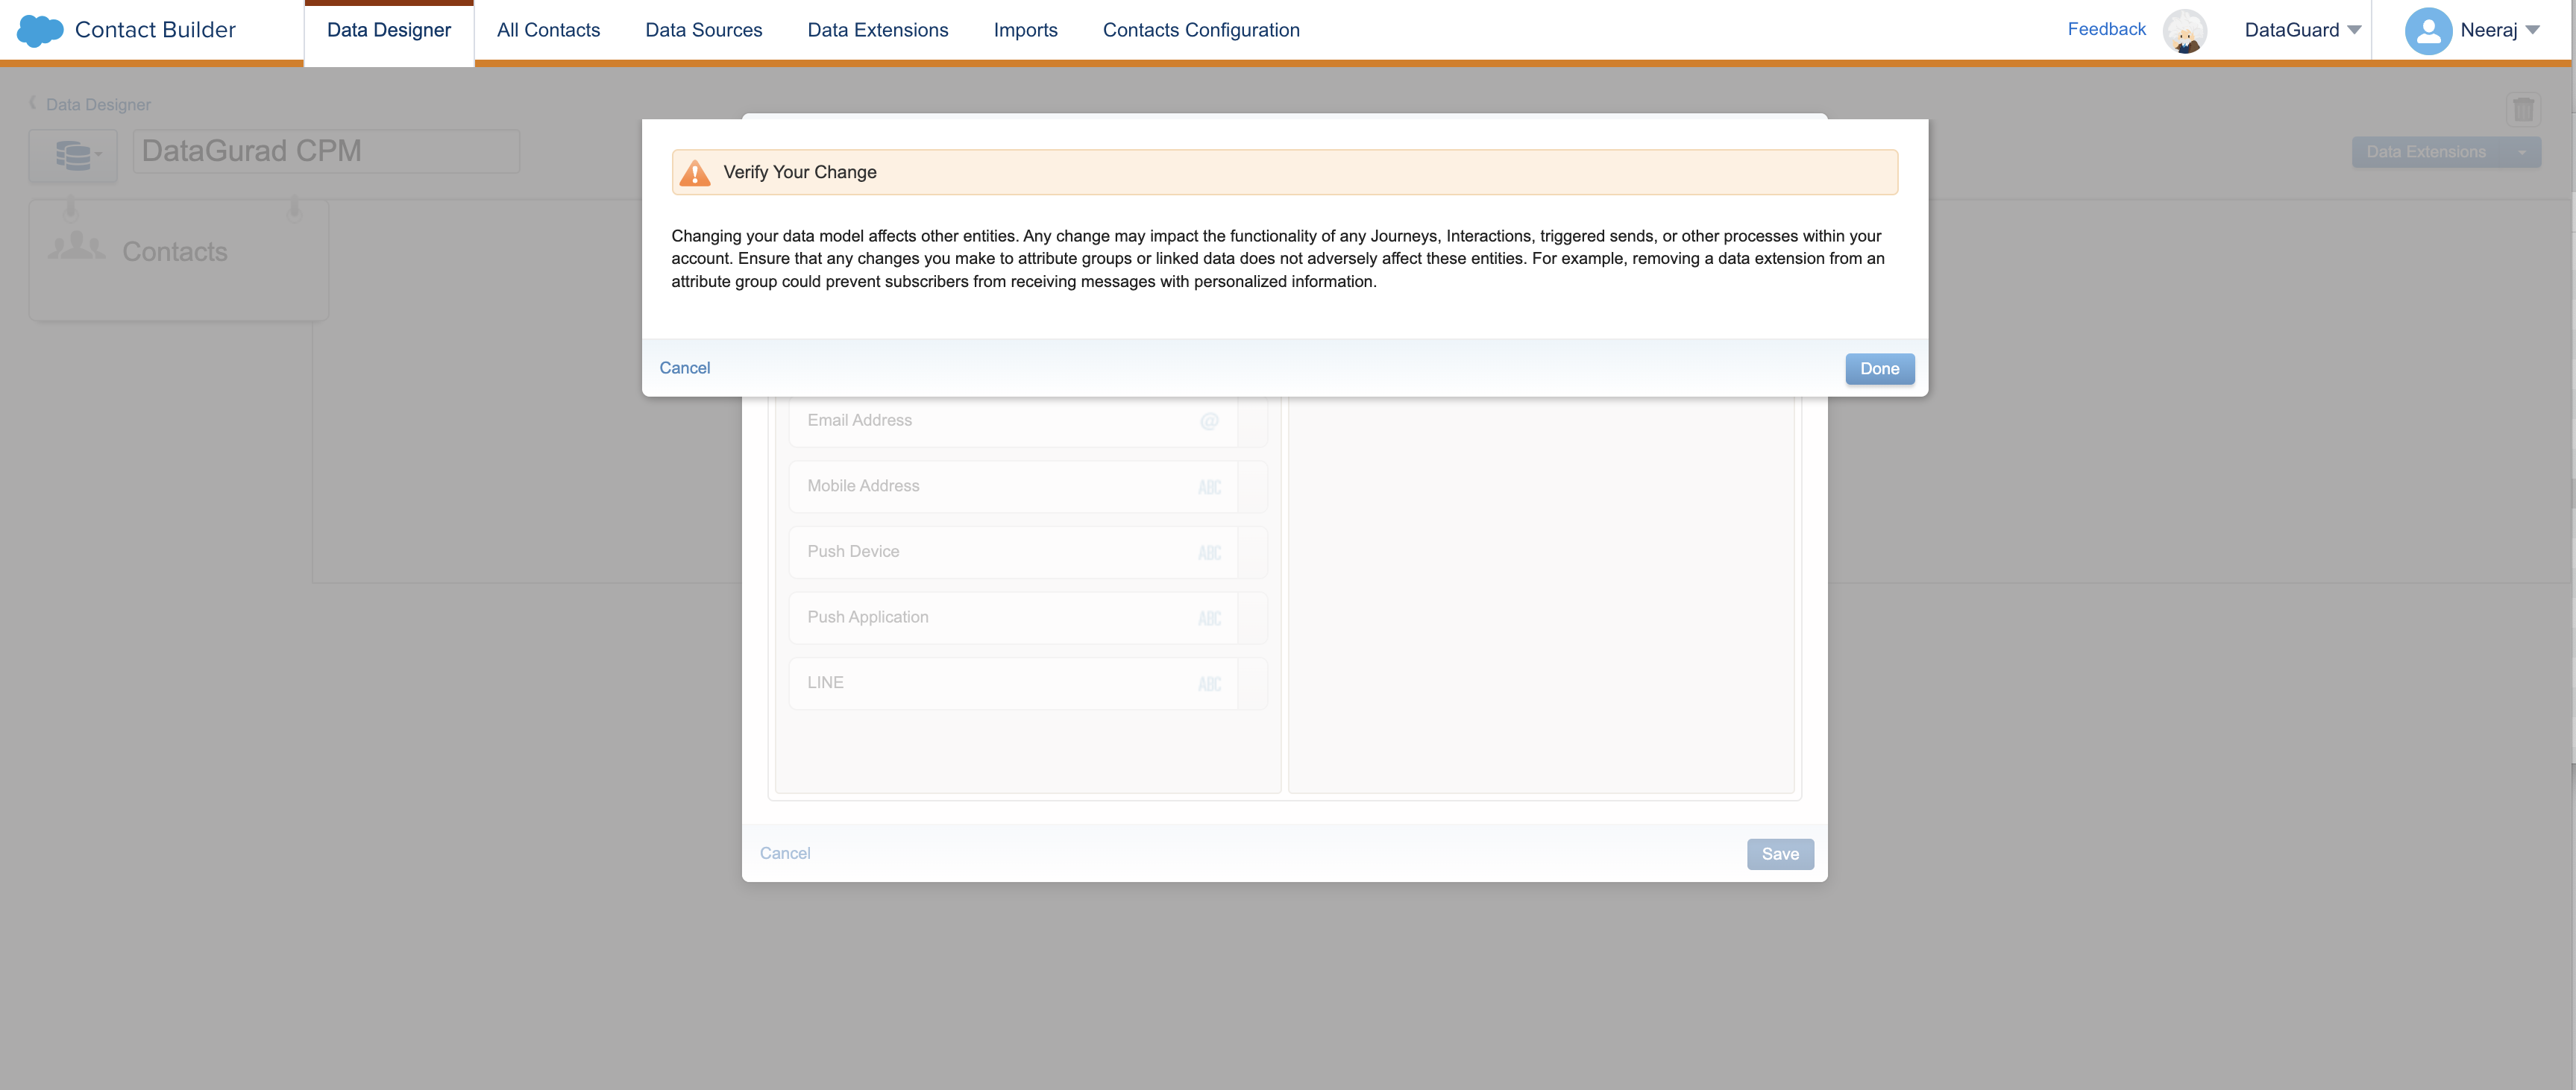
-
Click Save and verify your change by clicking Done
Integration Setup
Access the Integrations Marketplace
-
Log in to the DataGuard CPM Platform.
-
Navigate to the Integrations section and click on Marketplace.
-
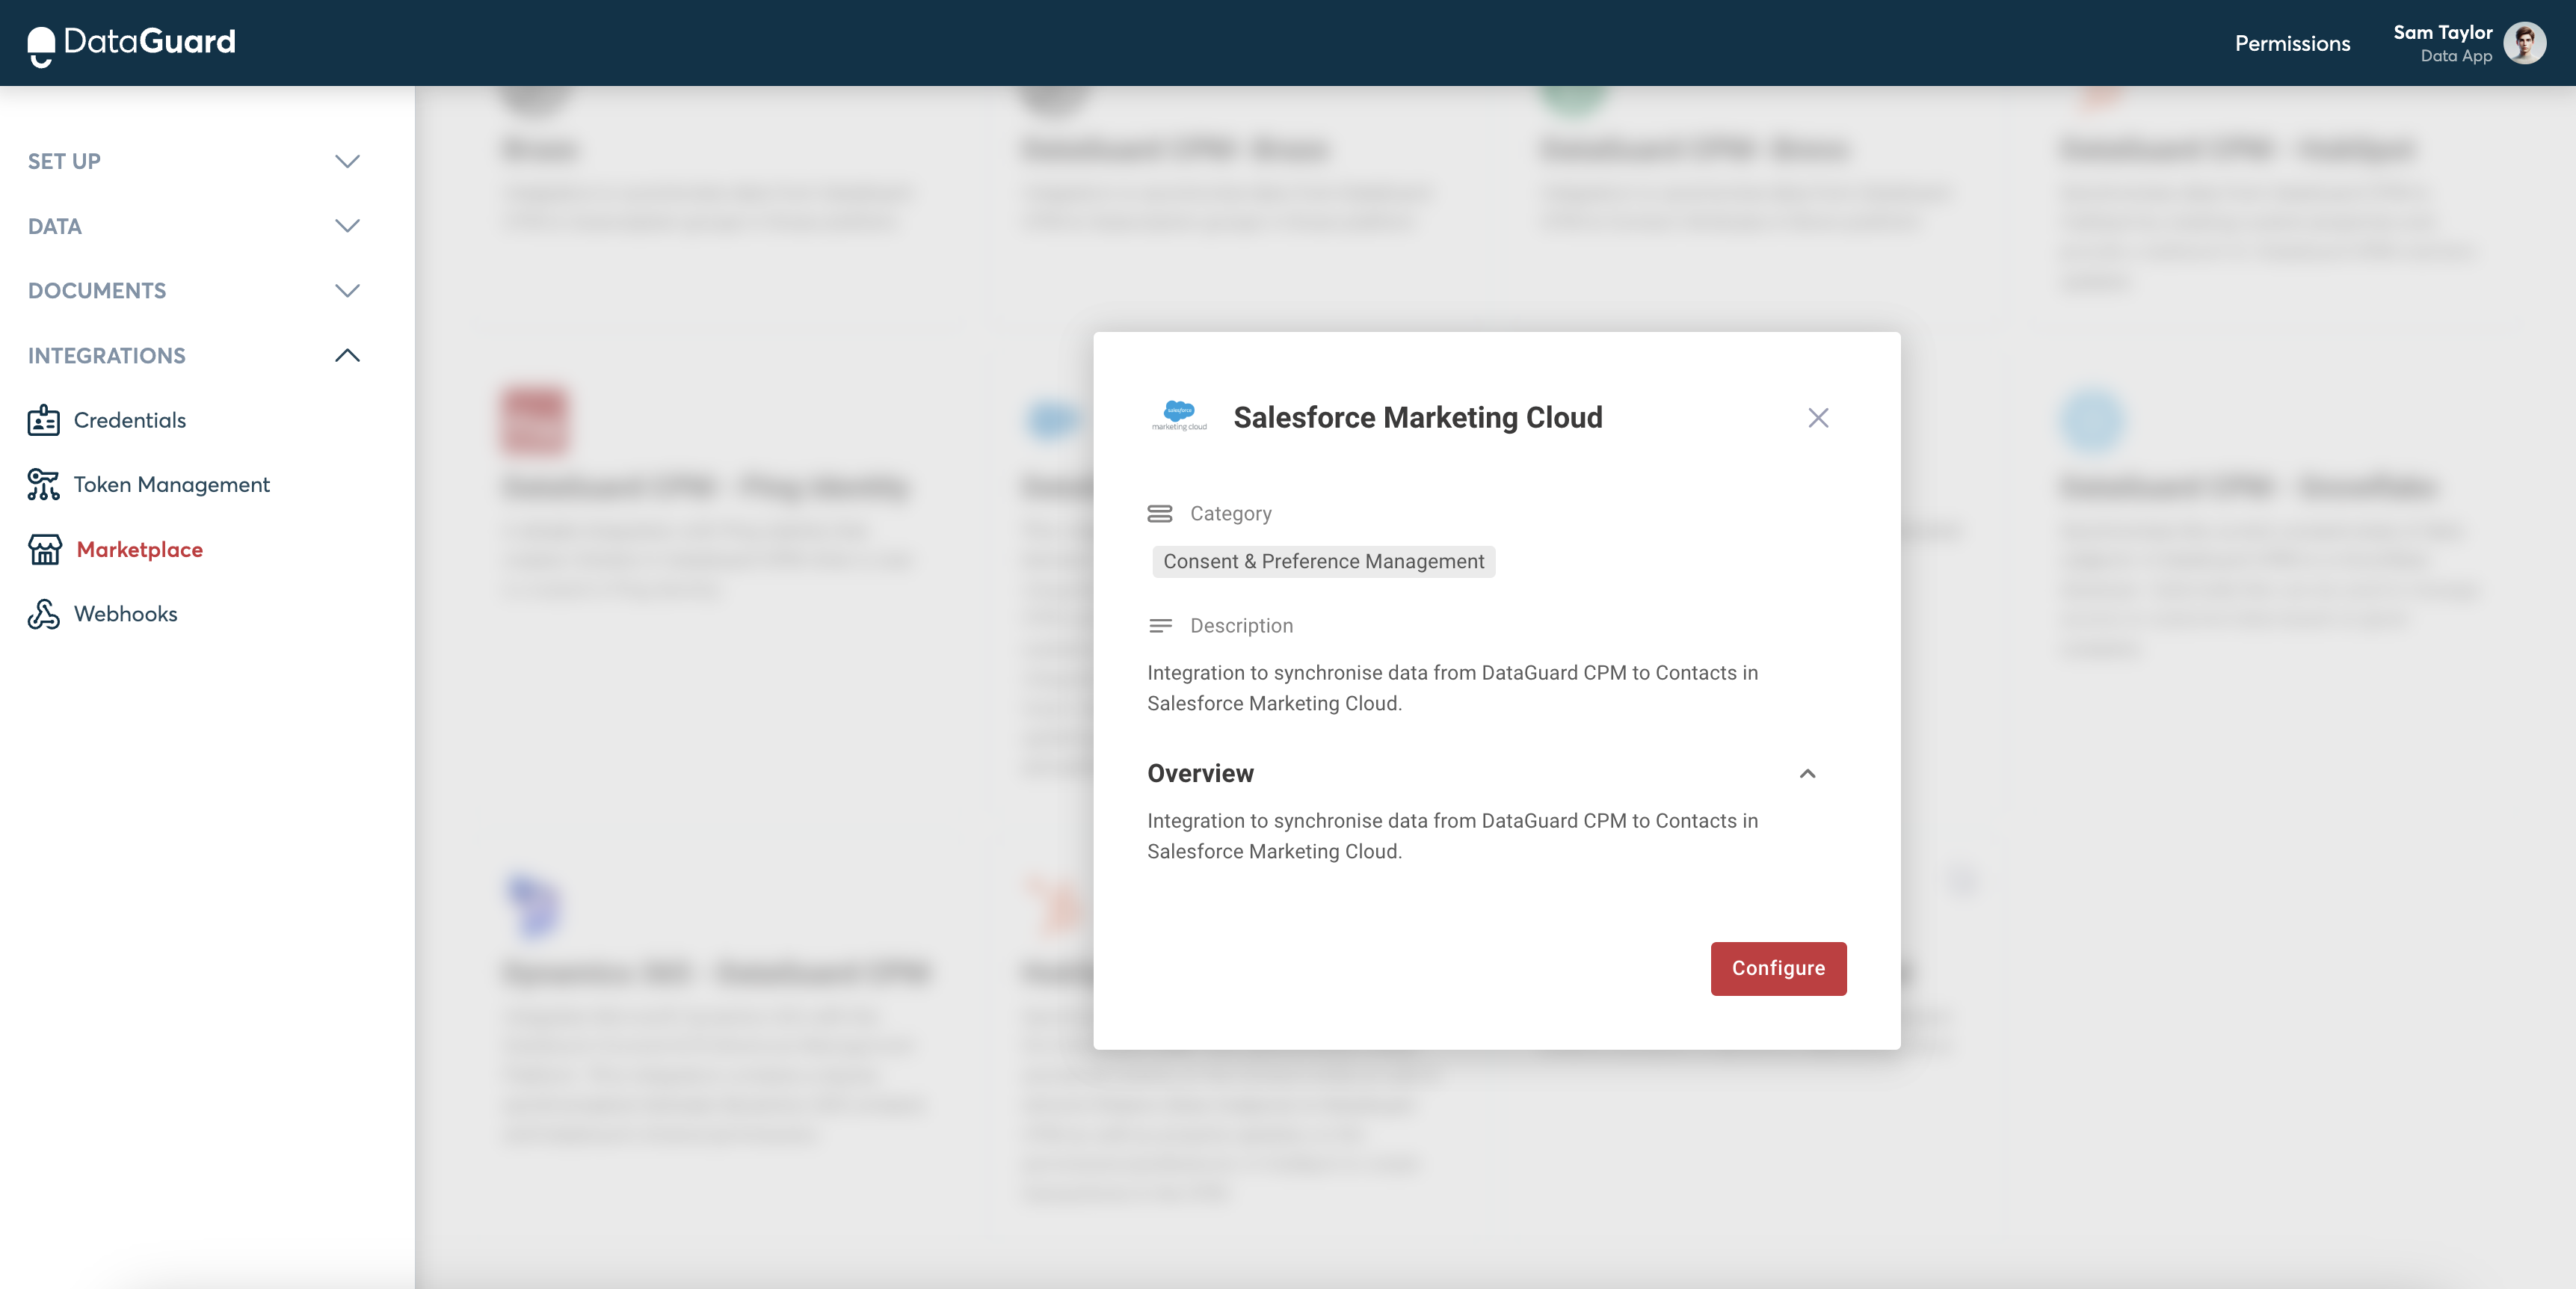
You will see a list of available integrations.
-
Click on the Salesforce Marketing Cloud integration to start the setup.
-
In the popup, click on Configure to begin configuring a new integration instance.
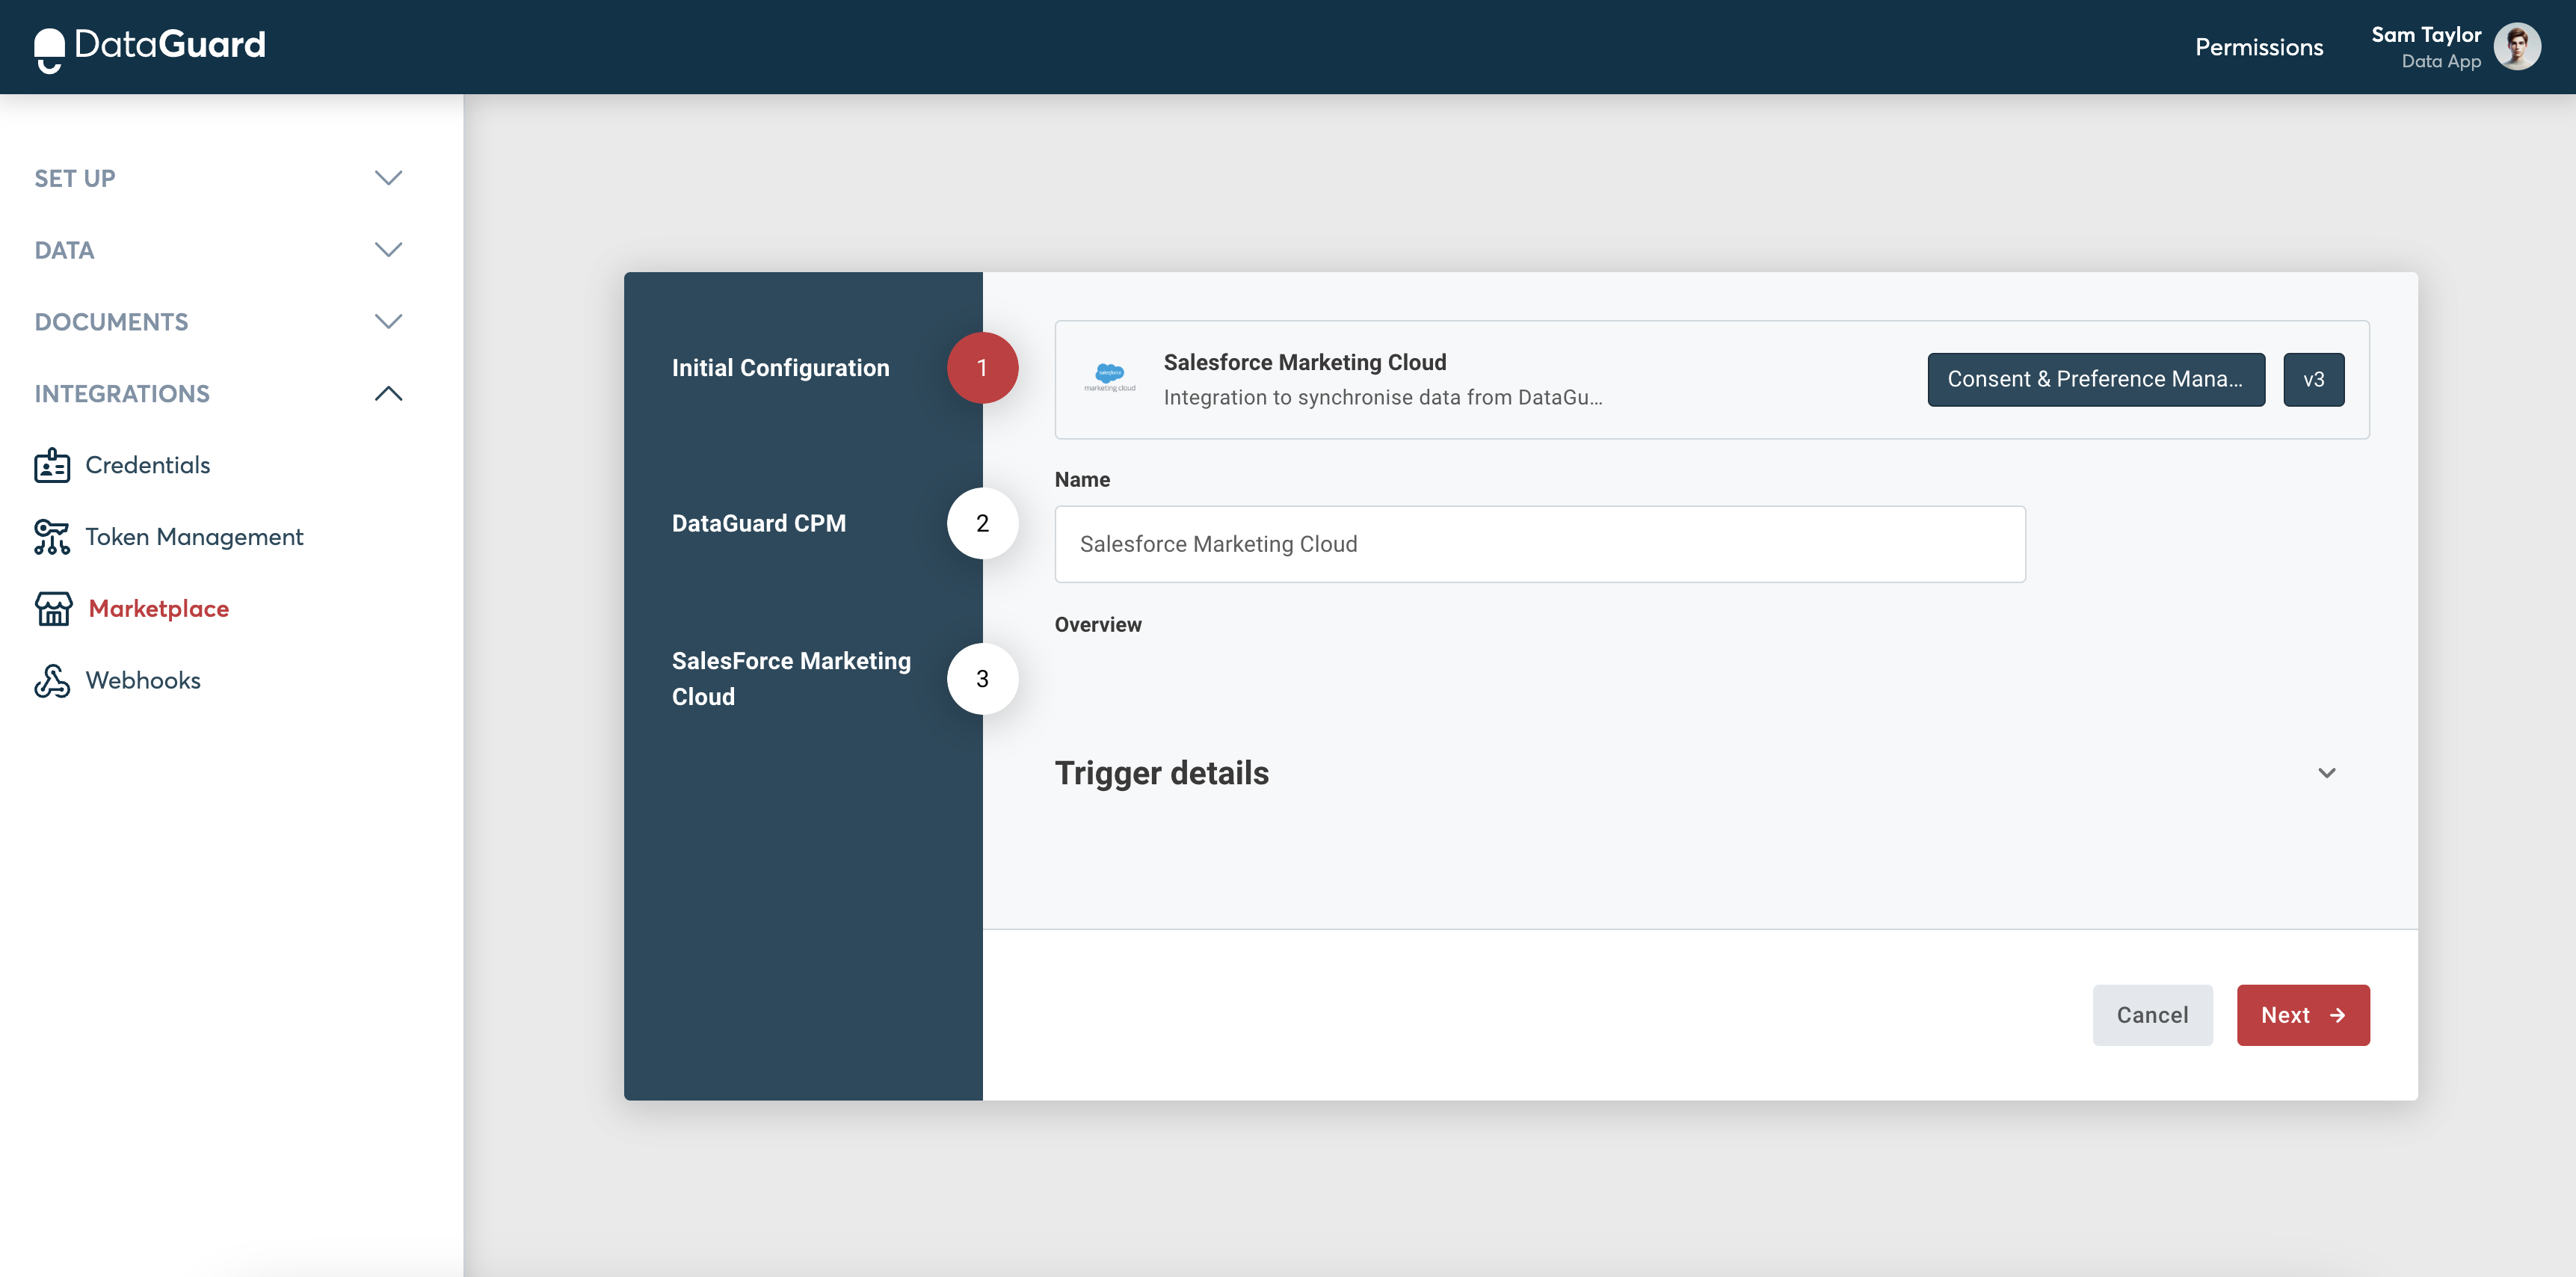
Step 1: Initial Configuration
-
Review the information presented, such as the Name, Version, and Description of the connector.
-
Click Next to proceed.
Step 2: Connections
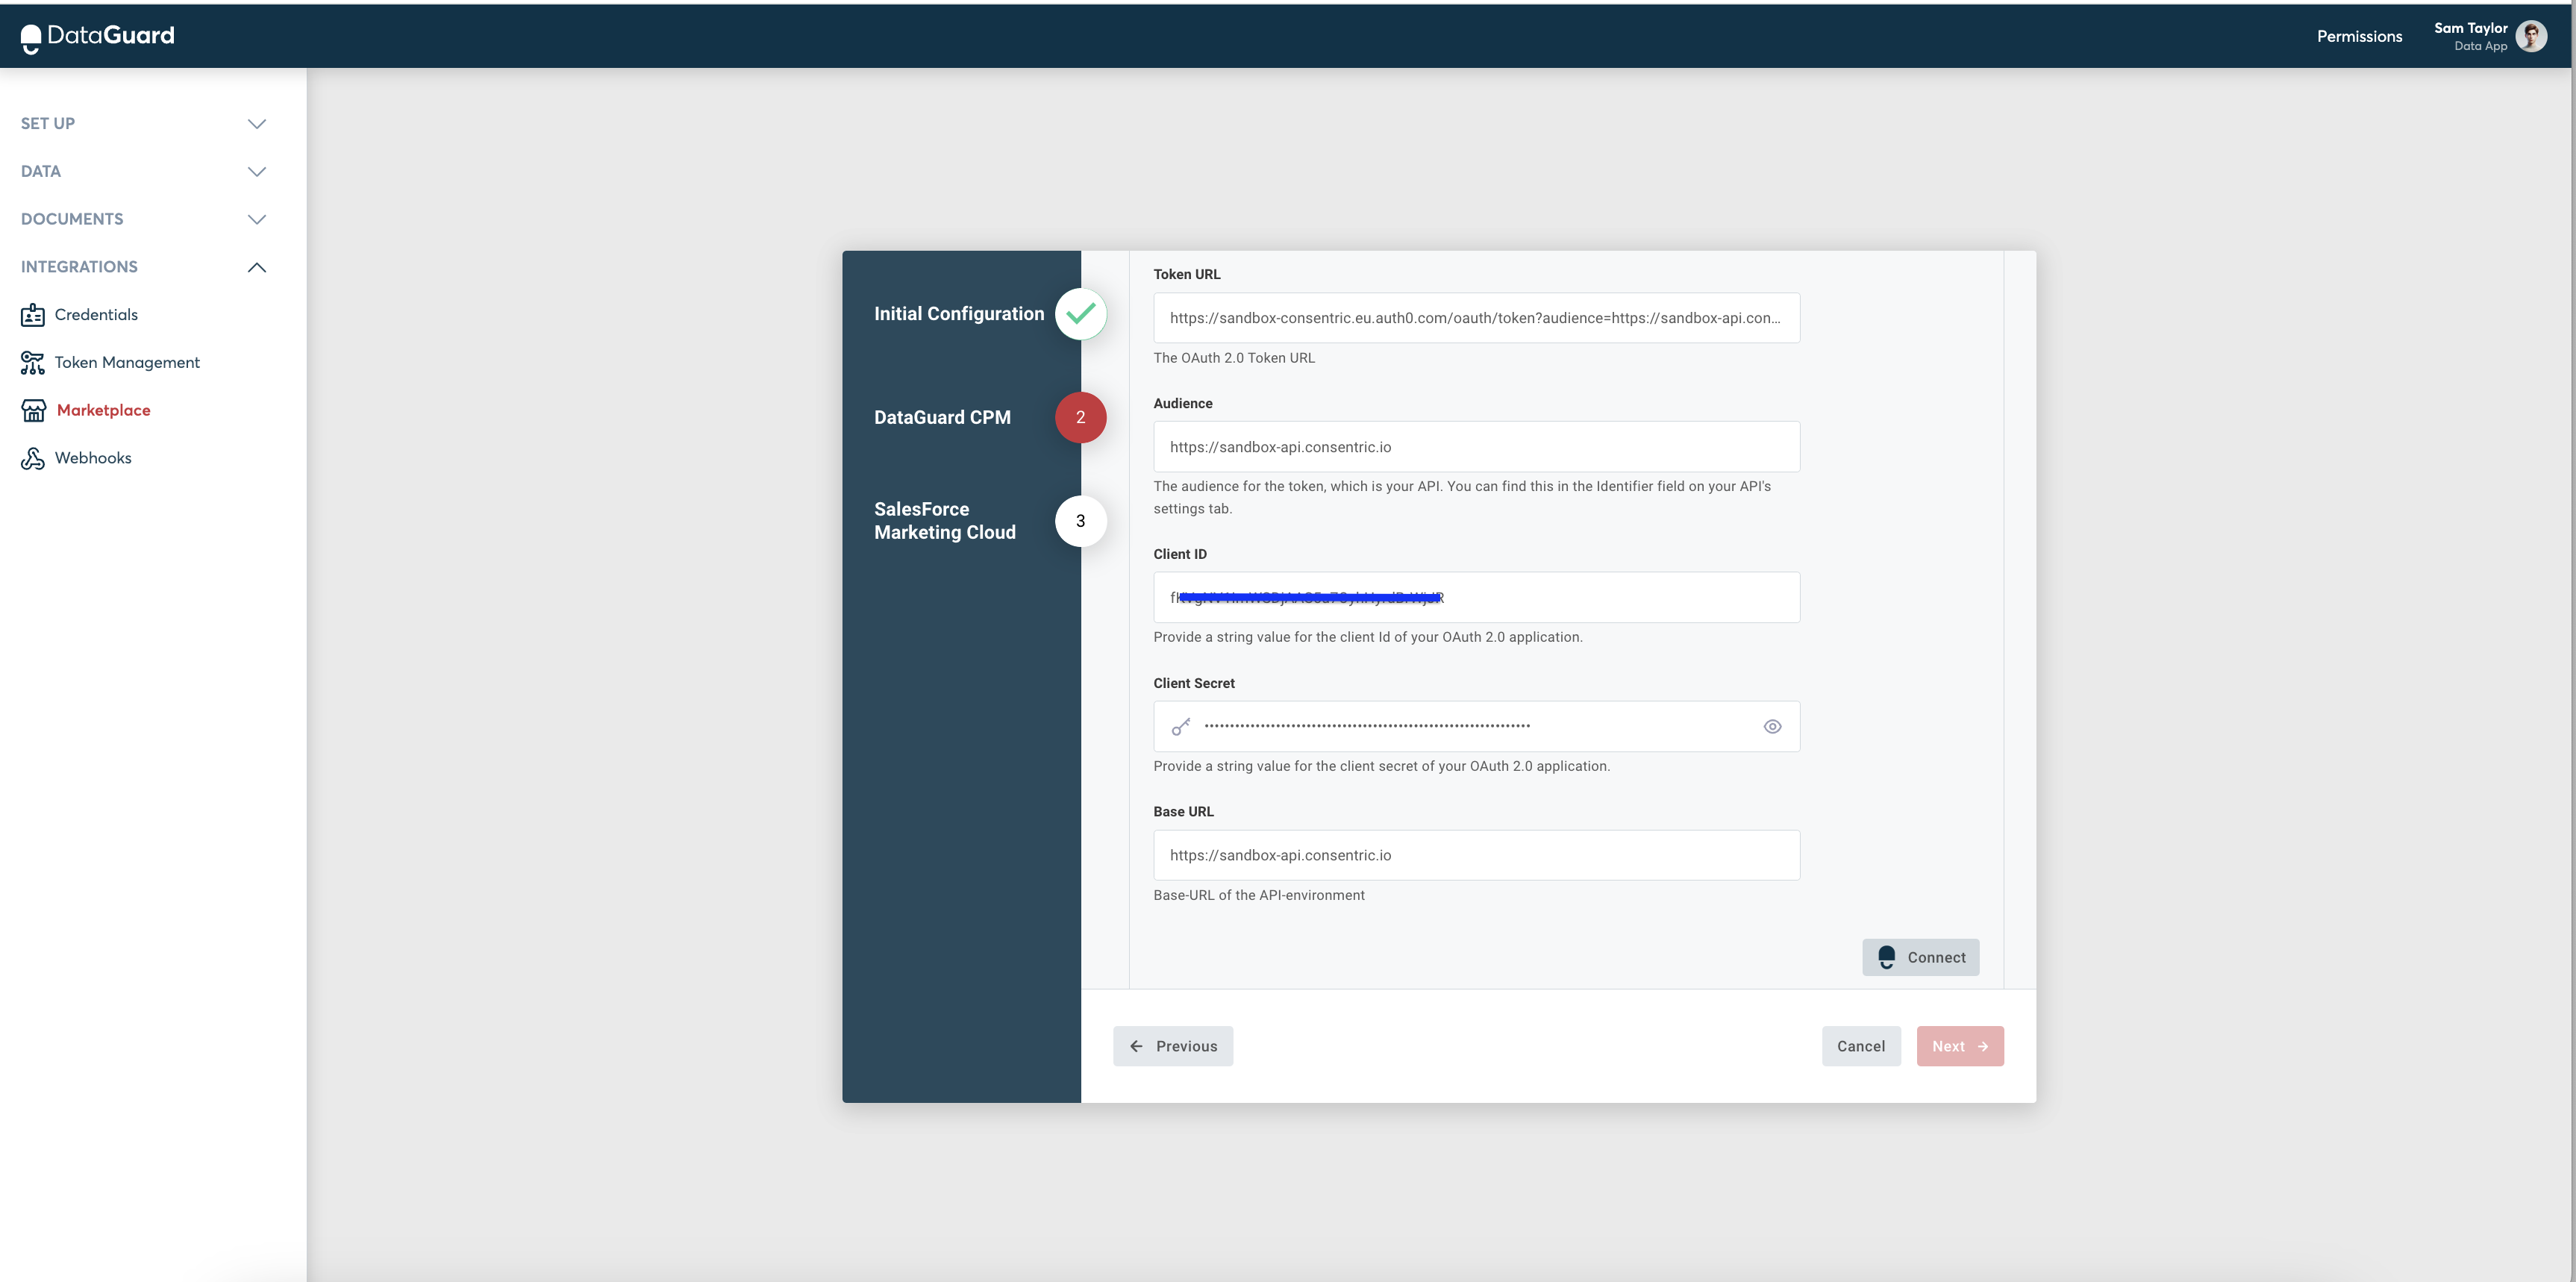
CPM Connection
-
The values of these fields will vary depending on the environment, enter these values into the form, using the Environments page to replace the placeholders below:
- Token URL: Should match this pattern:
<auth-url>/oauth/token?audience=<audience-url>. - Audience URL: Should be
<audience-url>. - Client ID: Is found on the Credentials page of the UI.
- Client Secret: found on the Credentials page of the UI.
- Base URL: Should be
<api-url>.
- Token URL: Should match this pattern:
-
Click Connect to establish the connection.
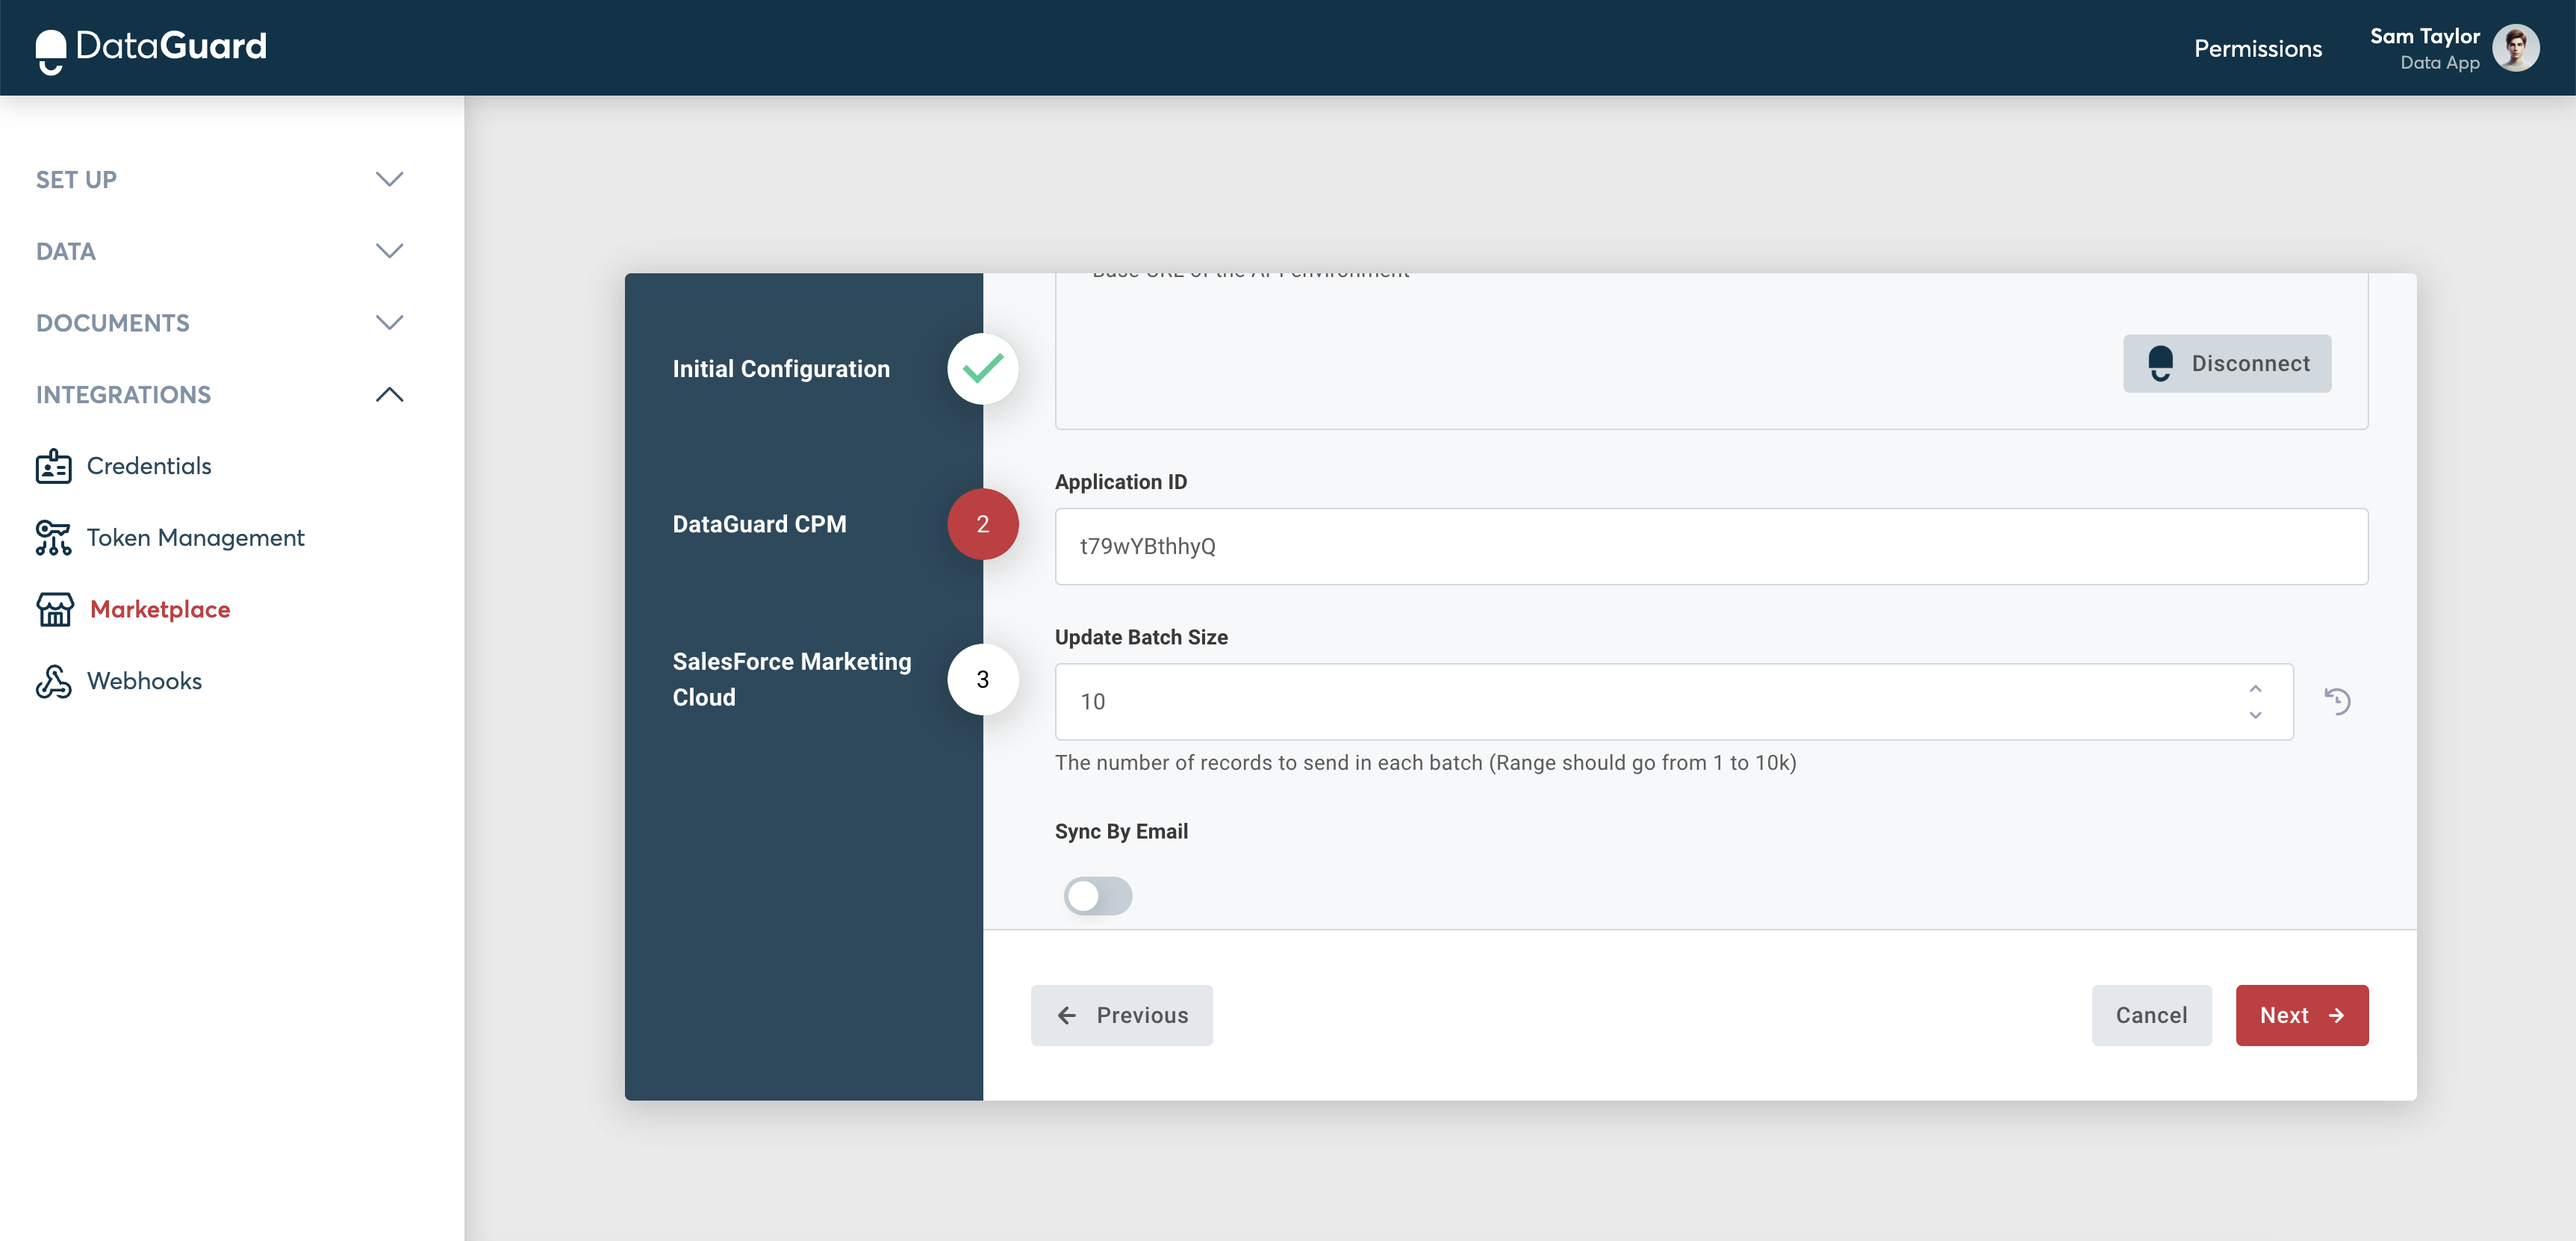
CPM Configuration
-
Application ID: Enter the Application ID, this can be found on the Credentials page of the UI.
-
Update Batch Size: Set the Batch size to define how many updates can be sent to SFMC per minute. This value should match the maximum number of requests you can receive per minute, based on your agreement with SFMC. If the number of updates exceeds this limit, DataGuard will queue the additional updates and send them later. The acceptable range for the batch size is between 1 and 10,000.
-
Sync By Email: Optionally, enable Sync By Email if you wish to use the Email Address field to map between Salesforce Marketing Cloud and CPM records.
-
Click Next to proceed.
Step 3: Salesforce Marketing Cloud Configuration
The values of the fields can be found in the installed packages page of your SFMC account.
To get the values:
- Login to your Salesforce Marketing Cloud account.
- Go to Setup > Platform Tools
- Navigate to Apps > Installed packages
- Click on the installed package “DataGuard CPM Integration”. The page will contain the fields for the API integration component added in earlier steps.
- Client ID: The Client ID of the API Integration component
- Client Secret: The Client secret of the API Integration component
- Host URL: The Authentication Base URI for token creation for SFMC. Should match format:
<Authentication Base URI>/v2/token - Config Update URL: The URL where the config updates should be synced. Should match format:
<SOAP Base URI>/Service.asmx - Citizen Update URL: The URL where the consent updates for Contacts should be synced. Should match format:
<REST Base URI>/v1/contacts
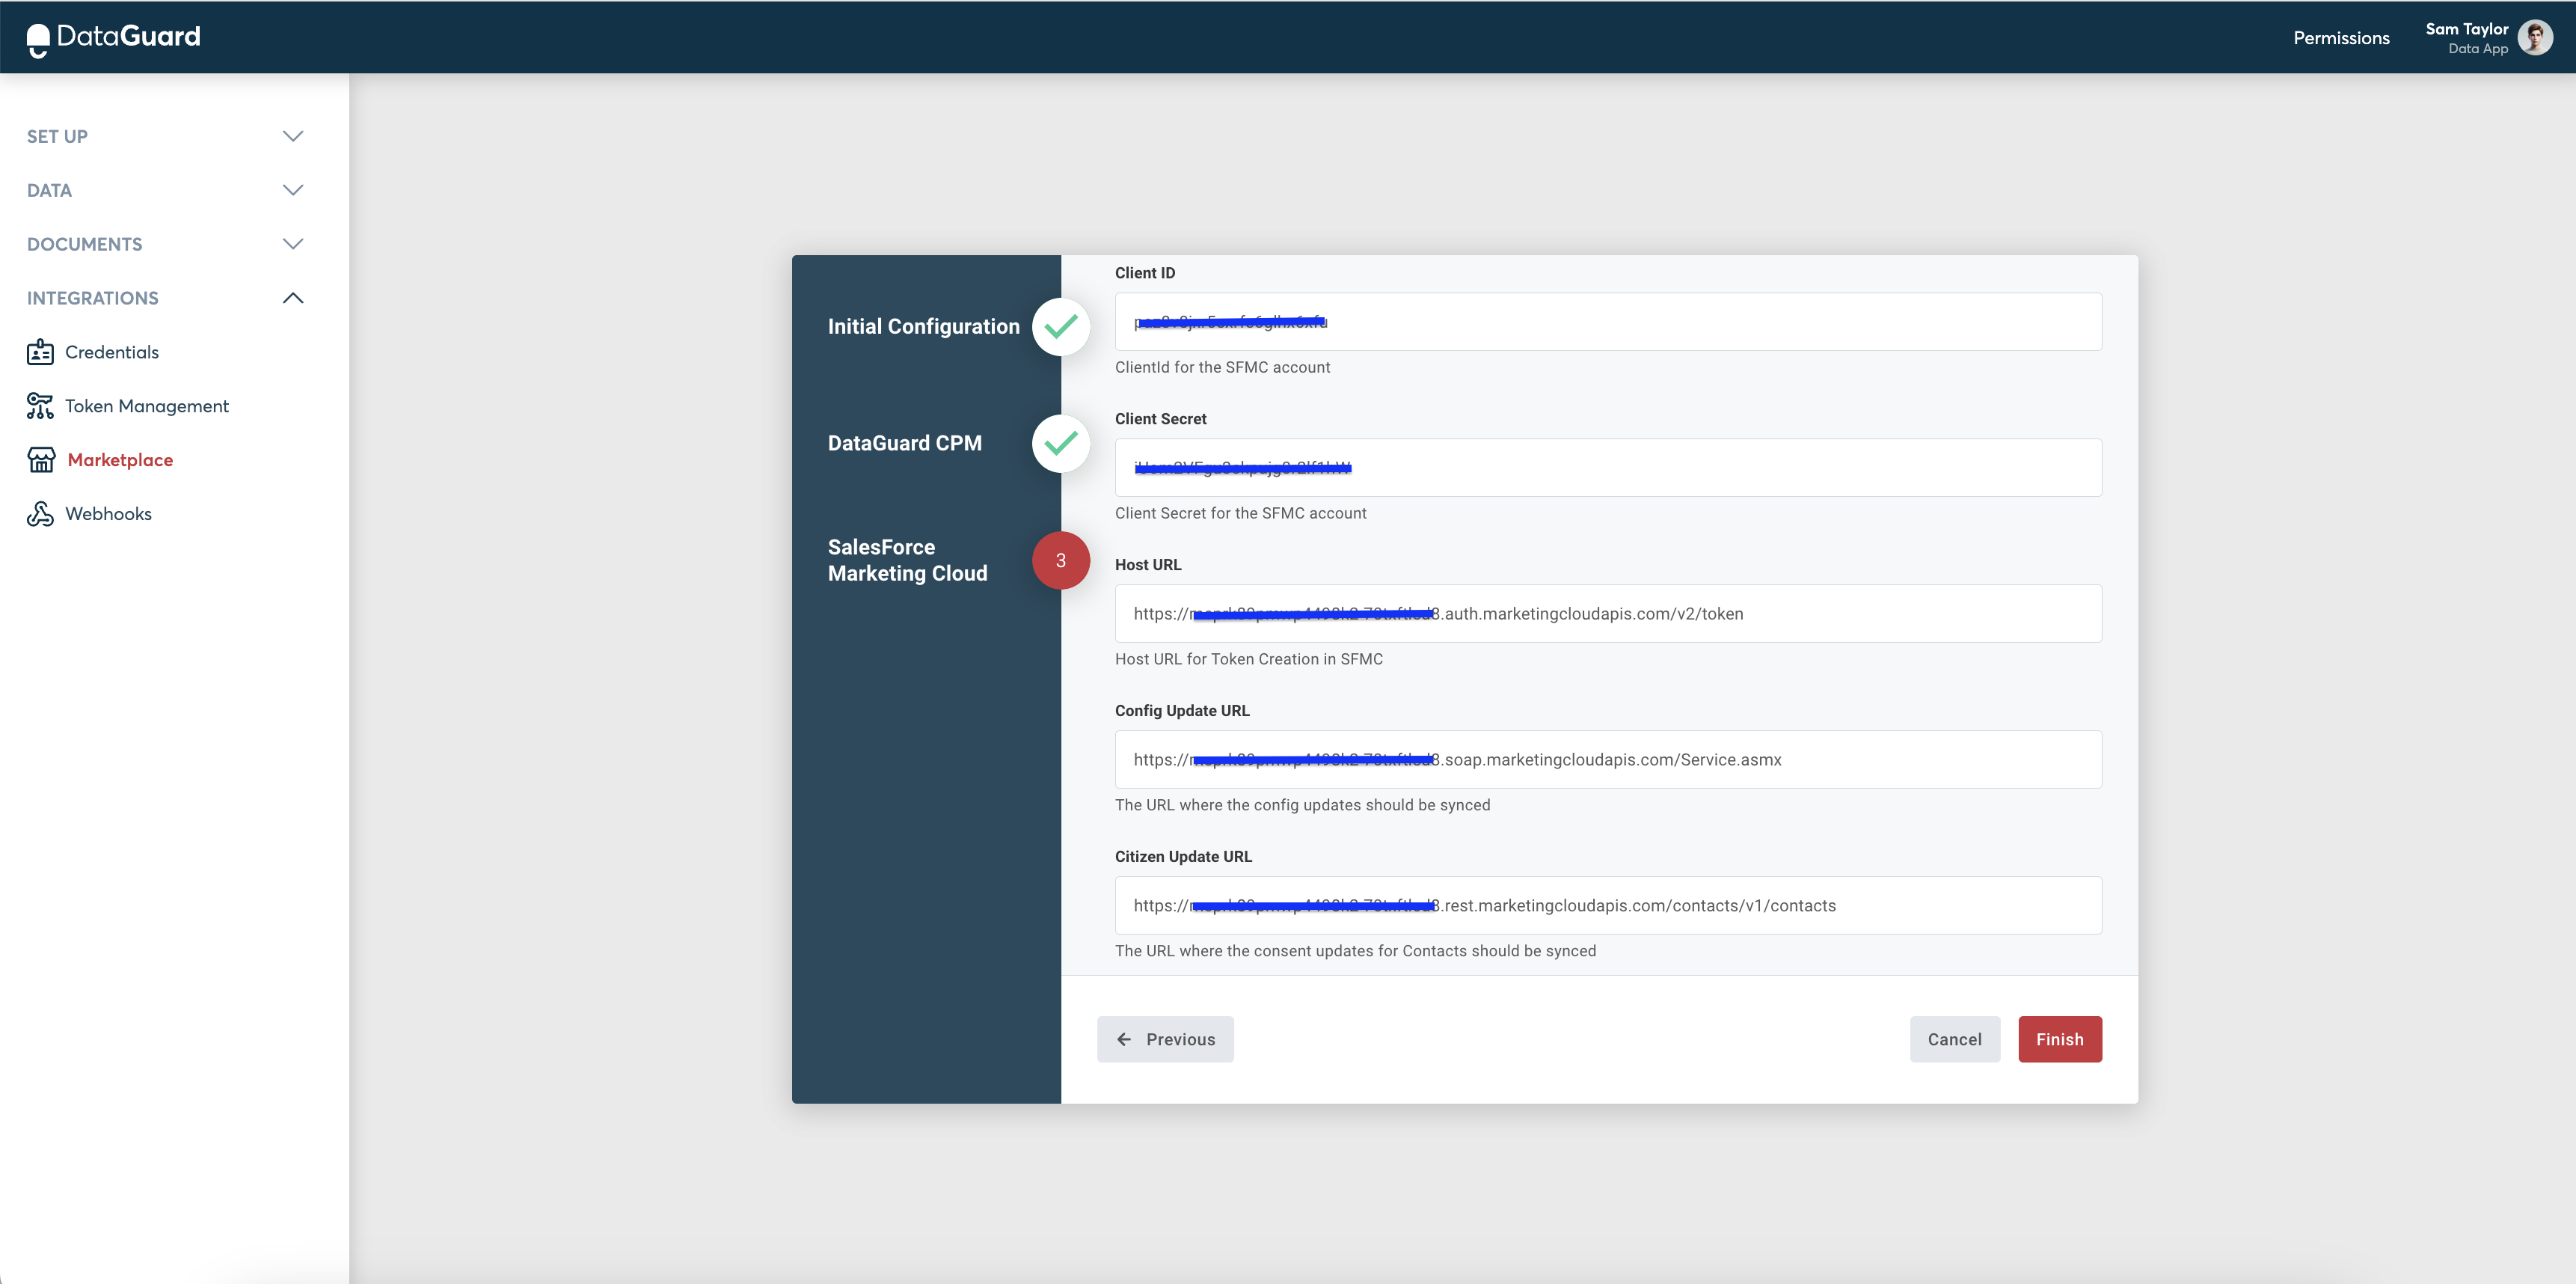
- Click Finish to complete the instance configuration.
Conclusion
Your Salesforce Marketing Cloud integration with DataGuard CPM is now complete. Your data will be automatically synced, ensuring that your Salesforce Marketing Cloud Contacts and DataGuard CPM stay aligned with the latest consent and preference information!
Updated over 1 year ago