Mailchimp

Mailchimp is a marketing automation and email campaign platform that helps businesses manage and communicate with their users. It allows you to create, send, and track email campaigns, manage contact lists, and automate communication—all from a single, easy-to-use dashboard.
Prerequisites
Before you begin, ensure you have the following:
- Access to the DataGuard CPM Platform.
- Administrative access to a Mailchimp account to set up the integration.
If you don't have access to the DataGuard CPM Platform, please contact us.
Mailchimp Setup
Obtain the API Key
- Log into your Mailchimp account
- Under Profile settings select Account & billing
- Click Extras->API keys” from the dropdown.
- Scroll to the Your API keys section
- Click Create A Key button and give it a descriptive name that will remind you which application it’s used for.
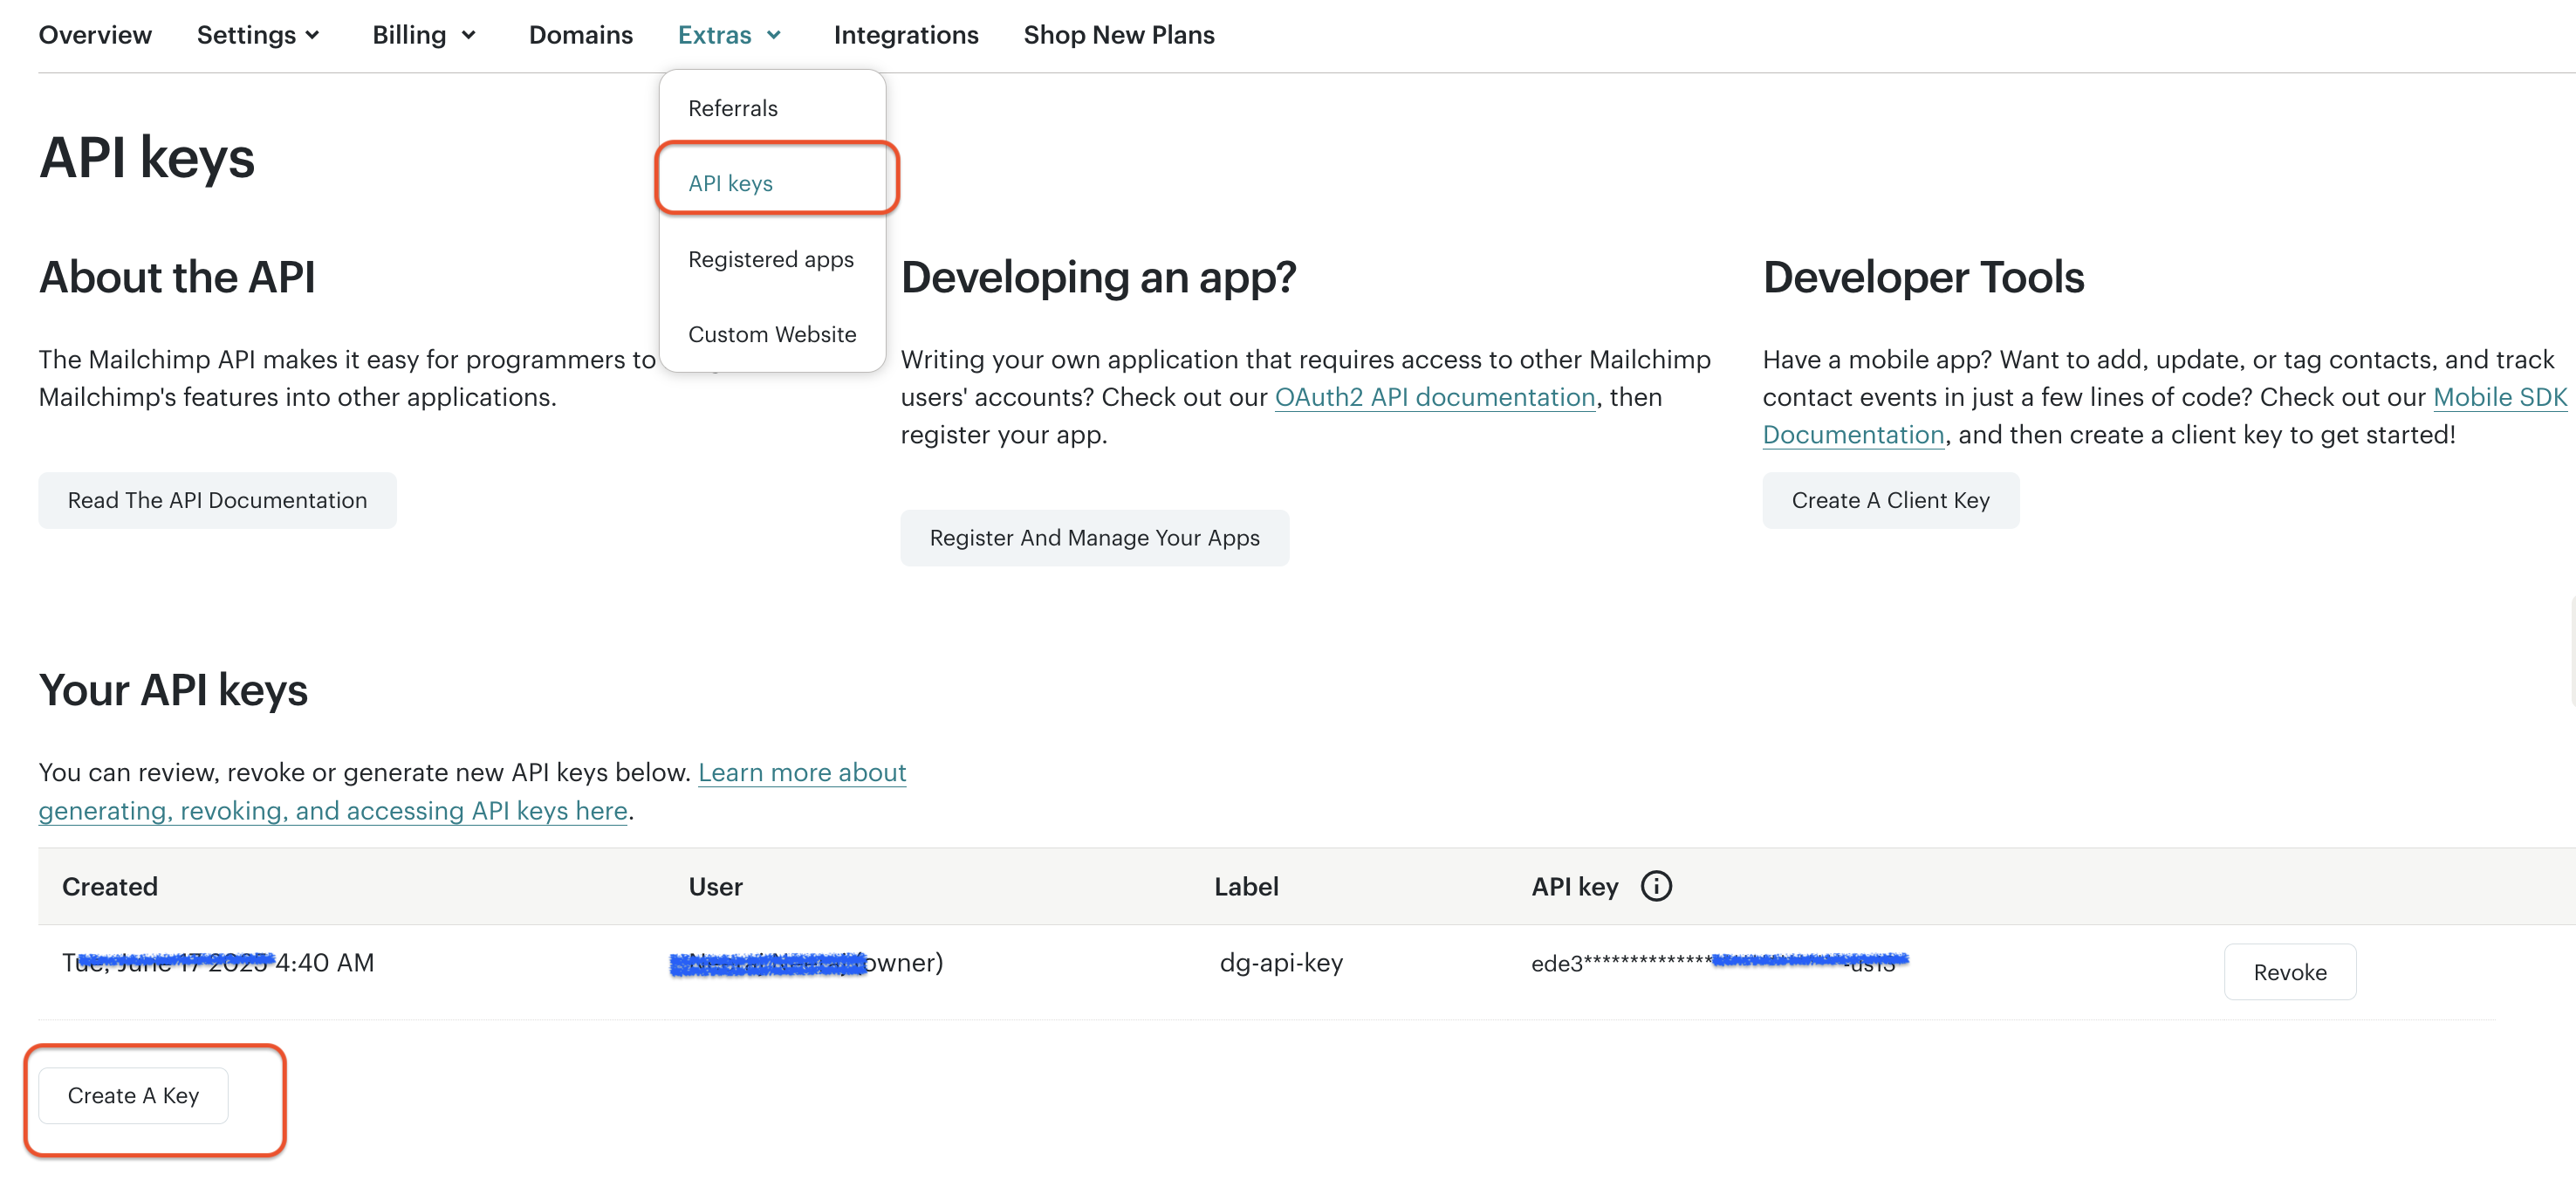
- After obtaining the API Key, keep it safe for use during the instance configuration process. Copy the generated key immediately and store it in a secure location. You won’t be able to see or copy the key once you finish generating it.
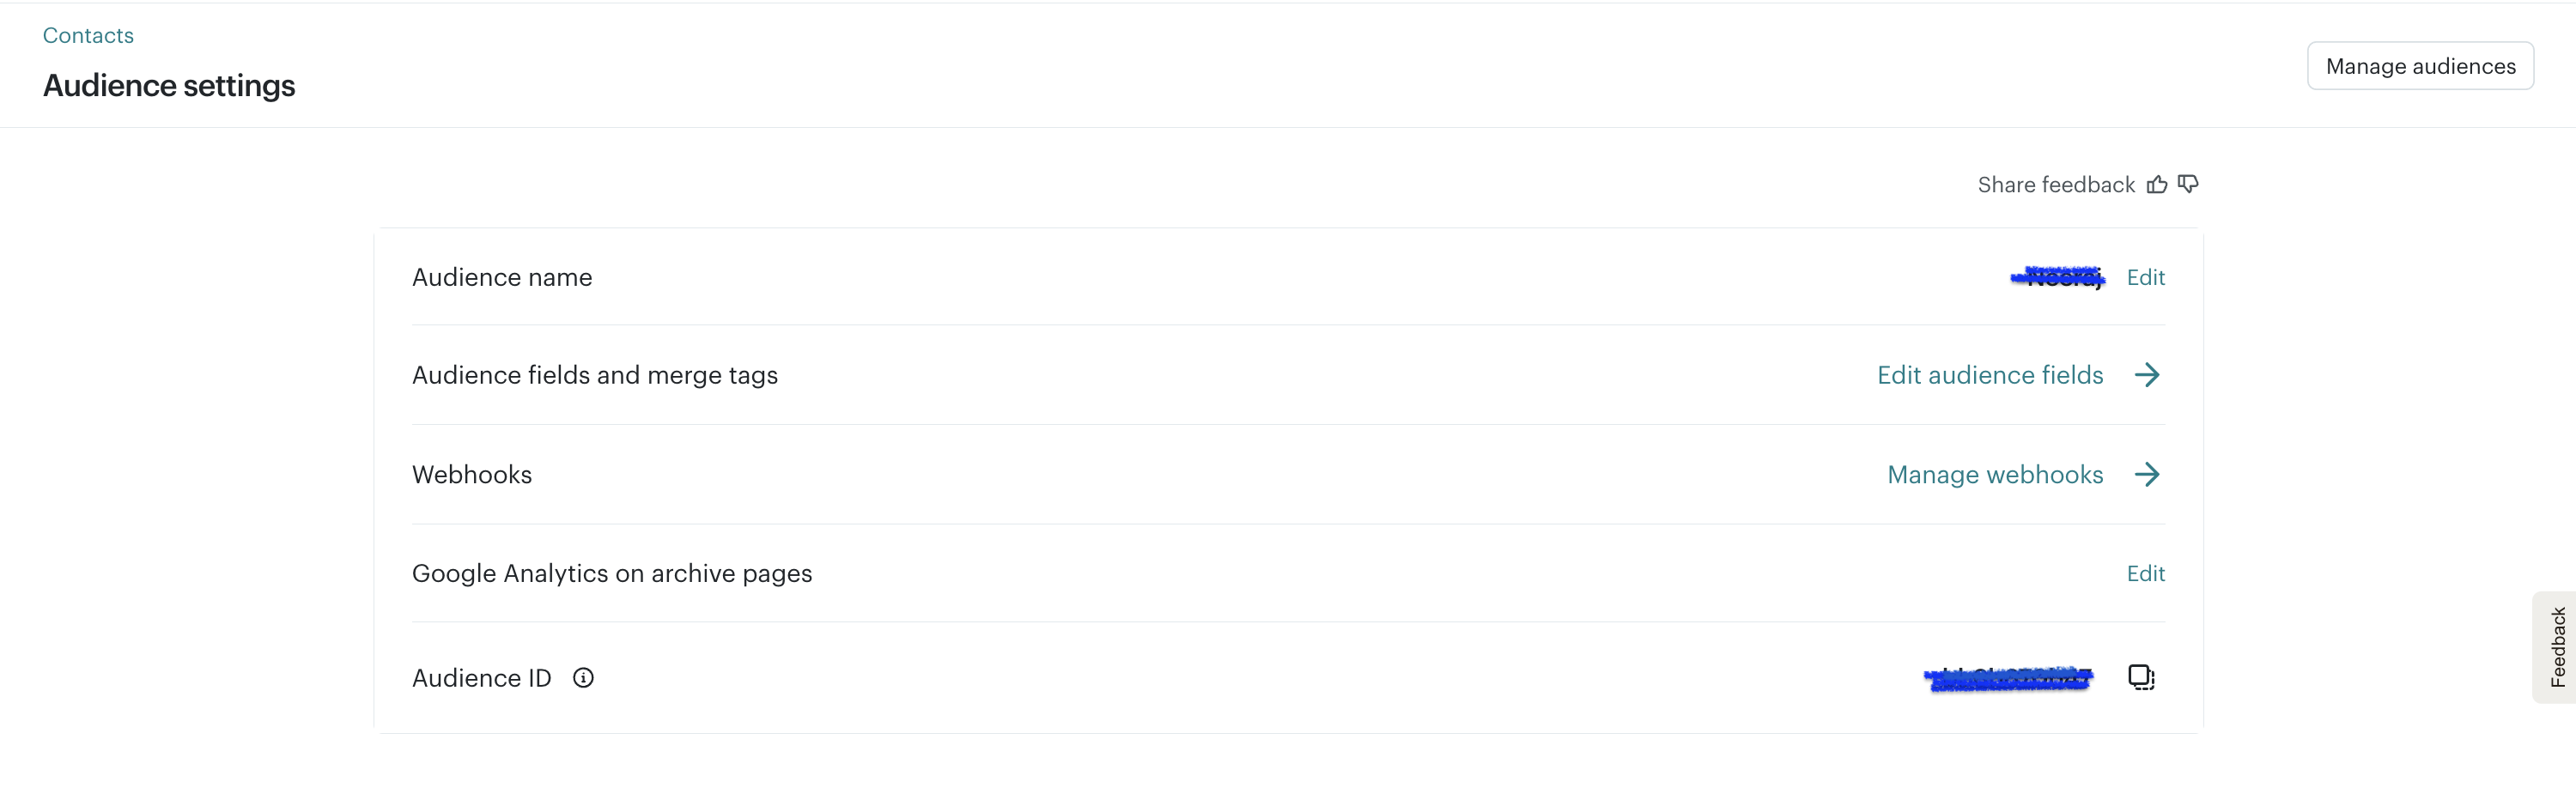
Obtain the Audience Id/ List Id
During setup we will need the Id of the audience for which users' consent data needs to be synced.
To find the Audience Id :
- Log into the Mailchimp account
- From the left-hand menu, click Audience.
- Click More options and select Audience settings from dropdown. If you have more than one audience, select the one you want to work with
- Scroll down to the section called Audience name and defaults
- You’ll see a field labeled Audience ID (or "List ID")
Integration Setup
Access the Integrations Marketplace
- Log in to the DataGuard CPM Platform.
- Navigate to the Integrations section and click on Marketplace.
- You will see a list of available integrations.
- Click on the Mailchimp integration to start the setup.
- In the popup, click on Configure / Add Instance to begin configuring a new integration instance.
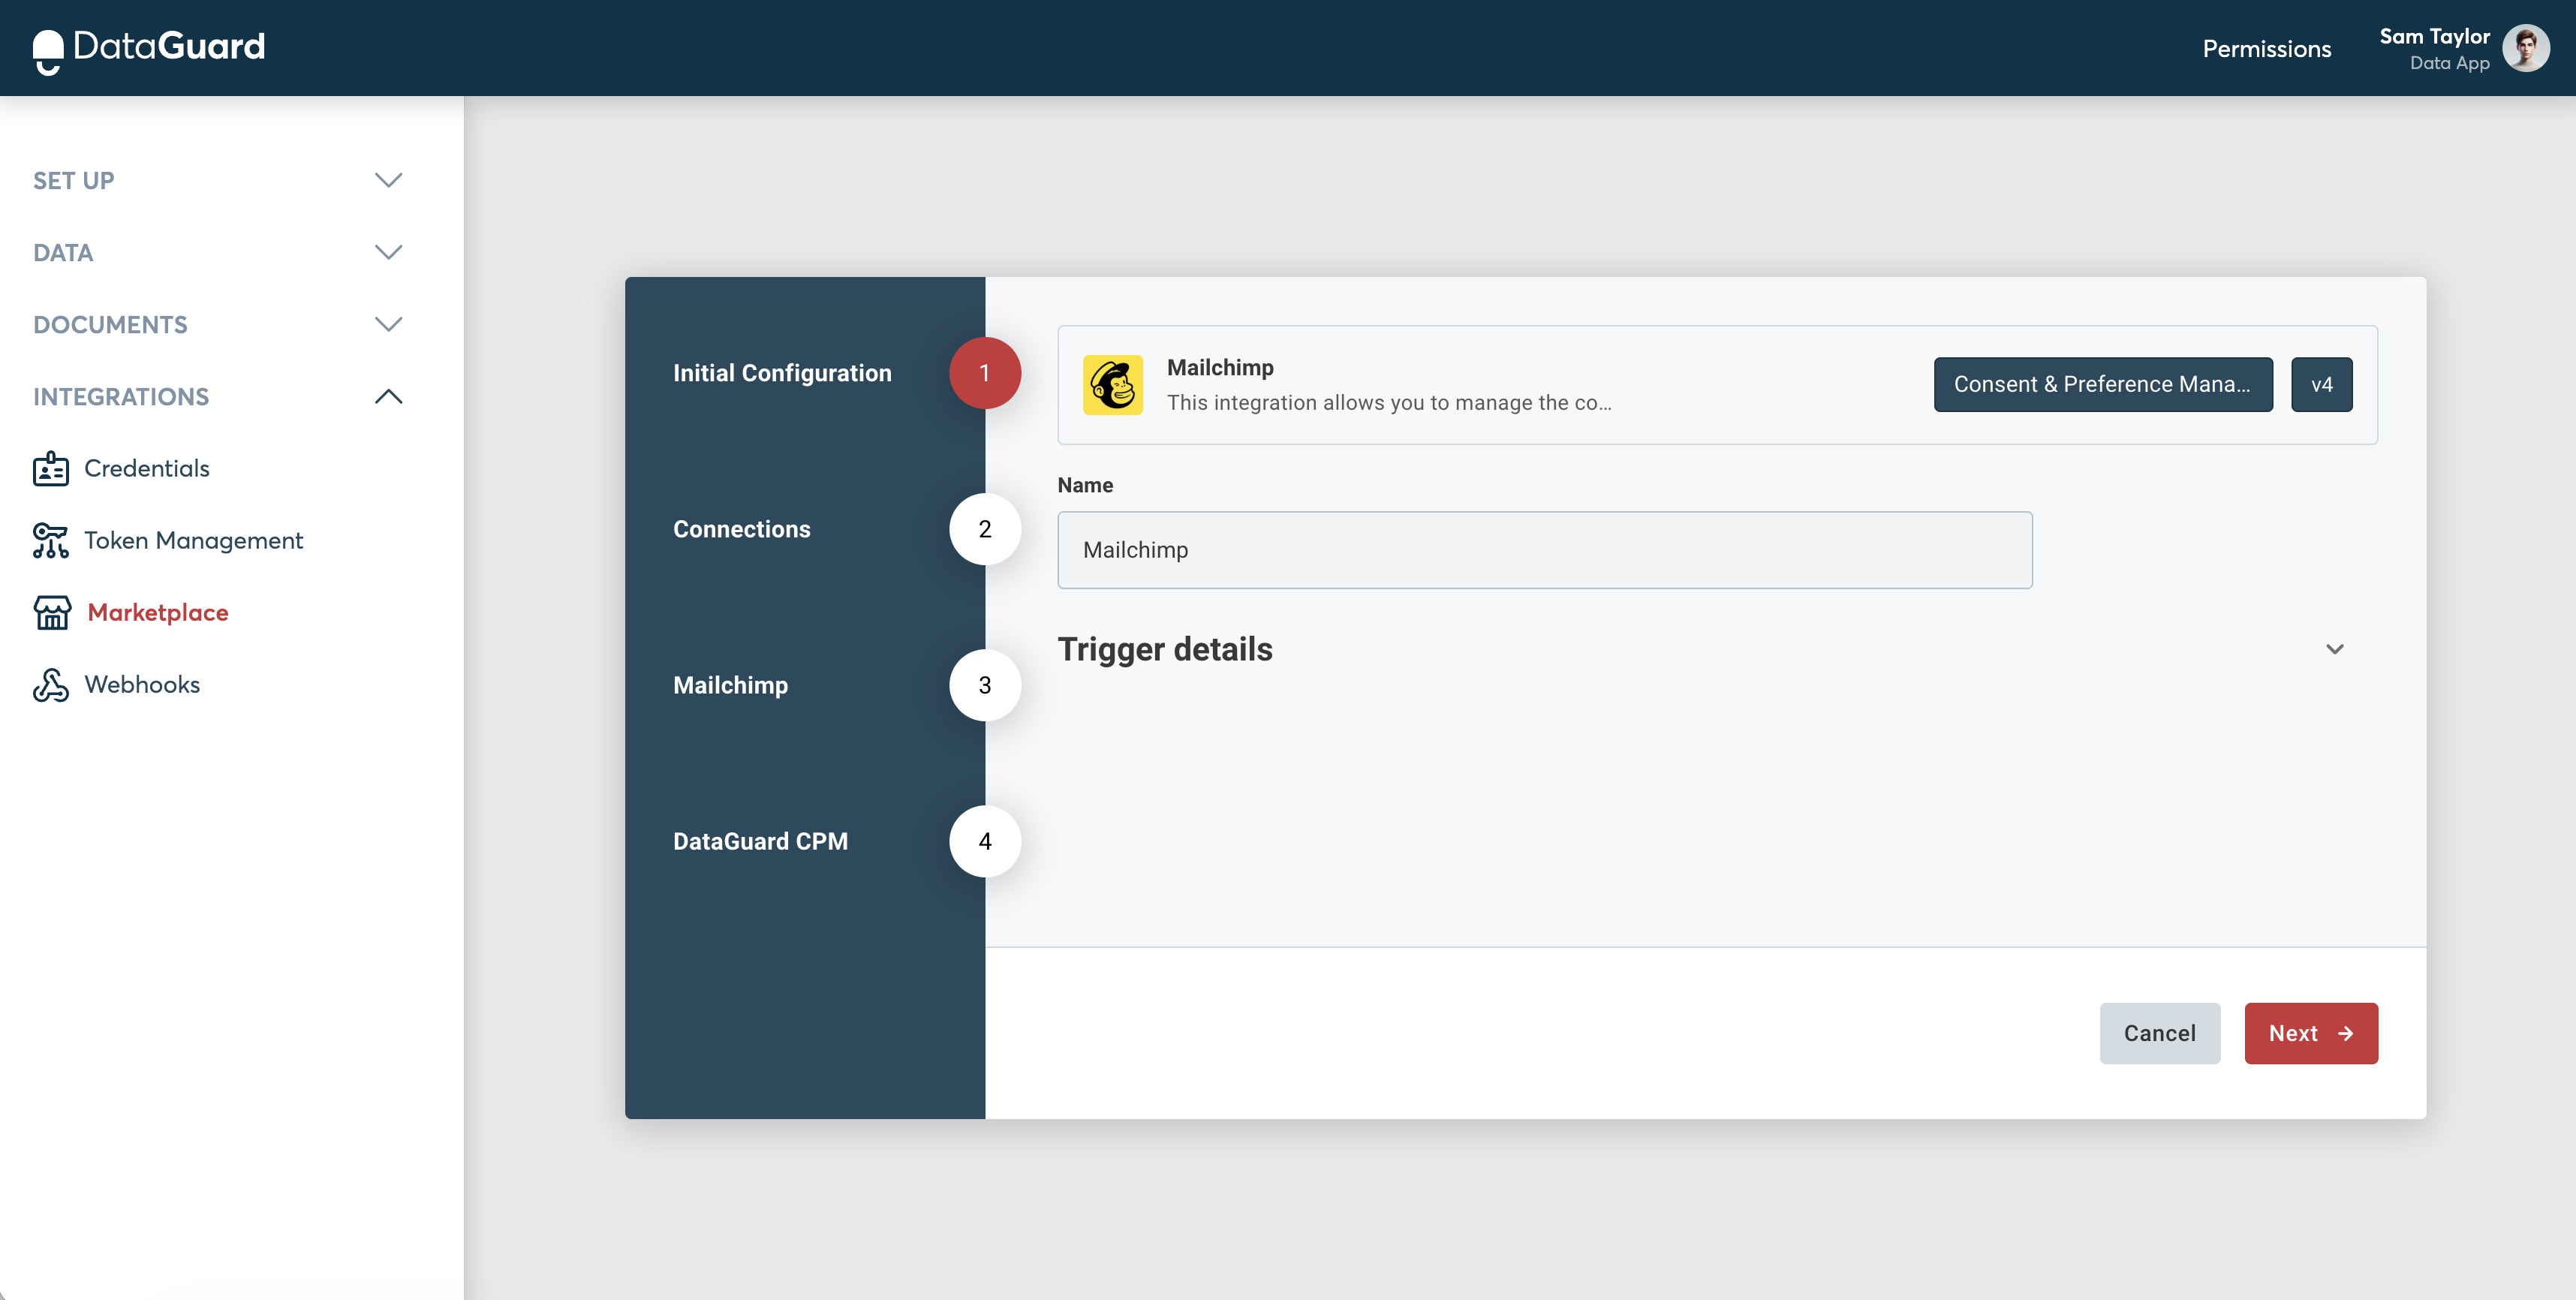
Step 1: Initial Configuration
- Review the information presented, such as the Name, Version, and Description of the connector.
- Click Next to proceed.
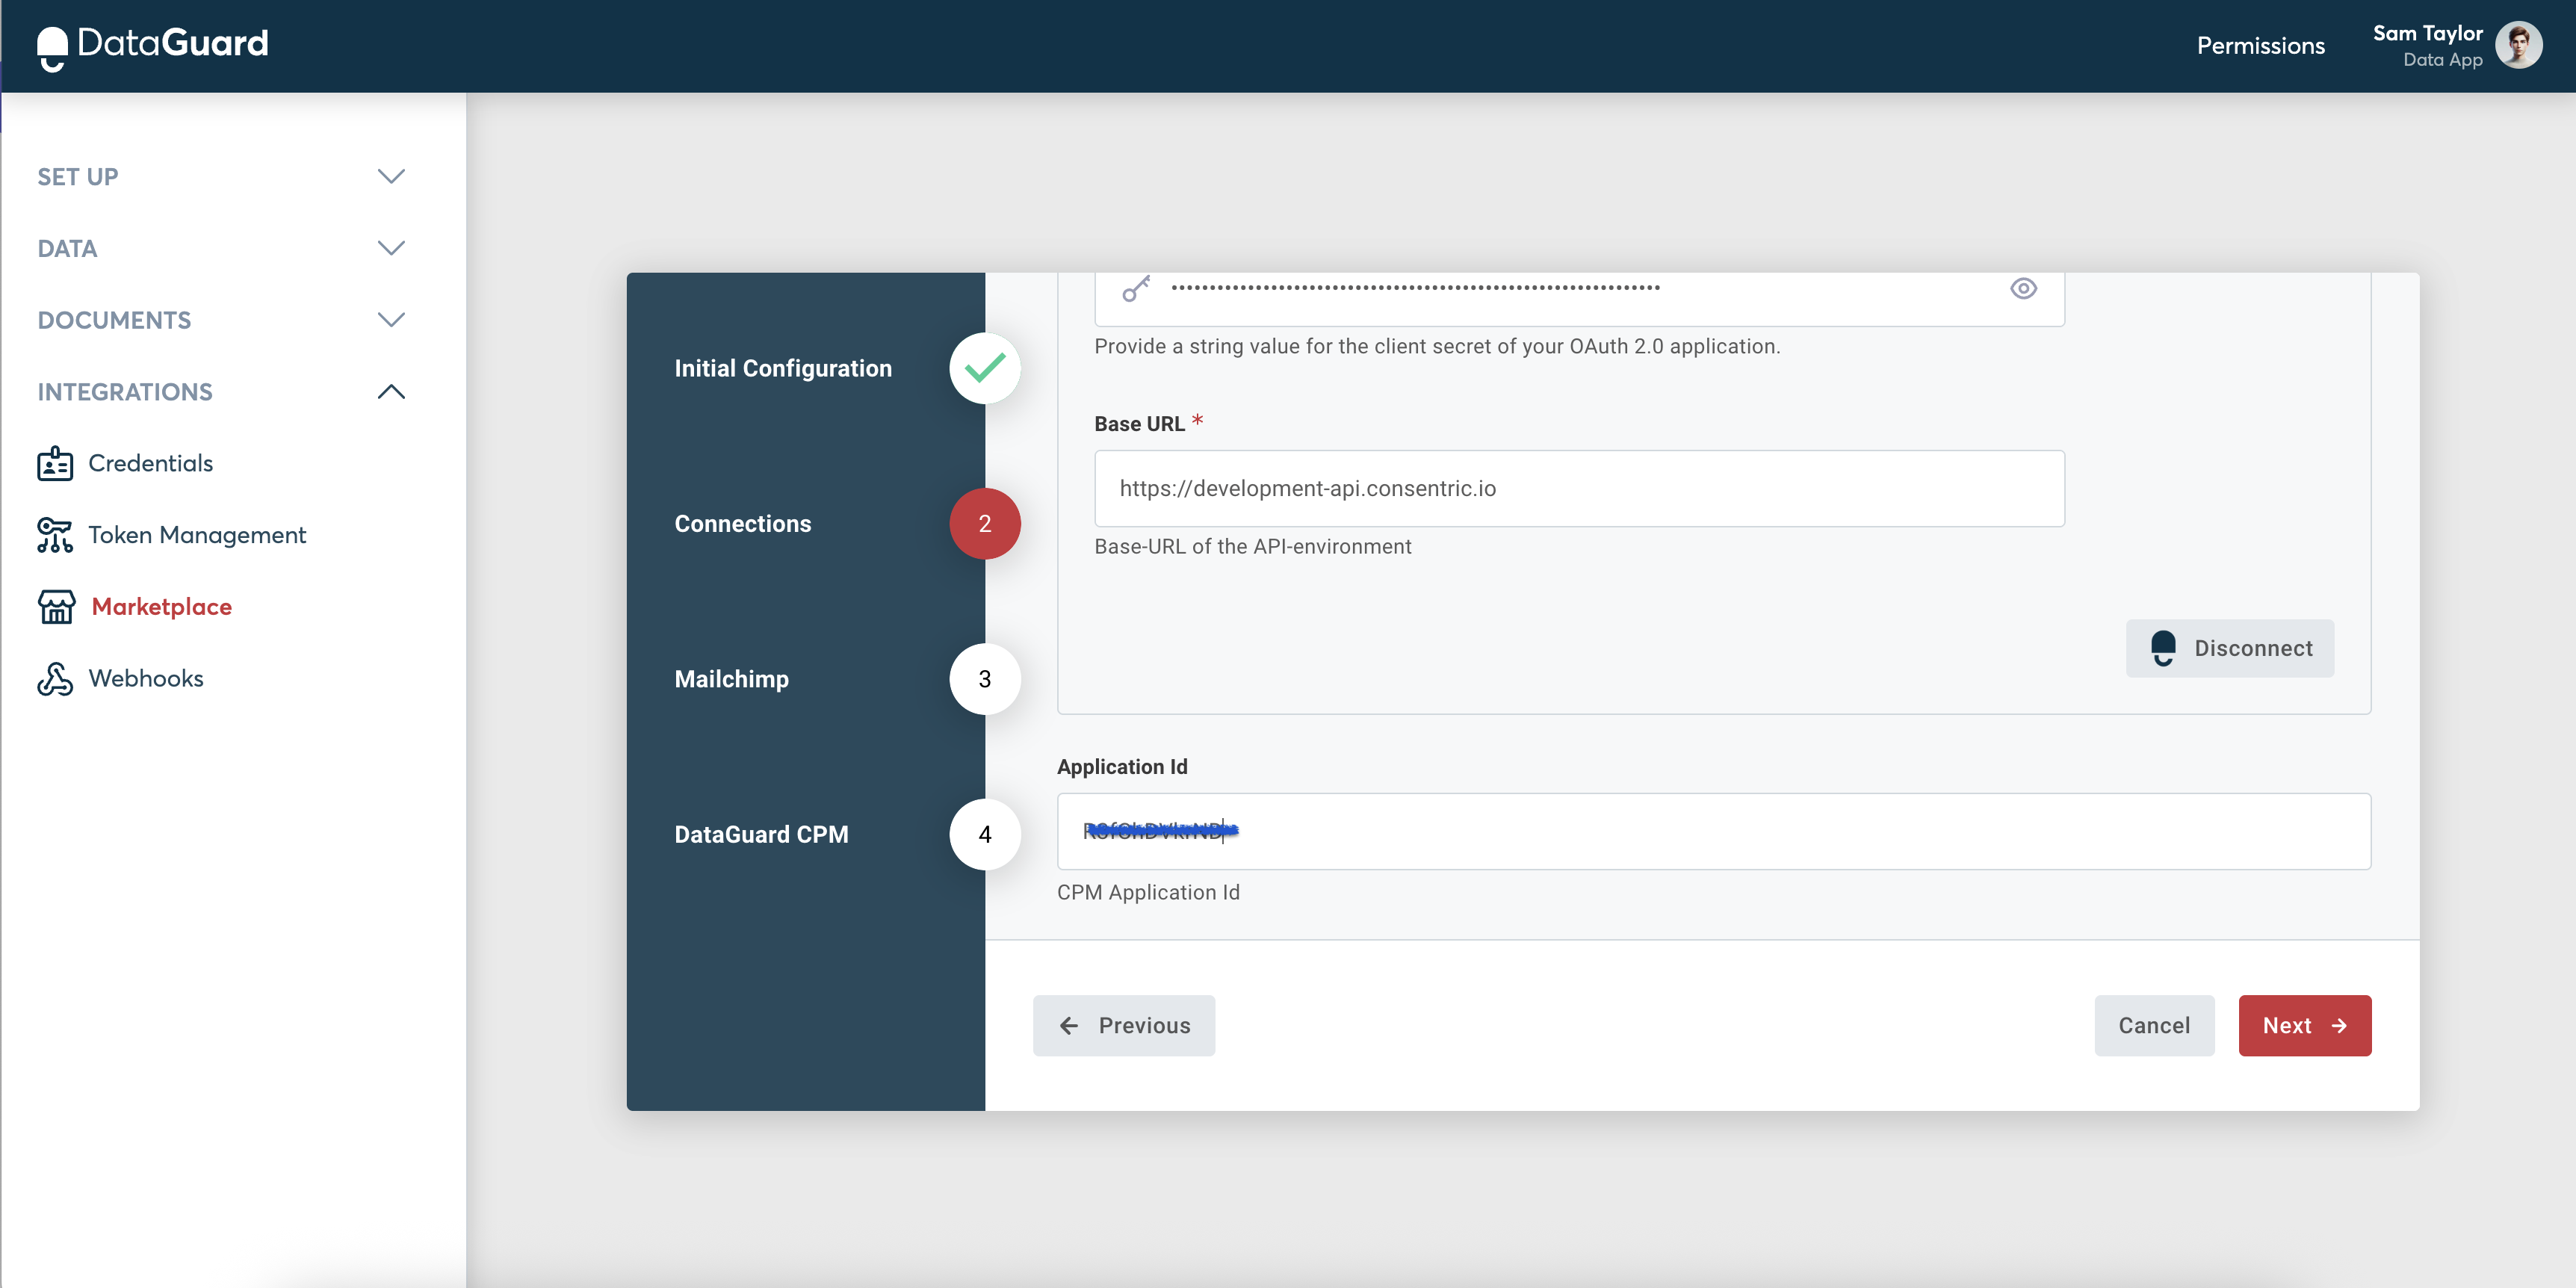
Step 2: Connections
CPM Connection
- The values of these fields will vary depending on the environment, enter these values into the form, using the Environments page to replace the palceholders below:
- Token URL: Should match this pattern:
<auth-url>/oauth/token?audience=<audience-url>. - Audience URL: Should be
<audience-url>. - Client ID: Is found on the Credentials page of the UI.
- Client Secret: found on the Credentials page of the UI.
- Base URL: Should be
<api-url>.
- Token URL: Should match this pattern:
- Click Connect to establish the connection.
Application Id
- Enter the Application Id, this can be found on the Credentials page of the UI.
- Click Next to proceed.
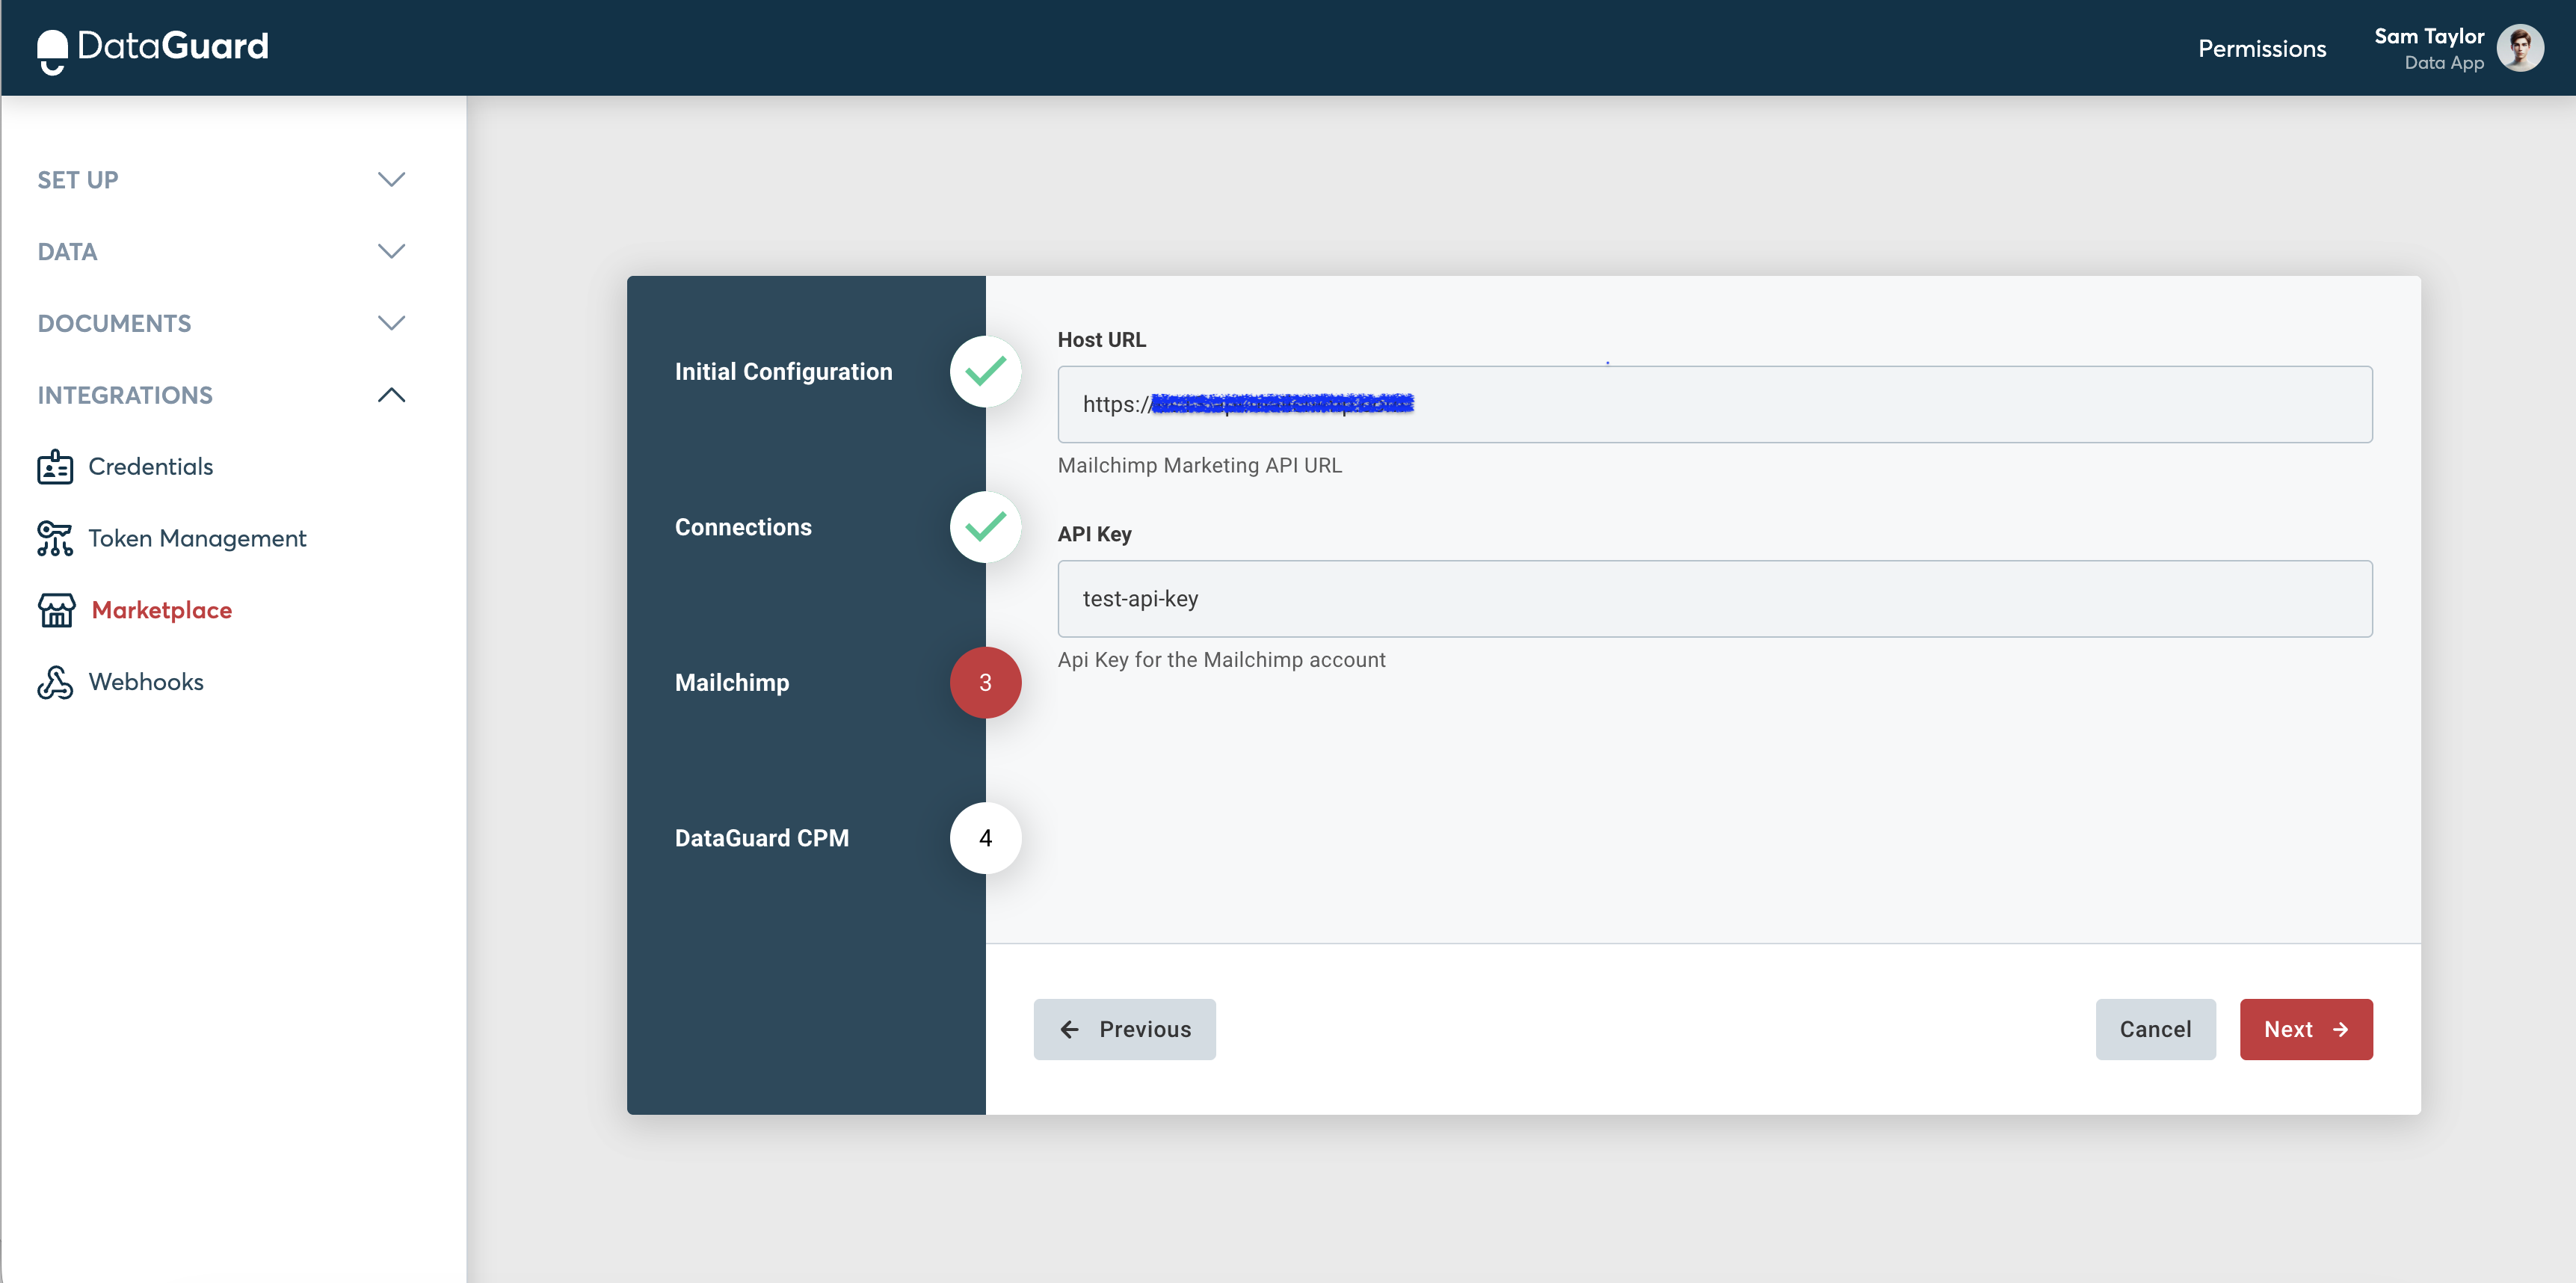
Step 3: Mailchimp
Host URL
The root url for the API is of format https://<dc>.api.mailchimp.com. The <dc> part of the URL corresponds to the data center for your account. For example, if the data center for your account is us6, all API endpoints for your account are available relative to https://us6.api.mailchimp.com/
Various ways to find your data center:
- It’s the first part of the URL you see in the API key section of your account; if the URL is https://us6.mailchimp.com/account/api/, then the data center subdomain is us6.
- It’s also appended to your API key in the form key-dc; if your API key is 0123456789abcdef0123456789abcde-us6, then the data center subdomain is us6
API Key
Fill in the value of the API key that was generated in prerequisite step
-
Click Next to proceed.
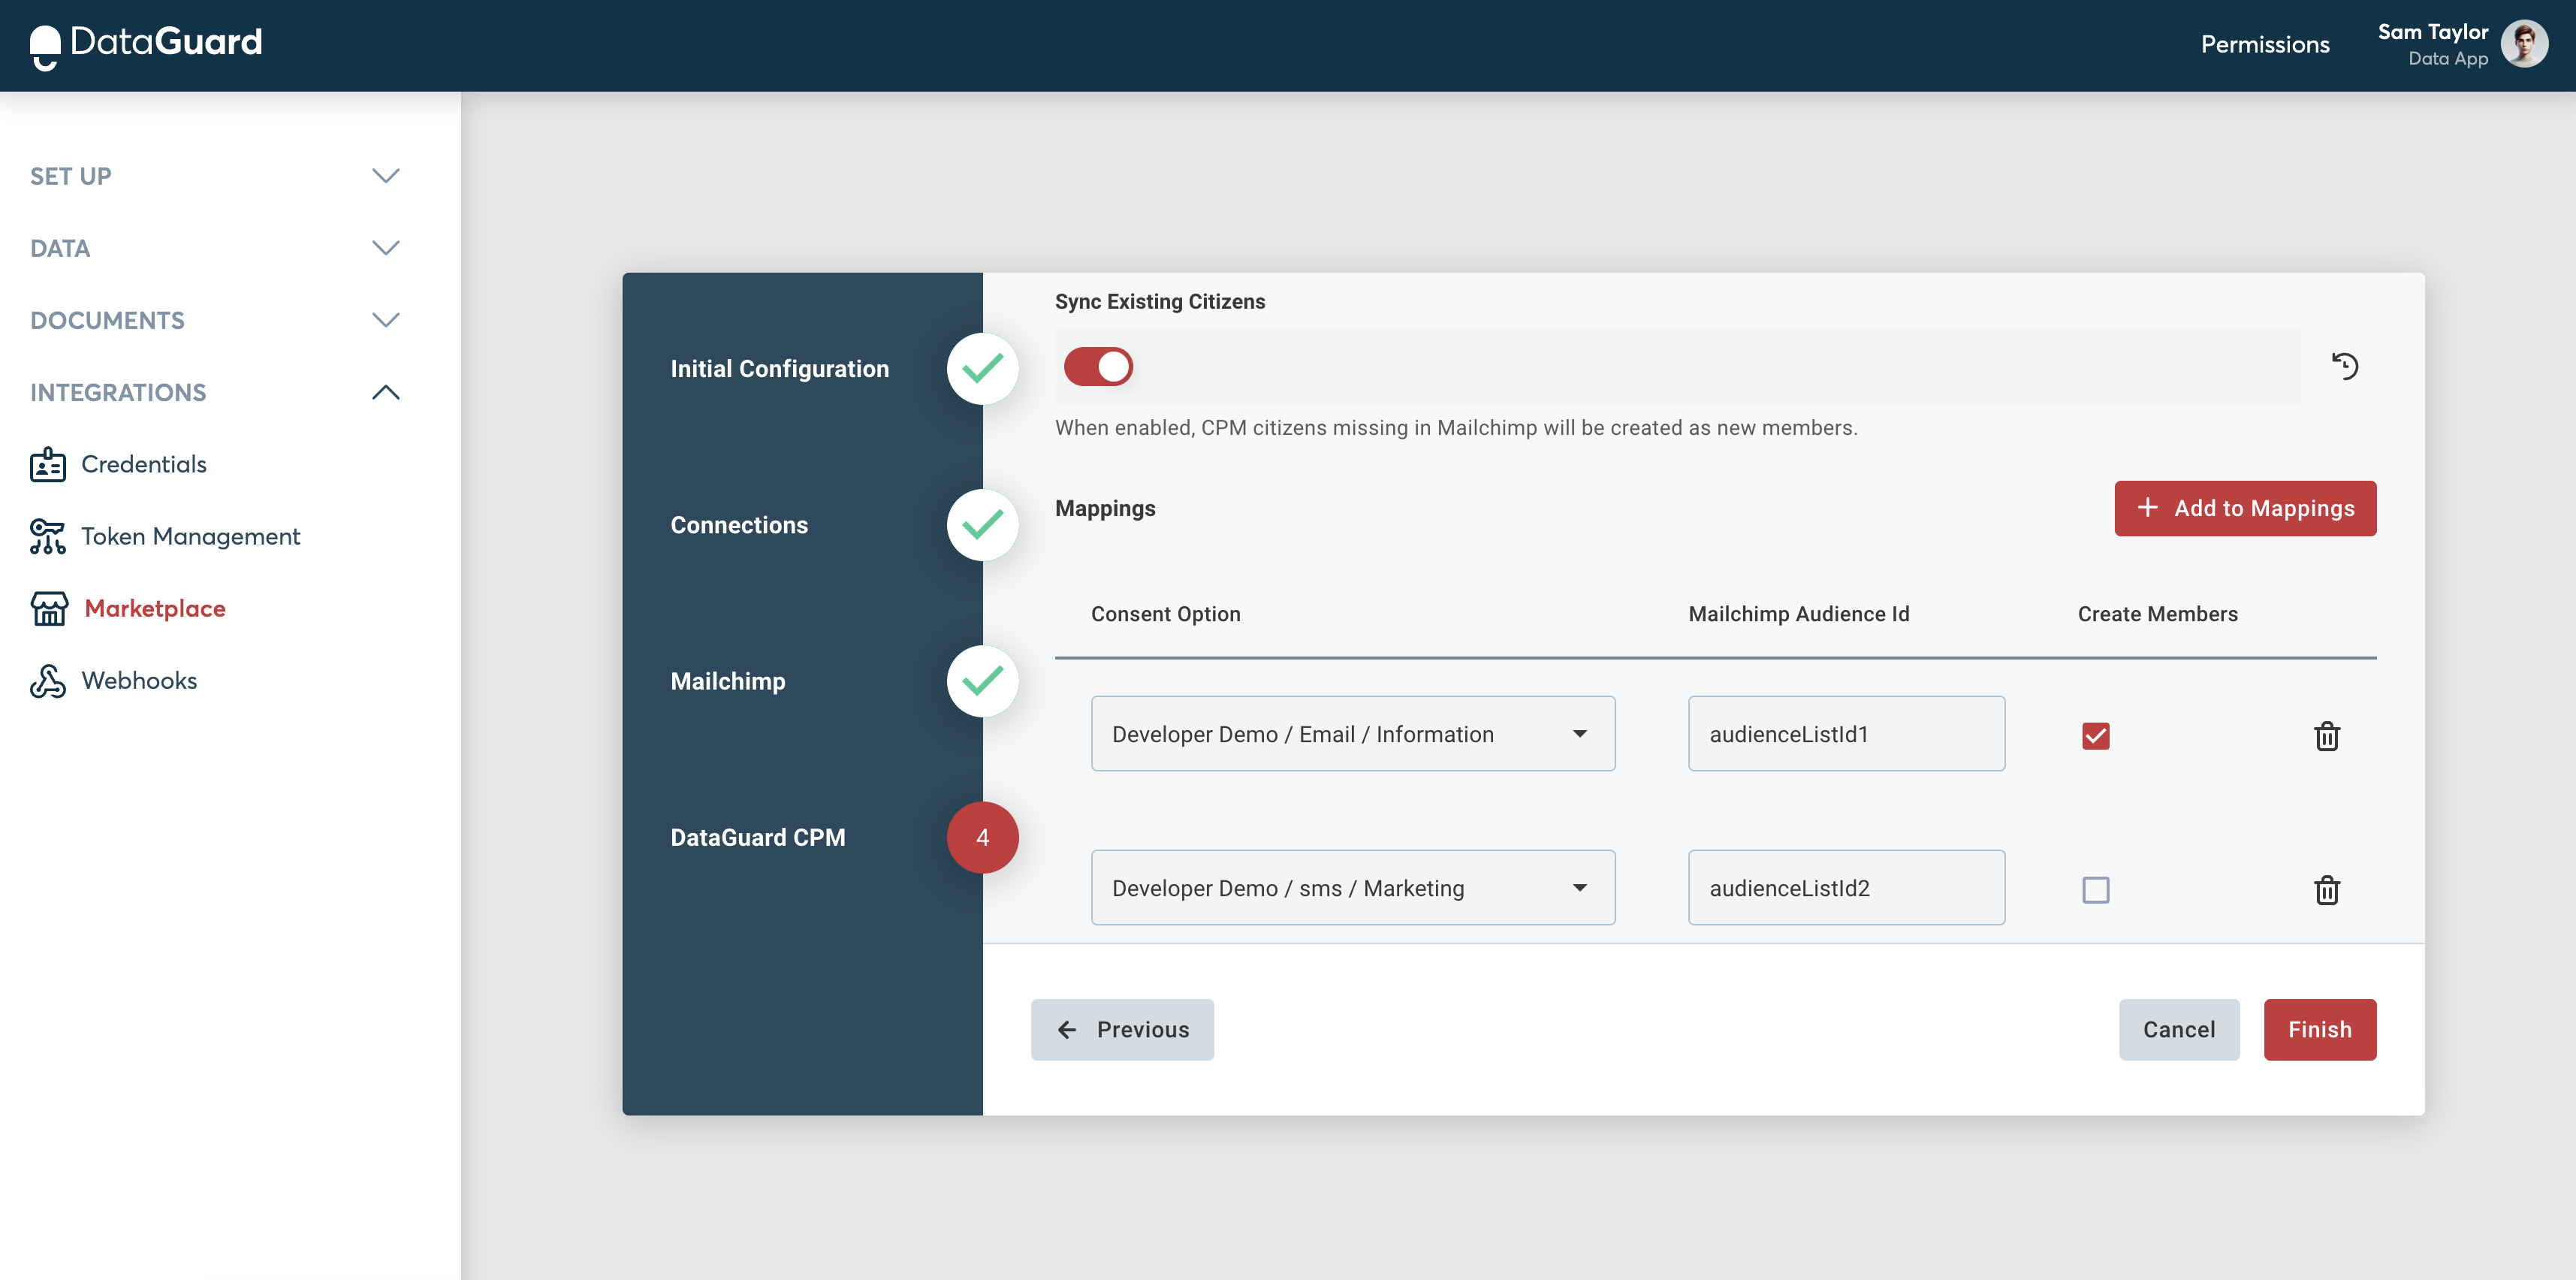
Step 4: CPM DataGuard
Sync Existing Citizens
- The Sync Existing Citizens toggle must be enabled in order to allow to sync existing users in CPM at the time of integration configuration.
Consent & Mailchimp Audience Mappings
Consent Option
Select the Permission option from the dropdown that corresponds to the Subscribed state of Email Marketing for your intended audience .
Audience/ List Id
Provide the Id of the audience where users' consent data for the previously selected consent option should be synced. Please check prerequisite step to find the audience Id.
Create Members
Select this option to allow new members to be created in the specified Mailchimp audience when a member don’t already exist
- Click on Finish to complete the configuration.
Conclusion
Your Mailchimp integration with DataGuard CPM is now complete. Your data will be automatically synced, ensuring that your Mailchimp users' contact subscribed state reflect the latest consent and preference information from DataGuard CPM!
Updated 6 months ago