Record Consent
Accurately recording consent is fundamental to maintaining compliance and building trust with Citizens. The Citizens UI in DataGuard CPM allows you to easily view, record, and update consents, ensuring that all data processing activities are authorised and well-documented. This guide will help you navigate the process of recording consent for a Citizen.
Step 1: Navigate to the Citizens UI
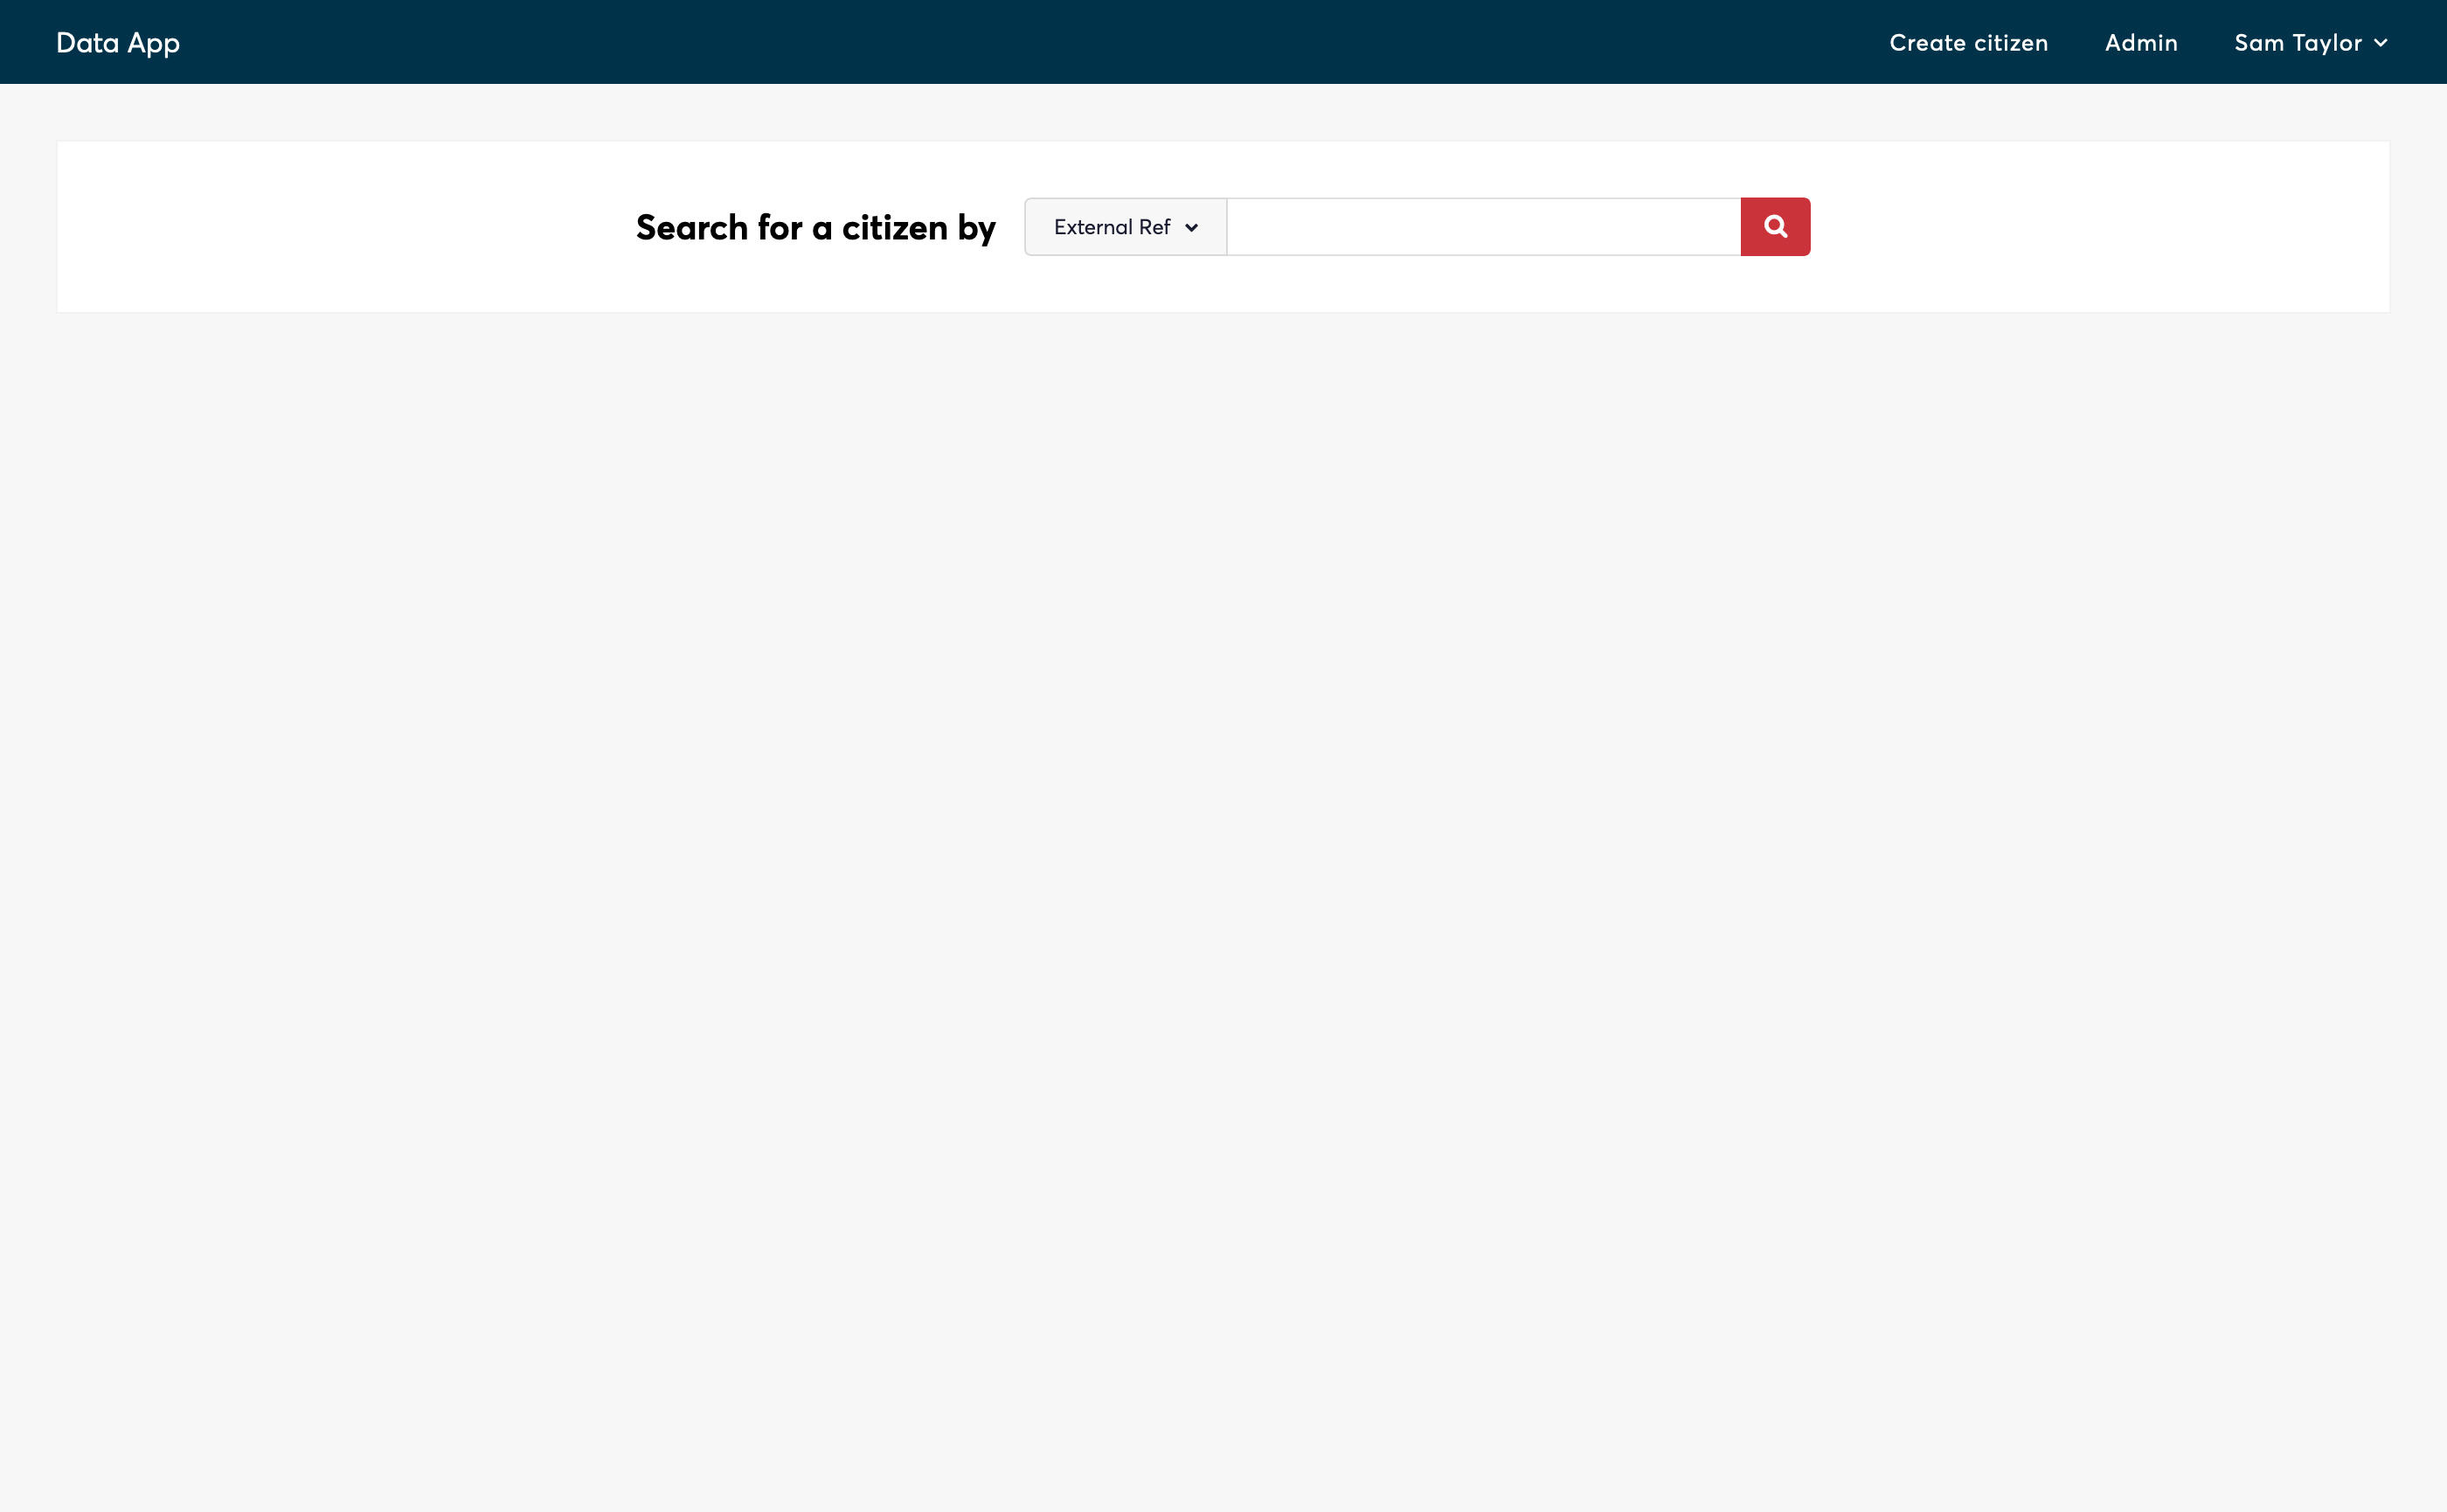
Begin by logging into DataGuard CPM, the Citizens UI will be the first page you see. This interface provides a complete overview of all Citizens who have interacted with your organisation.

Step 2: Search for the Citizen
Use the search functionality to locate the specific Citizen whose consent you need to record. You can search by either the reference of the citizen, or their email address. Note that depending on how you have implemented the product, the email may not be stored in the platform.
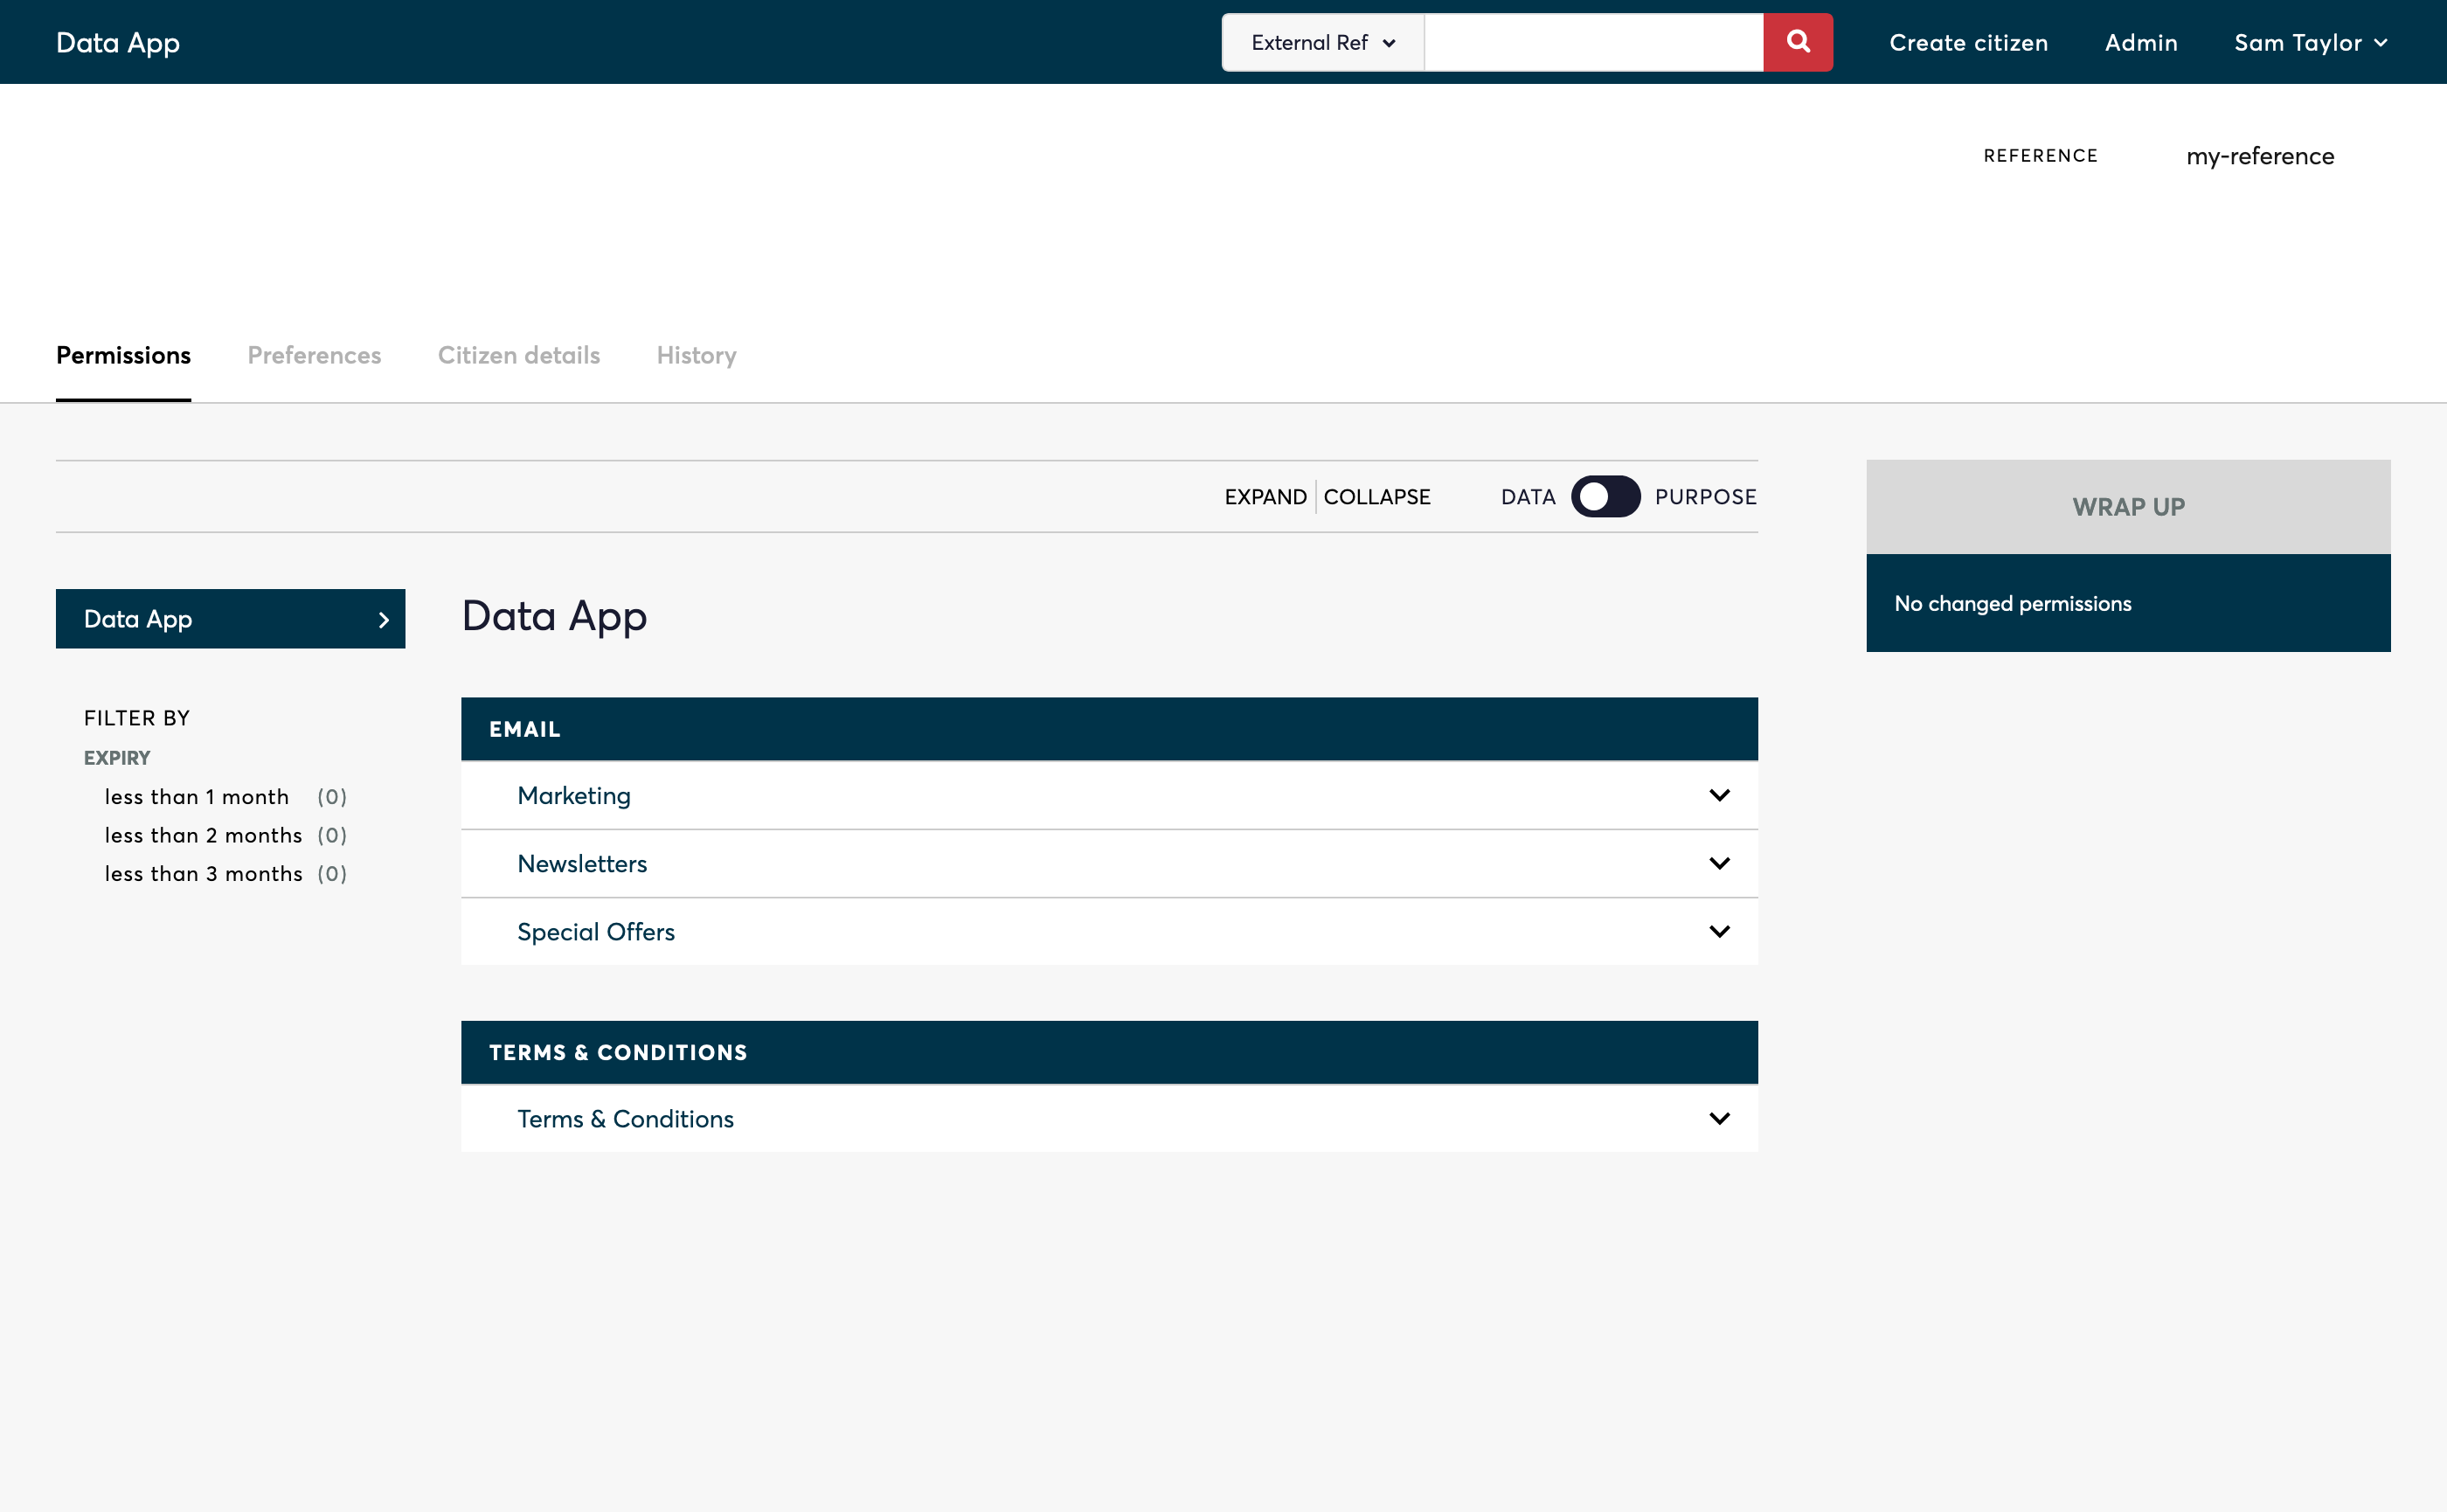
Enter the reference or email address, and click the search icon to open their profile.

Step 3: View Current State
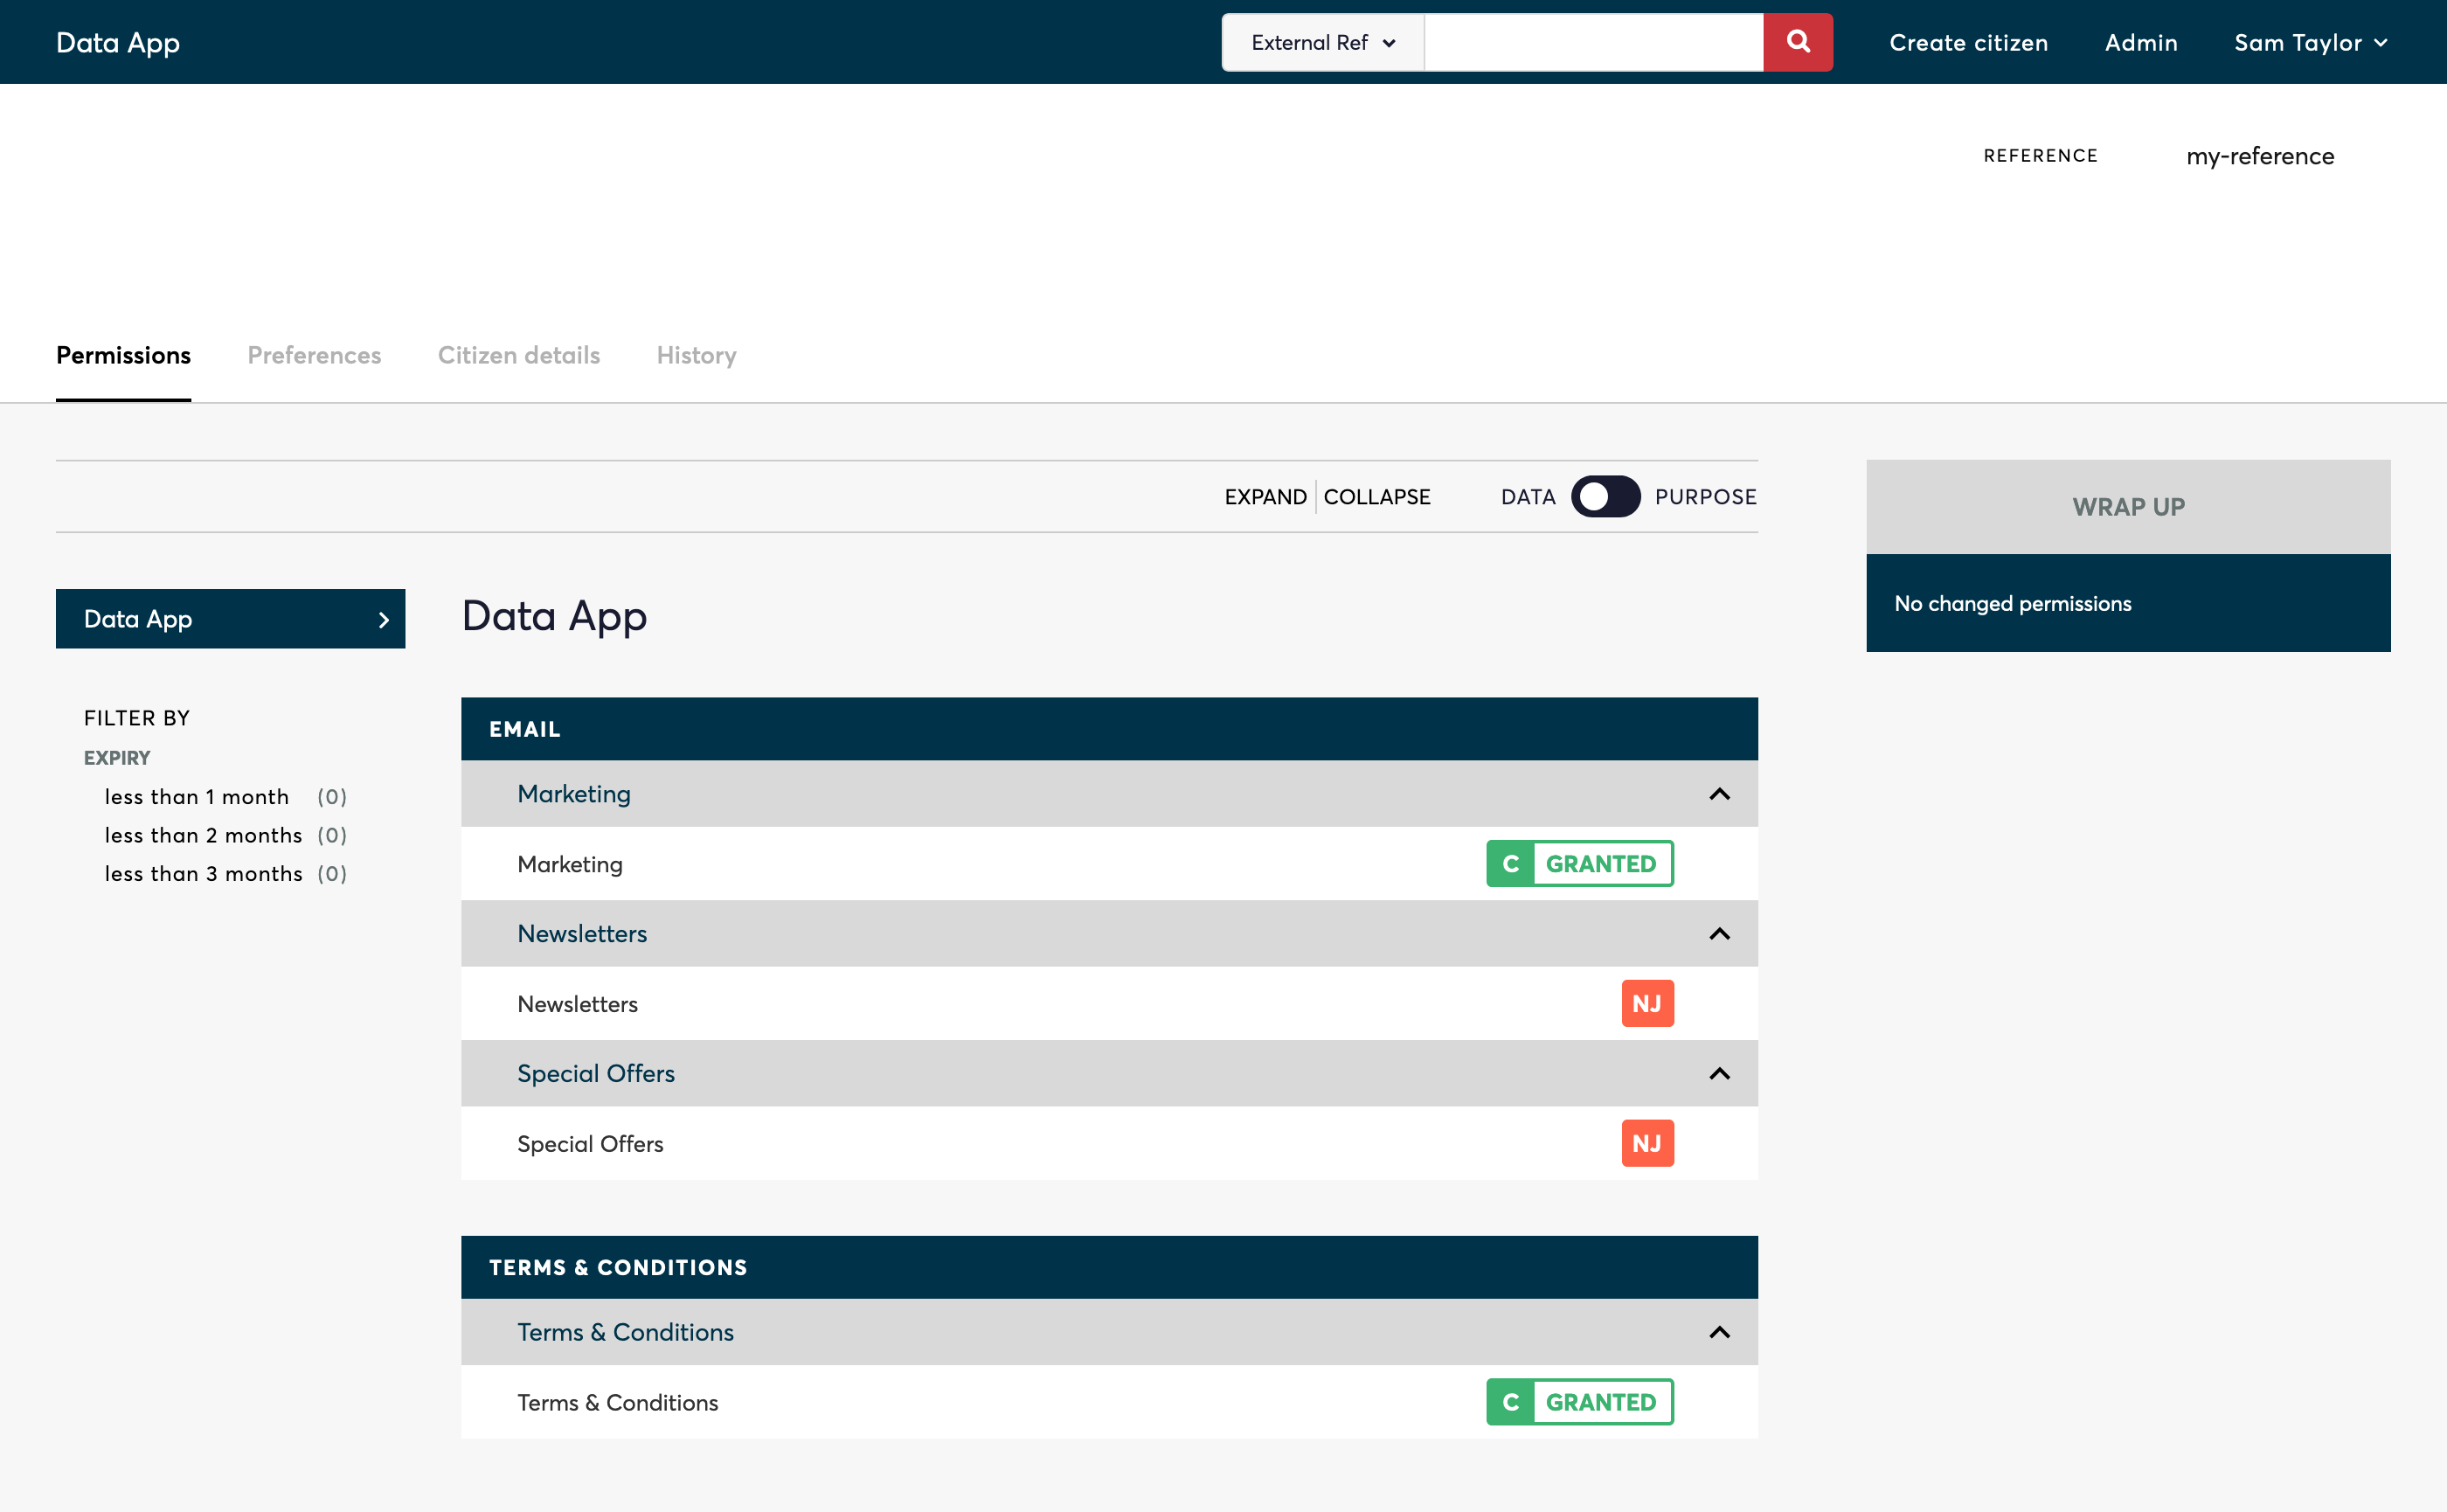
Click on the "Expand" button near the top of the screen to view the current state.

Step 4: Record New Consent
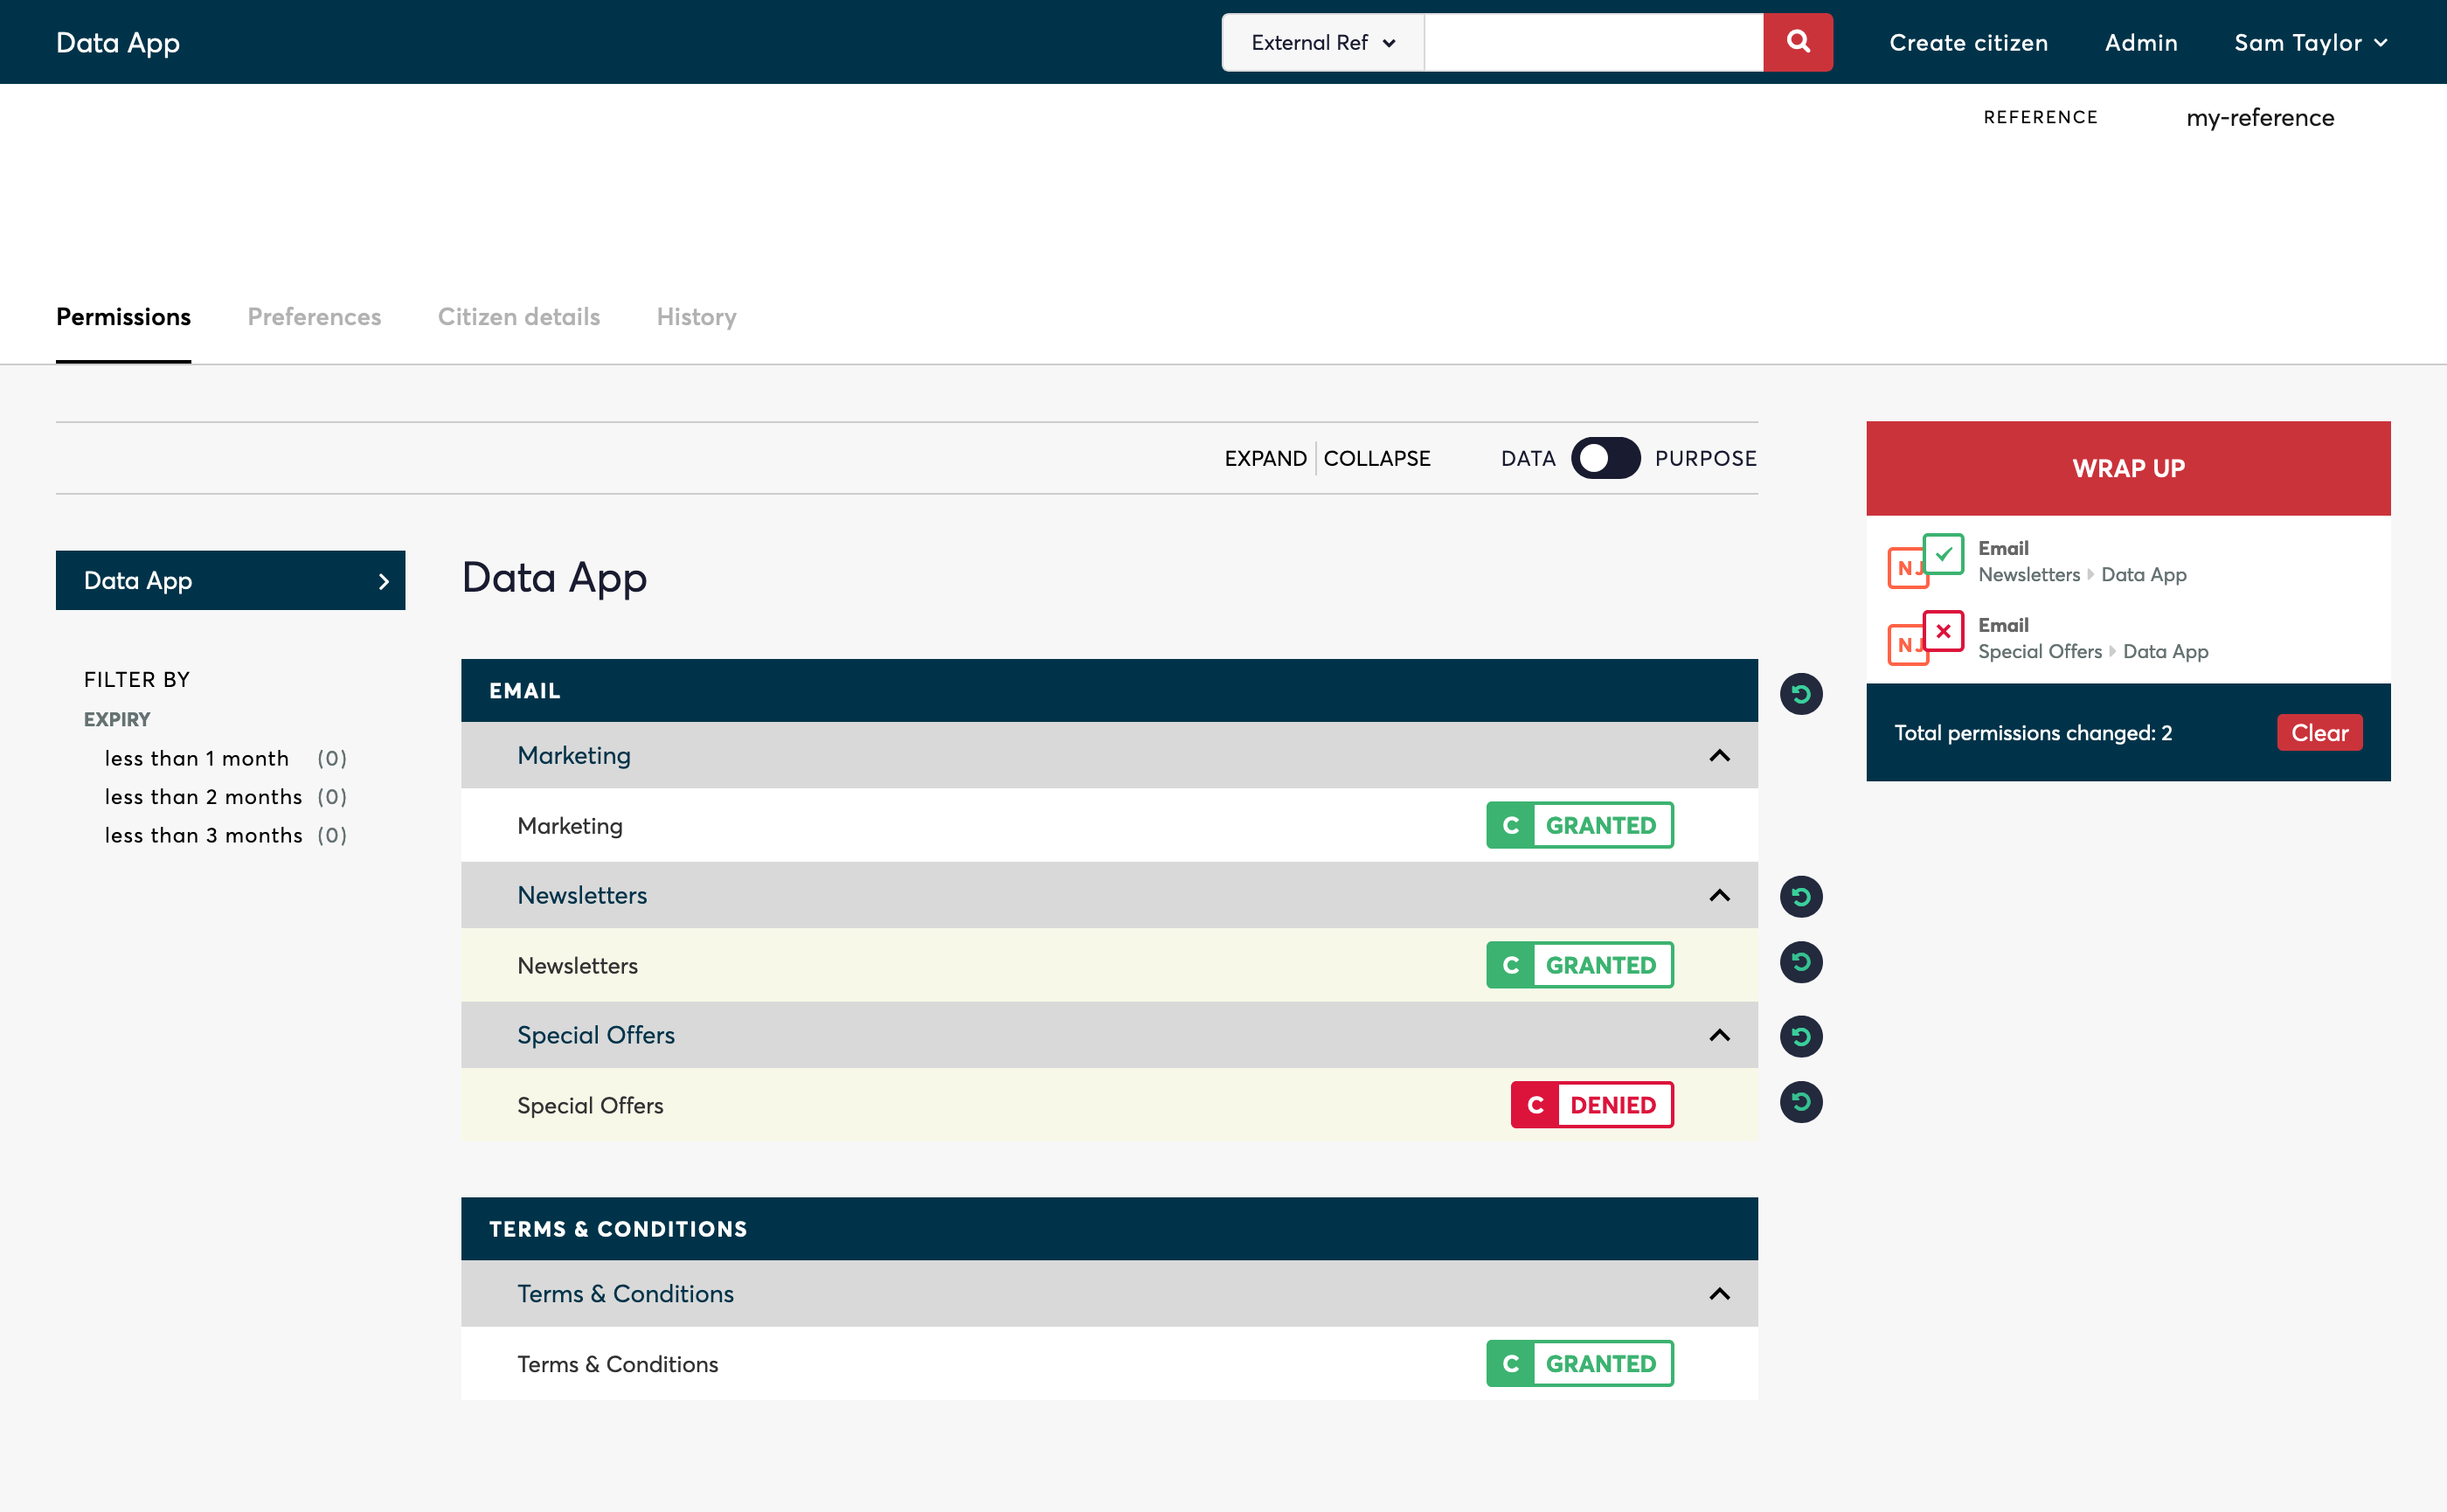
Click on the current state of a Consent Purpose to change it's state. You can select multiple Consent Purposes to change. Once you have made all the changes required, click on the Wrap Up button on the right hand side.

Step 5: Wrap Up Consent Change
Select a Privacy Policy, a Permission Statement and a Channel. Then click the "Complete wrap up" button to save the change. This will update the Citizen's Permissions and create a Transaction for the audit trail.
Next Steps
You have successfully recorded consent for a Citizen. Keeping these records up to date is crucial for maintaining compliance and respecting Citizens' choices.
Next, you can move on to Recording Preferences to ensure that all aspects of the Citizen’s interaction with your services are managed according to their wishes.
Move on to the next step: Record Preferences.
Updated 3 months ago
